

Easy Strawberry Red Velvet Cheesecake: A Sweet Indulgence
It was one of those gray, rainy days where the sky feels heavy, and a cozy blanket and a good movie would be the perfect companions. Honestly, I could practically smell comfort food wafting through the air, and my mind began to wander. I thought back to my kitchen experiments and the love I have for cheesecake. The way the cream cheese mixes luxuriously with sugary goodness—it just makes my heart sing! But let’s not forget about red velvet cake. Its rich, chocolatey flavor, combined with that striking color, always felt like a party on a plate. And then it hit me: why not marry these two incredible creations into one glorious dessert?
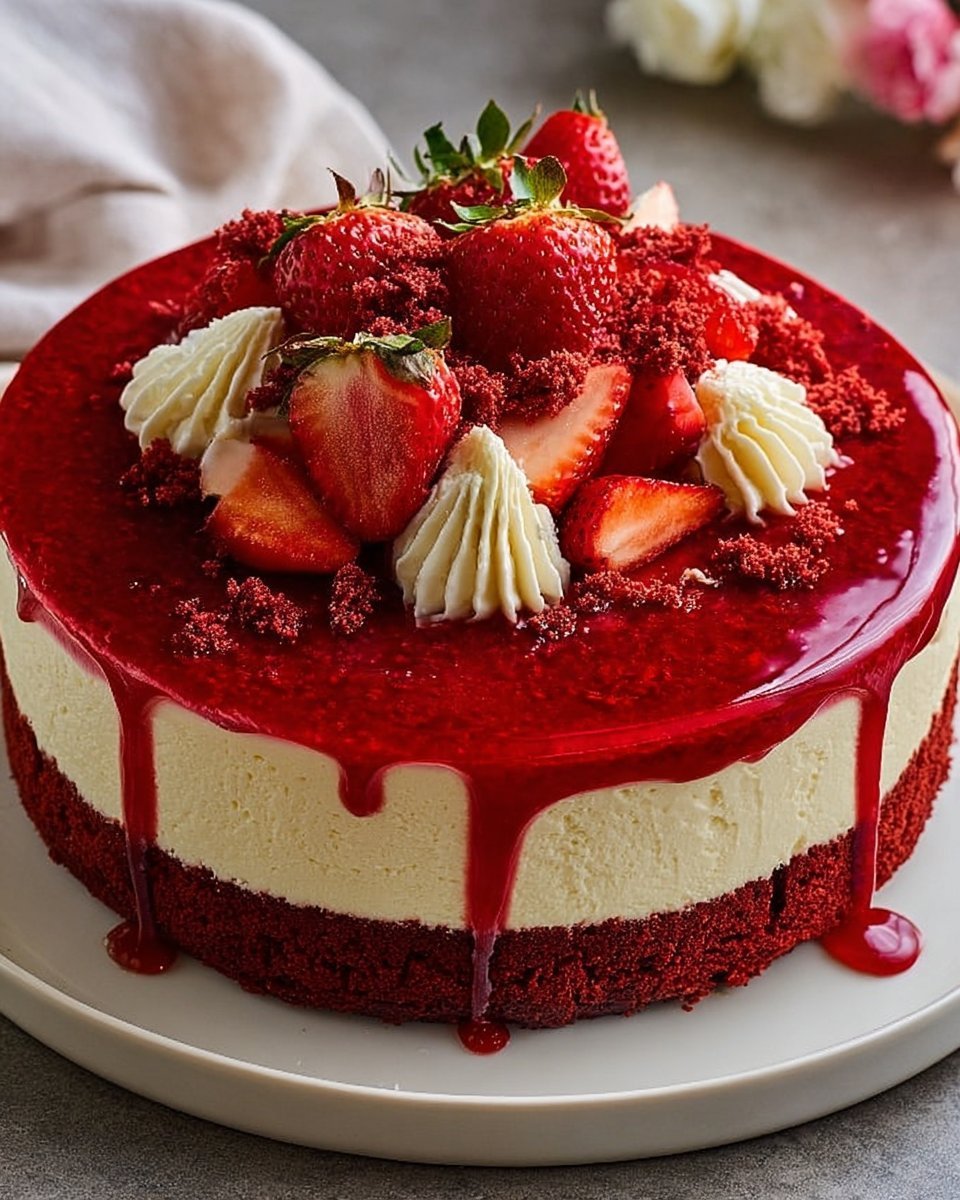
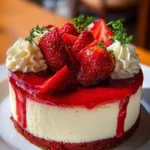
And thus, the Strawberry Red Velvet Cheesecake was born! Combining rich red velvet flavor with airy cheesecake and crowned with the freshest strawberries, this dessert feels like a celebration any day of the week, not just on special occasions. There’s something about the distinct layers, the whole experience of cutting into it, and—oh—the first bite that brings back memories of family gatherings and sweet moments shared over food. It’s an arm hug in cake form.
Okay, so let’s be real here—my first attempt at this recipe might as well have been a food horror movie. I forgot to grease the pan the first time around, which resulted in a red velvet cheesecake being stuck like a clingy best friend. Oops! As I frustratedly pried it from the pan, I told myself, “Next time will be easier.” Little did I know, the second attempt turned into a masterpiece. The layers came out beautifully, and the flavors were on point. And now? I’m here to share the ultimate easy recipe so that you can recreate this dessert without the kitchen chaos I experienced!
So, grab that apron and let’s dive into this deliciousness. Your kitchen will smell divine, and the results? Well, everyone’s going to ask for seconds!
Why You’ll Love This Recipe
-
Easy to Make: If there’s one thing I’ve learned in my kitchen ventures, it’s that making a show-stopping dessert doesn’t have to be complicated. This Strawberry Red Velvet Cheesecake is simple enough that even a newbie can tackle it with confidence! Plus, red velvet isn’t just for special occasions; it’s like sunshine on a dreary day.
-
Comfort Food at Its Best: Just thinking about this cheesecake gives me warm fuzzies. Each bite is like being wrapped in a cozy blanket, and if you’re familiar with that feeling of home cooked love, you’ll know exactly what I’m talking about.
-
Perfect for Meal Prep: Let’s face it; we love easy weeknight dinners, but sometimes, you just need dessert prepped and ready to go. This cheesecake can sit in the fridge and get better over time, making it an excellent choice for those crowded weeknights.
-
Leftover Magic: Is there anything better than dessert for breakfast? This cheesecake is delightful the next day, especially with that burst of fresh strawberries. It’s a breakfast dream come true or the perfect late-night sweet treat.
-
Picky Eater Approved: Kids and adults alike adore red velvet, and with the berry topping, you get some natural sweetness that appeals to even the fussier taste buds at the table (you know who I’m talking about!).
-
Look at Those Layers: I mean, come on! This cheesecake looks stunning, and it’s a total showstopper. Your friends will be asking how you managed to pull off such a gorgeous dessert, and you can keep your secrets (or share them, either way, I won’t judge!).
What Makes This Recipe Special?
This recipe is uniquely yours once you dive into it. The rich, cocoa notes of red velvet complemented by the velvety cream cheese and the lightness of whipped cream make such a symphony of flavors. And those strawberries? They add not just a pop of color but a delightful freshness that brightens each bite.
The beauty of this cheesecake lies in its versatility. Not only can you prepare it in one big show-stopping presentation, but you could also pour the batter into individual cups for smaller servings. It’s great for gatherings, especially when all you want to do is grab and go while mingling with friends over drinks.
So let’s not delay any further! Dive into the specifics and gear up for some seriously tasty moments. And remember, this dessert is not just about eating (although, let’s be honest, that’s major!), it’s about celebrating life’s sweet moments.
Ingredients
1 box red velvet cake mix: Yes, you read that right! This shortcut gives you the rich red velvet flavor without the fuss of gathering up all the individual ingredients.
1/2 cup vegetable oil: This adds moisture to your cake, keeping it dense yet fluffy.
3 large eggs: Because we need binding power. Eggs help with the structure.
1 cup water: This helps create the right batter consistency. Just think of it as the glue that holds everything together.
16 oz cream cheese, softened: The star of our cheesecake show! Cream cheese is rich and adds that creamy texture we all adore in cheesecake.
1 cup granulated sugar: We need sweetness, or we’re just eating something tangy, right? This keeps our filling balanced and delightful.
1 teaspoon vanilla extract: A splash adds depth and enhances the overall flavor.
2 cups heavy whipping cream: This is key to that fluffy texture we love in cheesecakes.
1/4 cup powdered sugar: Just to sweeten the whipped cream a tad, giving you that perfect touch of sweetness.
2 cups fresh strawberries, sliced: The fresh berries are great for health buff points as well as bringing that fresh sweetness we’re after in the topping!
Personal Tips
When using cake mix, try to avoid brands loaded with preservatives and added ingredients. Go for something simple. Also, make sure your cream cheese is completely softened—nobody wants clumps in their cheesecake!
How to Make It Step-by-Step
-
Preheat the oven: Start by cranking that oven up to a lovely 350°F (175°C). This is a crucial step, folks—no one enjoys a lukewarm cheesecake!
-
Grease and flour the pan: Grab a 9-inch springform pan. Trust me on this; your future self will thank you for avoiding the sticky situation that occurred on my first try! Spray it with a non-stick spray or grease it with butter, and then sprinkle a bit of flour to keep the edges from sticking.
-
Mix the cake batter: In a large mixing bowl, combine the red velvet cake mix, vegetable oil, eggs, and water. The red velvet mix might remind you of childhood baking adventures, stirring that bright red batter and watching it come to life. Mix until smooth, and keep an eye on those lumps—nobody invited them to the party.
-
Bake the cake: Pour that rich batter into the prepared springform pan and pop it in the oven. Let it bake for 30-35 minutes, but start checking it around the 25-minute mark. When a toothpick comes out clean, you’re golden. The aroma will start filling your kitchen, rich and decadent.
-
Let it cool: Patience is a virtue, my friend! Let the cake cool completely before moving on. You don’t want the filling melting and turning into a sad puddle on top of your cake.
-
Make the cheesecake filling: While the cake is cooling, grab another mixing bowl and beat the softened cream cheese, granulated sugar, and vanilla extract until everything is creamy and blended evenly. If you’re like me, you might taste it here and think, “Wow, I could just eat this straight with a spoon!”
-
Whip the cream: In another bowl, whip the heavy cream with powdered sugar until stiff peaks form. Seriously, this step is like magic. As you whip, you’ll see it transform into a fluffy cloud, and oh, the smell!
-
Combine the mixtures: Now, gently fold that whipped cream into the cream cheese mixture. Be gentle here; you want to keep that airiness intact.
-
Top the cake: Once the cake has cooled, carefully spread the cream cheese mixture over the top, smoothing it out. It doesn’t have to be perfect—remember: we like a little character in our desserts!
-
Refrigerate: This is where the real magic happens. Pop your cheesecake into the fridge for at least 4 hours (or overnight is even better). The flavors meld together, and it gets super creamy—pure bliss.
-
Add strawberries: Before serving, top with those gorgeous sliced strawberries. Honestly, the vibrant red pops against the creamy white and deep chocolate of the cheesecake, making it look fancy without any extra effort.
-
Slice & Serve: When you’re finally ready to indulge, slice yourself a piece, and let that first bite transport you to cloud nine. This is bliss—prepare for compliments!
Tips for Best Results
- Chill time is non-negotiable: Trust me; rushing this step will lead to a messy slice.
- Quality cream cheese: It’s worth investing in the good stuff—no one likes those grainy textures!
- Watch the baking time: Every oven is different; keep an eye on that toothpick test.
- Have fun with toppings: Feel free to mix in other fruits or chocolate shavings if you’re feeling adventurous.
Ingredients Substitutions & Variations
If you’re watching your calories, consider swapping out heavy cream for a low-fat alternative. No one will judge! You could even use Greek yogurt mixed with whipped cream for a slightly healthier version, while still keeping the richness in your cheesecake.
Add some extracts or flavoring to your whipped cream—maybe a touch of almond or orange for that surprise kick! Seasonal vacations? Top your cheesecake with peaches or blueberries instead of strawberries—each fruit brings a different charm.
Directions
-
Preheat the oven to 350°F (175°C). Grease and flour a 9-inch springform pan.
-
In a mixing bowl, combine the red velvet cake mix, vegetable oil, eggs, and water. Mix until smooth.
-
Pour the cake batter into the prepared springform pan and bake for 30-35 minutes, or until a toothpick inserted in the center comes out clean. Let it cool completely.
-
In another bowl, beat the cream cheese, granulated sugar, and vanilla extract until creamy and smooth.
-
In a separate bowl, whip the heavy cream with powdered sugar until stiff peaks form. Fold the whipped cream into the cream cheese mixture.
-
Once the cake has cooled, spread the cream cheese mixture over the top. Refrigerate for at least 4 hours or overnight.
-
Before serving, top with sliced strawberries. Enjoy!
Pairing Ideas (Drinks, Sides, etc.)
If you want to elevate your dessert experience, serve this cheesecake with a chilled glass of sparkling water or a rich hot chocolate for those cozy nights in.
Feeling fancy? Try serving alongside some vanilla ice cream or a dollop of whipped cream. And let’s be real—a rom-com playing in the background while you dig into this dessert is absolute perfection!
How to Store and Reheat Leftovers
This cheesecake will keep well in the fridge for up to 5 days, but don’t expect it to last that long—I mean, seriously! If you have any leftovers, store them in an airtight container. Honestly, I find that it tastes best chilled, but you might enjoy a slice warmed slightly (15-20 seconds in the microwave). Just don’t overdo it; no mushy cheesecake allowed!
Make-Ahead and Freezer Tips
If you want to get ahead of the game, feel free to make the cake portion ahead of time and freeze it. Just be sure to wrap it tightly to prevent freezer burn. Thaw it overnight in the fridge before adding the cheesecake layer.
Common Mistakes to Avoid
- Don’t skip greasing the pan! I’ve learned this the hard way, and trust me, it’s not a pleasant mess.
- If your cake appears cracked after baking, don’t sweat it. It might happen, and a luscious layer of cheesecake on top will hide any boo-boos.
- Never rush cooling times; it’s a crime against cheesecake and will only lead to a gooey disaster.
Frequently Asked Questions (FAQ)
Can I make this cheesecake ahead of time?
Absolutely! This cheesecake holds up well in the fridge and is actually even better after chilling overnight.
Can I freeze the cheesecake?
Yes, you can freeze it! Just wrap it tightly in plastic wrap or aluminum foil, and it should keep well for a month.
What can I swap instead of strawberries?
You can use any berry that tickles your taste buds. Blueberries, raspberries, or even cherries would be delightful!
How do I prevent cracks in my cheesecake?
Make sure to mix the ingredients gently, and be mindful of overbaking. Also, a water bath can help keep the moisture up if you’re up for it.
Why did my cheesecake separate?
This could be from overmixing or too much heat. Keep it cooler while making it and mix just until combined.
Cooking Tools You’ll Need
- 9-inch springform pan
- Mixing bowls (an electric mixer is a lifesaver)
- Measuring cups and spoons
- Spatula (for spreading the cream cheese mixture)
- Whisk or hand mixer for whipping cream
Final Thoughts
This Strawberry Red Velvet Cheesecake not only fills your stomach but also warms your heart. It’s perfect for celebrations, cozy nights in, or even just as a special treat after a long week. Embrace the process, enjoy the little messes, and celebrate the fact that you’ve created something absolutely delicious.
And if you try this recipe, I’d love to hear how it turned out! Share your version or any fun twists you added along the way. If you enjoyed this recipe, don’t forget to save it on Pinterest or share it with a friend!
Strawberry Red Velvet Cheesecake
Ingredients
For the Cake
- 1 box red velvet cake mix Select a simple brand without preservatives.
- 1/2 cup vegetable oil Adds moisture to the cake.
- 3 large eggs Ensure they are at room temperature for best results.
- 1 cup water Helps create the right batter consistency.
For the Cheesecake Filling
- 16 oz cream cheese, softened Must be completely softened.
- 1 cup granulated sugar Provides sweetness to the filling.
- 1 teaspoon vanilla extract Enhances flavor.
- 2 cups heavy whipping cream For a fluffy texture in cheesecake.
- 1/4 cup powdered sugar Sweetens the whipped cream.
For the Topping
- 2 cups fresh strawberries, sliced Provides freshness and color.
Instructions
Preparation
- Preheat the oven to 350°F (175°C). Grease and flour a 9-inch springform pan.
- In a mixing bowl, combine red velvet cake mix, vegetable oil, eggs, and water. Mix until smooth.
Baking the Cake
- Pour the cake batter into the prepared springform pan and bake for 30-35 minutes, or until a toothpick inserted in the center comes out clean. Allow to cool completely.
Making the Cheesecake Filling
- In another bowl, beat cream cheese, granulated sugar, and vanilla extract until creamy and smooth.
- In a separate bowl, whip the heavy cream with powdered sugar until stiff peaks form, then gently fold it into the cream cheese mixture.
Assembling the Cheesecake
- Once the cake has cooled, spread the cream cheese mixture over the top. Refrigerate for at least 4 hours or overnight.
Serving
- Before serving, top with sliced strawberries. Slice and enjoy!


