

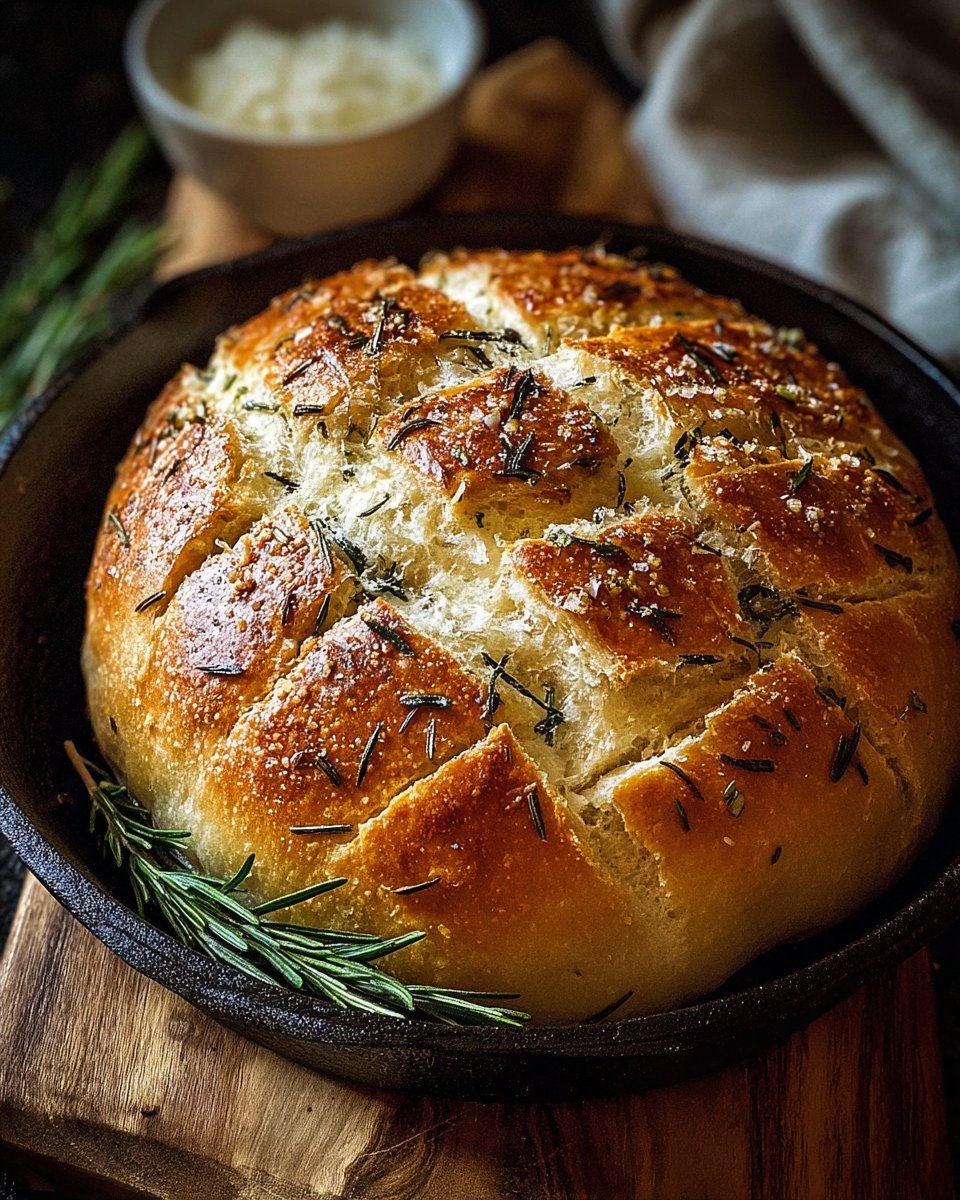
The Best Rustic No-Knead Rosemary Garlic Bread Recipe
I’ll be completely honest with you: I used to be terrified of baking bread. When I thought of bread-making, I envisioned getting flour everywhere (which I absolutely did), fighting with dough that refused to cooperate, and making a mess of my kitchen that would haunt me for days. But then, like a culinary fairy godmother waving her wand, I stumbled across this Rustic No-Knead Rosemary Garlic Bread recipe. It changed everything.
The first time I made this bread, I was having one of those cozy, rainy weekends where nothing feels better than curling up with a good book and a warm slice of something delicious. I’d just finished reading an artisanal bread book, and I was feeling adventurous. “How hard could it be?” I thought. Spoiler alert: I didn’t even have to knead the dough! A light bulb went off. I can do this. As the aroma of rosemary and garlic filled my kitchen, that hallowed ground between a Starbucks and a warm hug, I felt the stress of the week melt away.
There’s something so comforting about homemade bread. It brings warmth, both in temperature and in soul. It’s like a hug in a loaf, if you will. And let me tell you, this recipe is not just simple; it’s an absolute showstopper that elevates even the most average weeknight dinners. The crusty exterior that gives way to a tender, flavorful crumb speckled with the aromatic hints of rosemary and sweet garlic? Oh boy. You might even have to sacrifice a slice—strictly for the sake of your family’s approval, of course!
Why You’ll Love This Recipe
-
Easy to Make: No kneading means less mess. You can throw everything together, and let time do the work. Yes, please!
-
Comforting Flavors: The combination of rosemary and garlic makes this bread feel like a warm embrace. It’s earthy yet uplifting.
-
Picky-Eater Approved: Honestly, who can resist warm bread? It pairs well with just about anything, making it a universal hit with the entire family.
-
Leftovers for Days: This bread holds up beautifully. You can toast it, use it for sandwiches, or just snack on it—nobody’s judging!
-
Great for Meal Prep: Slice it and toss it in the freezer for quick high protein meals later. Don’t you love the sound of that?
-
Perfect for Entertaining: Bring this to a gathering, and watch it disappear. You’ll be hailed as a bread wizard!
What Makes This Recipe Special?
This recipe is special for a few reasons. First, it requires no special equipment or crazy skills. Just a mixing bowl and some patience—how refreshing is that? The flavors! Oh man, the infusion of garlic with rosemary brings a depth of flavor that elevates the simplest of butter spreads to royalty.
The long fermentation time develops a complex flavor, something you usually only get from spending hours with a traditional bread recipe. Plus, the simplicity of combining your ingredients and letting them mingle overnight means you can wake up to the aroma of fresh-baked bread without losing your sanity in the kitchen.
Lastly, this recipe invites you to make it your own. Want to toss in some sun-dried tomatoes or olives? Go for it! The world (or your taste buds) is your oyster.
Ingredients
Here’s what you’ll need to create this bread masterpiece:
-
3 ½ cups all-purpose flour: This provides the structure for your bread. Don’t skimp on quality here; a good flour makes all the difference.
-
1 ½ teaspoons salt: Salt isn’t just for flavor; it also strengthens the dough. It’s like the bouncer of the bread-making party, keeping everything in line.
-
½ teaspoon instant yeast: This little powerhouse does most of the heavy lifting, allowing your dough to rise easily and effectively. Instant yeast is accessible and you don’t have to wait to activate it. Win-win!
-
1 ¾ cups warm water (about 110°F): This helps the yeast bloom! Just the right temperature—too hot, and you’ll kill the yeast; too cold, and it won’t activate. It’s like finding the sweet spot of a warm bubble bath.
-
2 tablespoons fresh rosemary, chopped (or 1 tablespoon dried): Nothing elevates this bread quite like fresh herbs. If you don’t have fresh, don’t stress—just adjust the amount accordingly!
-
3 cloves garlic, minced: Garlic elevates everything to the next level. It adds a savory touch that is irresistible.
-
2 tablespoons olive oil: A drizzle of olive oil adds richness and flavor. Trust me; your dough will thank you.
-
½ teaspoon black pepper (optional): This adds an extra layer of flavor. You don’t have to use it, but oh, what a lovely touch it can be!
-
Extra flour for dusting: That sticky dough of yours will need a little help during shaping.
Now for a note of caution: avoid using expired yeast. It can ruin the bread-making experience faster than you can say, “oops!” Gotta love the grocery store for letting you know when things are past their prime!
How to Make It Step-by-Step
Alright, let’s roll up those sleeves (or just grab a good book and an apron) and dive into making this incredible loaf of bread!
Step 1: Mix Your Ingredients
In a large mixing bowl, combine the flour, salt, yeast, rosemary, garlic, and black pepper. It’s like a little party in there, with everything mingling together! Use a wooden spoon to mix it all until it resembles a shaggy dough. Now here’s the fun part—add in your warm water and olive oil. Stir it until a sticky dough forms. Honestly, it might look like a hot mess, and that’s perfectly fine! It’s supposed to be a bit sticky, no need for perfection here.
Step 2: The Waiting Game
This is where the magic happens! Cover your bowl tightly with plastic wrap or a clean kitchen towel. Let it sit at room temperature for 12-18 hours. I know this sounds like an eternity, but the longer it sits, the more flavor develops. Plus, think of it as a “do nothing day” for your dough!
Step 3: Shape Your Loaf
After the dough has risen to double its size and is bubbly, turn it out onto a lightly floured surface. You want to avoid overhandling it—this isn’t a wrestling match! Gently shape it into a round loaf by tucking the edges underneath.
Step 4: Rest Again
Place your formed dough on a piece of floured parchment paper. Cover it again and let it rest for another 30-45 minutes while your oven heats up. This is the second act in our bread-making play, and it’s just as critical for a lovely rise.
Step 5: Preheat the Oven
Meanwhile, preheat your oven to 450°F (230°C) and place your Dutch oven inside to heat up for about 30 minutes. You want it to be sizzling hot!
Step 6: Bake Your Bread
When the oven and Dutch oven are nice and hot, carefully (and I mean carefully) transfer the dough with the parchment paper into the Dutch oven. Cover it and bake for 30 minutes. This steam trap is what gives your bread that beautiful crust!
Step 7: Brown It Up
After 30 minutes, remove the lid and let it bake for another 10-15 minutes until golden brown. It’ll smell like a little piece of heaven has just entered your home.
Step 8: The Patience Game
Finally, let your bread cool on a wire rack for at least 15 minutes before you slice into it. I know, waiting is hard, but trust me: if you cut it too soon, you’ll get a gummy interior, and nobody wants that. You’ll achieve that perfect texture—one you dream about!
Tips for Best Results
-
Use Quality Ingredients: Good flour and olive oil make a difference. Spend just a bit more for the high-quality stuff; your future self will thank you!
-
Check Your Yeast: As mentioned, don’t let your yeast hang around too long. Get fresh yeast for a nice rise.
-
Adjust the Timing: Too hot or too cold in your kitchen? Adjust the rising time accordingly. Keep an eye on it! Not all kitchens are created equal.
Ingredient Substitutions & Variations
-
Herbs: You can totally switch out the rosemary for thyme or add in some oregano. Experiment with what you have—cooking is all about improvisation!
-
Add-Ins: Feel free to toss in some chopped olives or sun-dried tomatoes for a Mediterranean twist. You might even throw in some cheese if you’re feeling indulgent (why not?).
Serving Suggestions
This Rustic No-Knead Rosemary Garlic Bread pairs beautifully with so many dishes. Think cozy soups or stews for those chilly nights, or enjoy it simply with a smear of butter and a sprinkle of coarse salt while you binge-watch your favorite shows. You could even make mini sandwiches with leftover chicken or turkey for some quick family meals!
Now, picture this: a hot slice of that bread, some creamy spread, and your favorite rom-com playing in the background. It’s pure happiness on a plate!
How to Store and Reheat Leftovers
Got leftovers? Here’s the scoop: let the bread cool completely before wrapping it in a kitchen towel and then placing it in a zip-top bag. Keep it at room temperature for a day or two. If you know you won’t finish it within that time, slice it up, wrap in foil, and pop it in the freezer. That way, you can enjoy a piece of heaven straight from the oven whenever the craving strikes.
Reheating? Pop a slice in the toaster or use the oven. Wrap it in foil and heat at 350°F for about 10 minutes. It’ll taste as good as fresh!
Make-Ahead and Freezer Tips
You can totally make the dough a day ahead and let it sit in the fridge to develop more flavor. Bring it to room temperature before shaping. If you freeze it, just heed the advice above about slicing and wrapping. This bread freezes remarkably well, making it perfect for those busy weeknights.
Common Mistakes to Avoid
-
Underproofing: Give it enough time to rise! If the dough isn’t bubbly, your bread might not turn out as light as you want.
-
Overbaking: Keep an eye on that crust! Nobody wants a burnt loaf, so check it in the last few minutes.
-
Crowding: If you bake several loaves or other dishes, give them space. That steam needs to circulate to create that perfect crust.
Frequently Asked Questions (FAQ)
Can I use whole wheat flour?
Absolutely! While it may change the texture slightly, a mix of all-purpose and whole wheat flour usually works well.
What can I substitute for garlic?
If you’re not a garlic person (who even are you?), try leaving it out or using garlic powder sparingly.
Can I make this gluten-free?
You can explore specialty gluten-free flours, but keep in mind that you may need to adjust the ratios and hydration.
Cooking Tools You’ll Need
- A large mixing bowl: For mixing your fluffy love potion!
- Wooden spoon: The trusty tool for concocting your dough.
- Parchment paper: Necessary for easy transfer to the Dutch oven.
- Dutch oven: Essential for creating that crispy crust we all love!
Final Thoughts
Making this Rustic No-Knead Rosemary Garlic Bread has become one of my favorite kitchen rituals. It’s a labor of love that’s so simple, yet so rewarding. The happiness that fills my home when that loaf rises and then bakes is euphoric.
I’d love to hear your adventures and variations with this recipe! Share your favorite moments or kitchen mishaps, because believe me, I’ve had my fair share of “oops” moments in the kitchen too.
If you enjoyed this recipe, don’t forget to save it on Pinterest or share it with a friend! Life’s too short not to spread the joy of homemade bread.
Rustic No-Knead Rosemary Garlic Bread
Ingredients
Dry Ingredients
- 3.5 cups all-purpose flour Use quality flour for best results.
- 1.5 teaspoons salt Strengthens the dough.
- 0.5 teaspoon instant yeast No need to activate it beforehand.
- 0.5 teaspoon black pepper Optional for added flavor.
Wet Ingredients
- 1.75 cups warm water About 110°F to activate yeast.
- 2 tablespoons olive oil Adds richness and flavor.
Flavor Enhancers
- 2 tablespoons fresh rosemary, chopped Or 1 tablespoon dried.
- 3 cloves garlic, minced Elevates flavor.
For Dusting
- Extra flour For shaping the dough.
Instructions
Mixing
- In a large mixing bowl, combine the flour, salt, yeast, rosemary, garlic, and black pepper.
- Add in warm water and olive oil, and stir until a sticky dough forms.
First Rise
- Cover the bowl tightly with plastic wrap or a towel and let it sit at room temperature for 12-18 hours.
Shaping
- Turn the risen dough out onto a floured surface and gently shape it into a round loaf.
Second Rise
- Place the shaped dough on floured parchment paper, cover again, and let it rest for 30-45 minutes.
Preheating Oven
- Preheat your oven to 450°F and place a Dutch oven inside to heat up.
Baking
- Transfer the dough with parchment into the hot Dutch oven, cover, and bake for 30 minutes.
- Remove the lid and bake for another 10-15 minutes until golden brown.
Cooling
- Let the bread cool on a wire rack for at least 15 minutes before slicing.


