

Quick Pickled Red Onions: Your New Favorite Pantry Staple
There’s something undeniably magical about quick pickled red onions. The vibrant hue alone is like a burst of joy in any dish, and the sweet, tangy crunch they add can elevate even the simplest of meals to a culinary experience. I remember the first time I tried my hand at pickling. I say “tried” because, let me be honest, it was more of a hilarious kitchen disaster than a Martha Stewart moment. It was a rainy Thursday evening, and my ambition was high, but my skills? Not so much. I thought, how hard could it be to make these fancy pickled goodies? Spoiler alert: it’s easier than you think, especially with this quick pickled red onions recipe.
Let’s dive into a cozy kitchen moment, shall we? It was dusk; the soft glow of my kitchen lights mixed with the gloomy outside world, creating that comforting atmosphere ideal for some culinary experimentation. I hastily chopped red onions, their pungent scent filling my tiny kitchen, making me teary-eyed not only from the strong aroma but also the realization that I may not have enough vinegar to complete my ambitious plans. I grabbed whatever I could find from the pantry, not knowing how essential those little details would be!
Despite those early troubles, I learned a lot. Pickling taught me patience and the beauty of cooking on a whim. Plus, the satisfaction of having those bright, tangy slices ready for sandwiches, tacos, or any random meals was totally worth it. Honestly, few things feel as comforting as opening your fridge and finding jars filled with something you’ve made, ready to jazz up your easy weeknight dinners or serve as a snack at a casual gathering with friends.
So, why does this quick pickled red onion recipe matter to me? It’s colorful, it’s zesty, and more importantly, it’s a game-changer for anyone who wants to add a little flair to their meals without spending hours in the kitchen. Trust me, you’re going to want to bookmark this one!
Why You’ll Love This Recipe
- Rapid Preparation: No long wait; in under an hour, you’ll have deliciously tangy pickled onions ready to go.
- Versatile Addition: These bad boys can elevate salads, sandwiches, tacos, and even budget-friendly recipes. Seriously, add them on top of a simple salad, and you’ll feel like you’re dining in a five-star restaurant.
- Picky Eater Approval: They appeal to both adventurous eaters and those in your life who would rather nibble on plain rice. Their sweetness makes them surprisingly approachable!
- Great for Meal Prep: They last for up to two weeks in the fridge, making them a perfect healthy comfort food addition to your meal prepping routine.
- Flavor Upgrade: The vinegar, sugar, and optional aromatics bring a depth of flavor that adds excitement to your everyday dishes. They almost feel like a hug in a bowl!
- Kitchen Catastrophe Friendly: Even if you mess up a bit, no one will know—it’s all about experimentation!
What Makes This Recipe Special?
Let’s talk about the flavors. The vibrant red of the onions turns even the most mundane of meals into a feast for the eyes. The essential elements—vinegar, water, sugar, and salt—create a tangy brine that’s both refreshing and addictive. The optional spices? They’re like little surprises that you get to customize with each batch, adding layers of flavor that are simply delightful.
Growing up, I remember my grandmother pickling vegetables during the summer, and she always had the best stories to tell while doing it. Each jar was more than food; it was a connection to family and memories. I think that’s what I cherish most about this quick pickled red onions recipe—it reminds me that cooking is not just about sustenance; it’s about heritage, love, and the warmth of home. So, grab your onions, and let’s get cooking!
Ingredients
To whip up these magical onions, you’ll need:
- 2 red onions, thinly sliced: They’re the star of this show, with their brilliant color and taste.
- 1 cup water: This helps dissolve the sugar and salt while balancing the acidity of the vinegar.
- 1 cup vinegar (white or apple cider): This adds the tang! Apple cider gives a slightly sweeter profile, while white vinegar is a classic pickling brine.
- 2 tablespoons sugar: Don’t skip this! It counterbalances the vinegar’s acidity and rounds out the flavors.
- 1 tablespoon salt: Helps enhance the flavors and act as a preservative.
- Optional spices: Think peppercorns, garlic, or bay leaves. They can take your pickling game to the next level—feel free to get creative here!
A little pro tip? If you want a little heat, toss in some red pepper flakes! Oops, speaking of which, I tried to get too fancy once with herbs de Provence. Let’s just say some flavor combos don’t mix well. Stick to simple spices your taste buds recognize, especially if you’re new to pickling.
How to Make It Step-by-Step
Ready to make some pickled magic? Let’s roll up those sleeves and dive in!
-
Prepare the Onions: Grab those vibrant red onions and slice them thinly. You’re looking for slices that are around ⅛ inch thick. I learned this the hard way—it took me several attempts to perfect my slicing technique. Trust me; even the most imperfect cuts work here, but thinner slices allow for better brining.
-
Boil the Brine: In a small pot, combine your water, vinegar, sugar, and salt over medium heat. It’s a magical moment when it starts to simmer, sending that delightful tangy scent wafting in the air. Stir it occasionally, letting it bubble away until everything dissolves. You don’t want to let it boil vigorously; just gently simmer. Who knows, you might even feel like a mad scientist as the pot steams!
-
Combine the Onions and Brine: Grab a jar—make sure it’s clean! Place the sliced onions inside, packing them down a bit. Then, pour the hot brine over them until they are completely submerged. It’s like giving them a little spa day!
-
Spices Optional But Recommended: If you want to add spices, toss them in now! Don’t be shy—it’s your creation. Garlic cloves add a nice kick; bay leaves introduce earthiness. I once tossed in some mustard seeds, and wow, what a flavor bomb!
-
Cooling Time: Let the mixture cool to room temperature. Don’t rush this part! Once it’s cooled, cover your jar or bowl and pop it in the fridge. Patience is key here; these bad boys need at least 30 minutes to start working their magic, but overnight is even better.
-
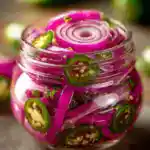
Enjoy!: After the waiting game, it’s go-time! You’ll love the sheer beauty of those deep pink rings glistening in the jar. Those crunches and pops when you add them to tacos, on salads, or even sandwiches—pure bliss. I’ve found that they are amazing in grain bowls with roasted veggies. Seriously, it’s like having a flavor party, and everyone’s invited!
Tips for Best Results
Want to make sure your onions are as awesome as possible? Here are a few tips that really make a difference:
- Slice Evenly: Consistent thickness helps ensure even pickling. It’s worth the time, trust me!
- Don’t Skip the Sugar: It might seem trivial, but that sweetness really rounds out the flavors you want.
- Experiment: Have fun with those spices! If your first batch is a flop (which happens to everyone), take a mental note and tweak it for next time.
- Use Fresh Ingredients: Fresh onions will yield the crispiest results. Nobody likes soggy pickles!
Ingredient Substitutions & Variations
Let’s get creative! Here are some ideas if you want to mix things up:
- Vinegar Variety: Don’t just stick to plain old vinegar; try red wine vinegar for a slight fruitiness or even rice vinegar for a gentler flavor.
- Sweeteners: Swap out sugar for honey or agave for a more distinctive flavor. Just be mindful of the quantities; honey is thicker, and you might need to adjust the liquid slightly.
- Added Vegetables: Bell peppers or cucumbers can be quickly pickled alongside the onions, adding an exciting twist. They’ll soak up all that flavor too!
Serving Suggestions
These quick pickled red onions are incredibly versatile:
- Pairs Perfectly with: Tacos, serving as a zesty topping; grilled chicken sandwiches for that crunch; or even on salads—think mixed greens with goat cheese and walnuts drizzled with olive oil.
- Snack Attack: Serve them as a tangy side to any charcuterie board; they provide a bright contrast to heavy cheeses and cured meats.
- Perfect Companion: Sip on a fizzy soda or a crisp rosé to wash down your delightful meal. And of course, for cozy evenings, these are a must-have while binge-watching your favorite rom-com—you know, for that “me-time” experience.
How to Store and Reheat Leftovers
These beauties can be stored in the fridge for up to two weeks, if they last that long! Just remember to keep them in an airtight container. Frankly, if they seem to get a little mushy – don’t worry; they’ll still be packed with flavor, even if the texture isn’t ideal.
Now, here’s an important tip I learned: if you decide to double this batch, just use more jars. Trying to cram everything into one is a recipe for disaster (literally—my fridge became a vinegar explosion zone!).
Make-Ahead and Freezer Tips
Make them ahead! Seriously, they’re perfect for prepping on a Sunday to accompany your meals throughout the week. Just do your future self a favor and keep them away from the freezer. I once did that thinking I could prolong their life, and oops—find a messy, purple popsicle disaster when I opened it three months later!
Common Mistakes to Avoid
- Not Using Enough Salt/Sugar: This is just not cute. Skimping will result in under-seasoned pickles that not even your picky eater cousin will touch.
- Forgetting to Let Them Cool: Placing hot brine over the onions in a tightly sealed jar can lead to a hot mess of condensation. Let them cool first!
- Skip the Waiting Time: I know, I know—waiting is the worst! But don’t bite the bullet too soon. Give them at least 30 minutes, or even better, let them sit overnight. You won’t regret it!
Frequently Asked Questions (FAQ)
1. Can I use other types of onions?
Absolutely! Yellow onions work, but they won’t be as pretty. They have a stronger flavor, so it might alter the end results a bit.
2. What if I don’t have vinegar?
While vinegar is essential for that tang, lemon juice can be an alternative, but it won’t hold up for as long. You’ll want to consume them within a few days if you go this route.
3. Can I jar these for longer preservation?
This quick pickling method is designed for refrigerator storage, not long shelf life. If canning is your jam, there are specific techniques for that that differ from this recipe.
4. How do I know if they’re bad?
Look for off smells or signs of mold or unusual textures. If anything seems funky, toss it out.
Cooking Tools You’ll Need
- Sharp Knife: A good knife makes all the difference in slicing those onions.
- Cutting Board: Protects your counters and keeps your cutting area neat.
- Small Pot: For warming the brine. No need for fancy cookware here!
- Jar or Bowl: Glass jars work best; they’re beautiful, and who doesn’t love a good vintage jar moment?
Final Thoughts
There you have it—your personal guide to making quick pickled red onions! I hope you find joy in the process, just as I did. Cooking should always be an adventure, even if it does involve the occasional kitchen mishap or messy countertop.
Every time I open my fridge and catch a glimpse of my little jars, I’m reminded of why I adore cooking in the first place: the love, the laughter, and the community that it fosters. So, embrace the mess, have fun, and dig into those vibrant, tangy bites!
If you enjoyed this recipe, don’t forget to save it on Pinterest or share it with a friend! Let’s spread the love of food together!
Quick Pickled Red Onions
Ingredients
Main Ingredients
- 2 pieces red onions, thinly sliced They’re the star of this show, with their brilliant color and taste.
- 1 cup water This helps dissolve the sugar and salt while balancing the acidity of the vinegar.
- 1 cup vinegar (white or apple cider) Apple cider gives a slightly sweeter profile, while white vinegar is a classic pickling brine.
- 2 tablespoons sugar It counterbalances the vinegar's acidity.
- 1 tablespoon salt Enhances flavors and acts as a preservative.
Optional Ingredients
- Optional spices (peppercorns, garlic, bay leaves) Feel free to get creative here!
- Red pepper flakes For a little heat, if desired.
Instructions
Preparation
- Slice the red onions thinly, about ⅛ inch thick.
- In a small pot, combine water, vinegar, sugar, and salt over medium heat until dissolved.
- In a clean jar, pack the sliced onions tightly and pour the hot brine over them until submerged.
- Add optional spices if desired.
- Let the mixture cool to room temperature before covering and refrigerating.
- Let them sit for at least 30 minutes (overnight is best) before enjoying.


