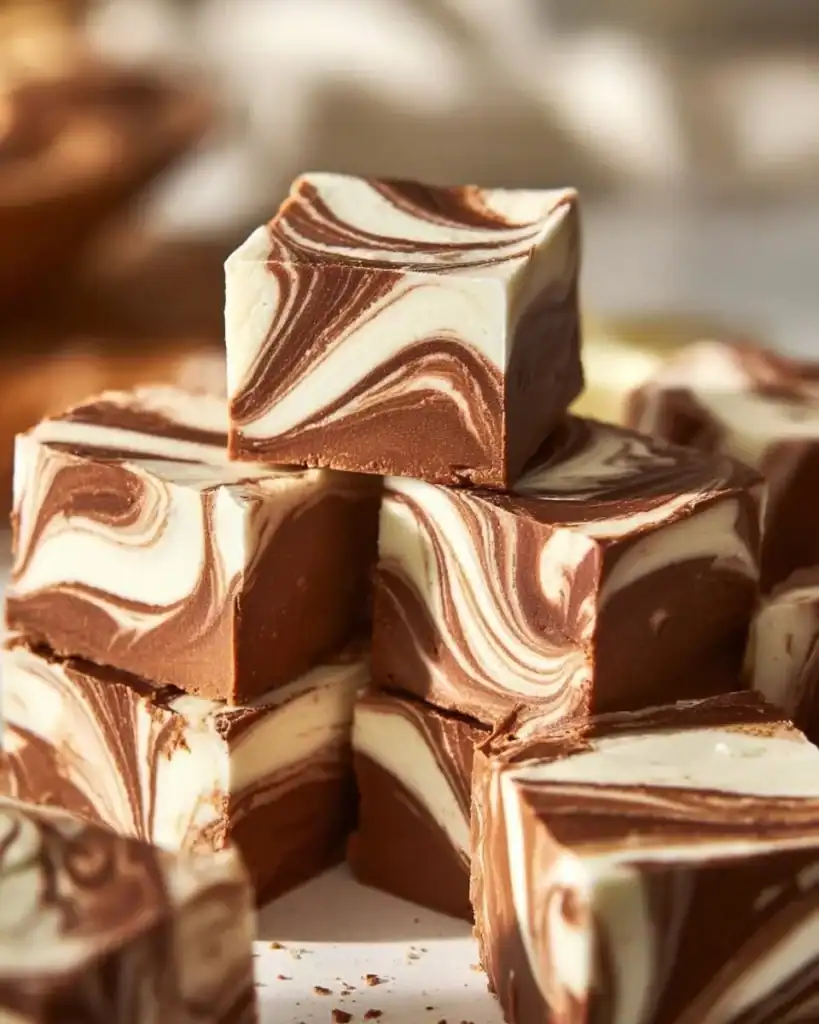

Easy Marshmallow Swirl Fudge: A Sweet Treat for Every Occasion
It was one of those rainy afternoons, the kind where the sky folded into shades of gray, and every drop outside seemed to chant, "Stay cozy, stay inside!" There I was, rummaging through my kitchen cabinets, daydreaming about something sweet to make. That’s when I stumbled upon an old family recipe for Marshmallow Swirl Fudge. Honestly, my heart did a little happy dance at the thought of this chocolaty magic. My grandma used to whip this up on especially drizzly days, and it became our favorite rainy day indulgence.
The memory of us sitting on the kitchen counter, the smell of chocolate wafting through the air, warm mugs of hot cocoa in hand—those moments were pure gold. I remember my first attempt at making this fudge; I was probably ten or eleven, and let’s just say I learned the hard way about melting chocolate. The spatula slipped right out of my hand, and well, you can imagine the chaotic scene of chocolate splatter. Oops! But, oh, what a mess it was, and through it all, I learned the joy that comes from a kitchen adventure, both messy and sweet.
As I set the mood, pouring the sweetened condensed milk and chocolate together, I let the memories flood in, allowing the cozy vibes to blanket the room. Trees tapped against the window, and the world outside faded as the chocolate melted into velvety bliss. This fudge recipe is not just a treat; it’s a hug in a bowl, and the swirling mini marshmallows make it even more inviting. You just can’t beat that!
So, if you’re after a recipe that brings back those warm, heartfelt moments and is ridiculously easy to whip up, settle in. You’re in for a delightful kitchen escapade that’s perfect for sharing (or keeping all to yourself). Let me take you through the joys of making Marshmallow Swirl Fudge!
Why You’ll Love This Recipe
- Simplicity at its Best: With minimal ingredients, this fudge comes together quicker than you can say "What’s for dessert?"
- Picky-Eater Approved: Seriously, who doesn’t love fudge and marshmallows? It’s a guaranteed hit for kids and adults alike.
- Versatile Dessert: You can tweak it based on what your pantry holds and still come out smelling like a baking genius.
- Perfect for Meal Prep: Nothing beats having a stash of fudge waiting in the fridge for a midnight snack or surprise guests.
- Emotional Comfort Food: This treat has a history, a rustic vibe that fills your heart and soul with warm fuzzies.
- Customizable: Want to play around with flavors? You do you! Add extra nuts, switch up the chocolate varieties—the world is your fudge!
What Makes This Recipe Special?
There’s something about the combination of rich semi-sweet chocolate melding with gooey marshmallows that makes it special. Each bite is an experience—you get that silky texture, balanced sweetness, and a little bit of crunch if you decide to toss in some nuts. The sweetened condensed milk is the secret ingredient! It turns the chocolate into a lovely creamy base, providing that melt-in-your-mouth goodness. Each piece of fudge gives a nostalgic wink, reminding me of laughter-filled kitchens and cozy nights.
Don’t underestimate the power of vanilla extract either. It adds a depth of flavor that makes this fudge irresistible. And let’s not forget about those mini marshmallows! They’re playful little bursts of sweetness that give your fudge a fun swirly appearance. Um, yes please!
Ingredients
- 2 cups semi-sweet chocolate chips: The base of our fudge. I personally prefer Ghirardelli or Nestlé for their rich flavors; they never let me down!
- 1 can (14 oz) sweetened condensed milk: This is your magic ingredient that gives depth and creaminess. Skip the low-fat stuff; you want decadence!
- 1 teaspoon vanilla extract: Pure vanilla is worth the splurge—trust me, it makes a world of difference.
- 1 cup mini marshmallows: These little guys not only bring sweetness but also create delightful swirls in your fudge.
- 1/2 cup chopped nuts (optional): Walnuts, pecans, or almonds—pick your favorite! They add a nice texture that contrasts beautifully with the smooth fudge.
A Few Tips:
- Don’t even think about using low-quality chocolate. The better the chocolate, the better your fudge.
- If you’re not into nuts, leave them out—this fudge will still be de-lish!
- As for marshmallows, remember: mini is key. They’ll melt and swirl without overpowering the chocolate.
How to Make It Step-by-Step
Let’s dive into the making of this elegant yet simple treat. Grab your apron (or at least a towel for the inevitable spills) and let’s cook!
-
Prep Your Dish: First off, line an 8-inch square baking dish with parchment paper or give it a generous spray of cooking spray. This ensures your fudge can be removed easily later. Trust me, you don’t want to be wrestling with fudge stuck to the bottom of the dish. Not today, chocolate battle!
-
Melt the Goodness: Grab a good-sized saucepan and warm it up over low heat. In it, you’ll combine the semi-sweet chocolate chips and sweetened condensed milk. Stir frequently—be patient! The chocolate melts and transforms into this glossy, thick potion. The rich aroma fills the kitchen, and you may find yourself wanting to taste—just a tiny bit!
-
Flavors Unite: Once the chocolate is completely melted and smooth (don’t forget to stir, or you might have some chocolate sticks), remove it from the heat. Stir in that heavenly teaspoon of vanilla extract. It’s like a warm hug for your fudge mixture.
-
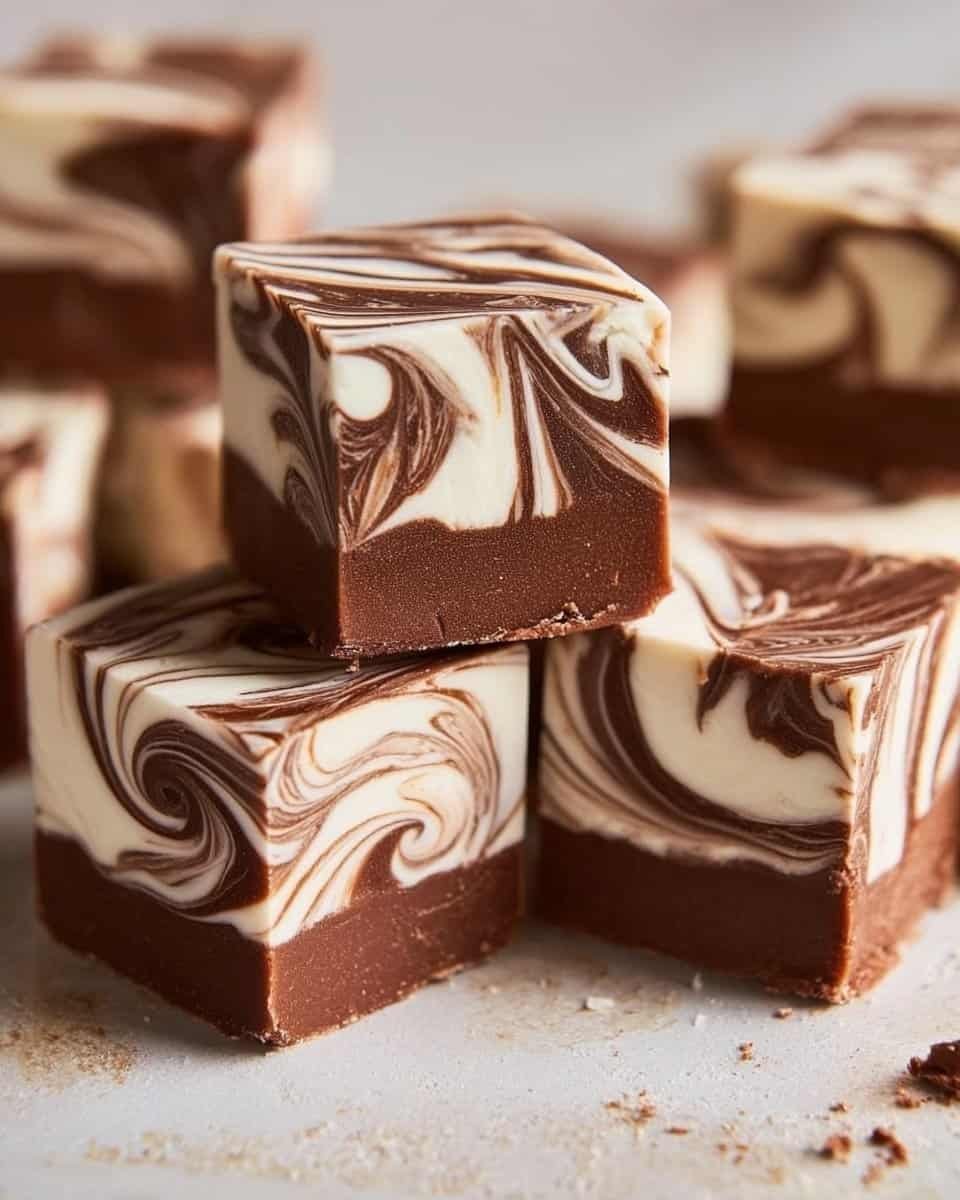
Fold in the Goodies: Now, it’s time for the fun part! Gently fold in the mini marshmallows and nuts (if you’re using them). You should see a beautiful swirl of color starting to form. The little marshmallows melt slightly and create that classic fudge effect we love.
-
Pour and Spread: Pour your fudge mixture into the prepared baking dish. Use a spatula to spread it evenly. It should be thick and luscious, and you might want to dive right in with a spoon! I won’t judge, promise!
-
Firm It Up: All that’s left is to chill your fudge. Pop it into the refrigerator for at least two hours, or until it’s firm. During this time, you can keep your nose pressed against the fridge door— I mean, who can resist smelling that sweet goodness? Compelling you to taste it early is a hazard I can’t warn you enough against!
-
Cut, Share, and Enjoy: Once firm, remove the fudge from the pan by lifting the parchment paper. Cut it into squares—you can go small or large, whatever your heart desires. And voila! There you have it: your Marshmallow Swirl Fudge, ready for munching or sharing… or both!
Tips for Best Results
- Slow and Steady: Always melt chocolate on low heat; high temperatures can cause it to seize. Chocolate crimes are not okay!
- Cool Down: Allow the fudge to cool slightly before placing it in the fridge. Rapid cooling can cause some bizarre texture issues.
- Explore Flavors: Drizzle some melted white chocolate on top for extra decoration. It’s like adding a crown on your fudge!
Ingredient Substitutions & Variations
Want to switch things up? Here are a few suggestions:
- Chocolate Variety: Swap semi-sweet for dark chocolate or milk chocolate. Each will bring a different a flavor profile, and you may just discover a new favorite.
- Nut Substitutions: Prefer a smoother texture? Omit the nuts altogether or use sunflower seeds if you’re nut-free.
- ** Seasonal Swaps**: During the holidays, why not sprinkle in some peppermint extract or crushed candy canes? This gives your fudge a festive twist!
Serving Suggestions
Now that you have your delectable fudge, what to do next? Enjoy it straight away, of course! But let’s elevate the experience:
Pair your fudge with a warm mug of hot cocoa for when you want that complete-cozy-night-in vibe. Or maybe alongside a dollop of whipped cream and a drizzle of chocolate sauce for an indulgent dessert. If I’m feeling adventurous, I throw a marshmallow on top and toast it lightly—instant s’mores vibes! And do I even need to mention that it’s perfect for parties, holiday gatherings, or that moment when you just need a special treat? Grab a square, settle in with a good rom-com, and let the good times roll.
How to Store and Reheat Leftovers
Leftover fudge? A rare phenomenon! But if it happens, store it in an airtight container at room temperature for up to one week. If you notice it beginning to harden, don’t fret! Just pop it in the microwave for a few seconds to soften.
Reheating for this treat is easy. A quick zap in the microwave for about 15 seconds will have it back to its gooey state without losing its charm! Yum!
Make-Ahead and Freezer Tips
If you’re looking to prep ahead, go for it! This fudge actually freezes beautifully. Cut it into squares, wrap individual pieces in wax paper, and then place them in a ziplock bag. They should keep well for up to three months. When the sweet tooth strikes, grab a piece and let it thaw on the counter for a perfect moment of indulgence.
Common Mistakes to Avoid
-
Melting at High Temp: I can’t stress this enough—slow and steady is the key. Avoid high heat to prevent the dreaded chocolate seize!
-
Overmixing Nutty Add-Ins: When folding in marshmallows or nuts, do so gently so they don’t break apart too much. Preserve that delightful texture!
-
Wrong Pan Prep: Not lining the pan can result in a fudge disaster. Seriously, you’ll end up wrestling with your dessert.
-
Peeking Too Soon: Resisting the temptation to peek at your fudge as it chills can be hard. Believe me, waited for chilling pays off!
Frequently Asked Questions (FAQ)
Can I use chocolate bars instead of chips?
Absolutely! Just chop them into small pieces before melting—easy peasy.
Can I add more marshmallows?
You sure can! Just ensure they’re evenly distributed so you have sweet surprises in every bite.
Is the fudge gluten-free?
Yes, all the ingredients used here are gluten-free, making this fudge suitable for many guests.
Can I use dairy-free milk?
Yes! You can use coconut milk or any non-dairy milk as substitutes, but it may alter the texture a bit!
How long does the fudge last?
Stored properly at room temperature, it can last for about a week. If you freeze it, it can go for much longer!
Cooking Tools You’ll Need
- Saucepan: For melting the chocolate and sweetened condensed milk.
- Spatula: Essential for stirring and folding.
- Baking dish (8-inch): To cool the fudge.
- Parchment paper or cooking spray: For easy removal.
Final Thoughts
Marshmallow Swirl Fudge is more than just a recipe; it’s a tradition that brings warmth, love, and a bit of chaos into the kitchen. With every bite, you’re not just tasting chocolate; you’re reliving memories and creating new ones. So don’t be afraid to get a little messy along the way—that’s part of the fun!
I hope this recipe evokes those same cozy feelings for you and your loved ones as it did for me. If you enjoyed this recipe, don’t forget to save it on Pinterest or share it with a friend! Now, go grab your ingredients and get swirling. Happy fudge-making!

Marshmallow Swirl Fudge
Ingredients
Main Ingredients
- 2 cups semi-sweet chocolate chips Use Ghirardelli or Nestlé for rich flavors.
- 1 can (14 oz) sweetened condensed milk Provides creamy texture; avoid low-fat.
- 1 teaspoon vanilla extract Pure vanilla enhances flavor.
- 1 cup mini marshmallows For sweetness and swirling effect.
- 1/2 cup chopped nuts Optional; walnuts, pecans, or almonds.
Instructions
Preparation
- Line an 8-inch square baking dish with parchment paper or grease it with cooking spray.
Melting
- In a saucepan over low heat, combine the chocolate chips and sweetened condensed milk, stirring frequently until melted and smooth.
Flavors Unite
- Remove from heat and stir in the vanilla extract.
Combine Ingredients
- Fold in the mini marshmallows and nuts until evenly mixed.
Pour and Chill
- Pour the fudge mixture into the prepared dish and spread it evenly.
- Chill in the refrigerator for at least 2 hours or until firm.
Serve
- Lift the fudge out of the pan using the parchment paper, cut into squares, and enjoy!


