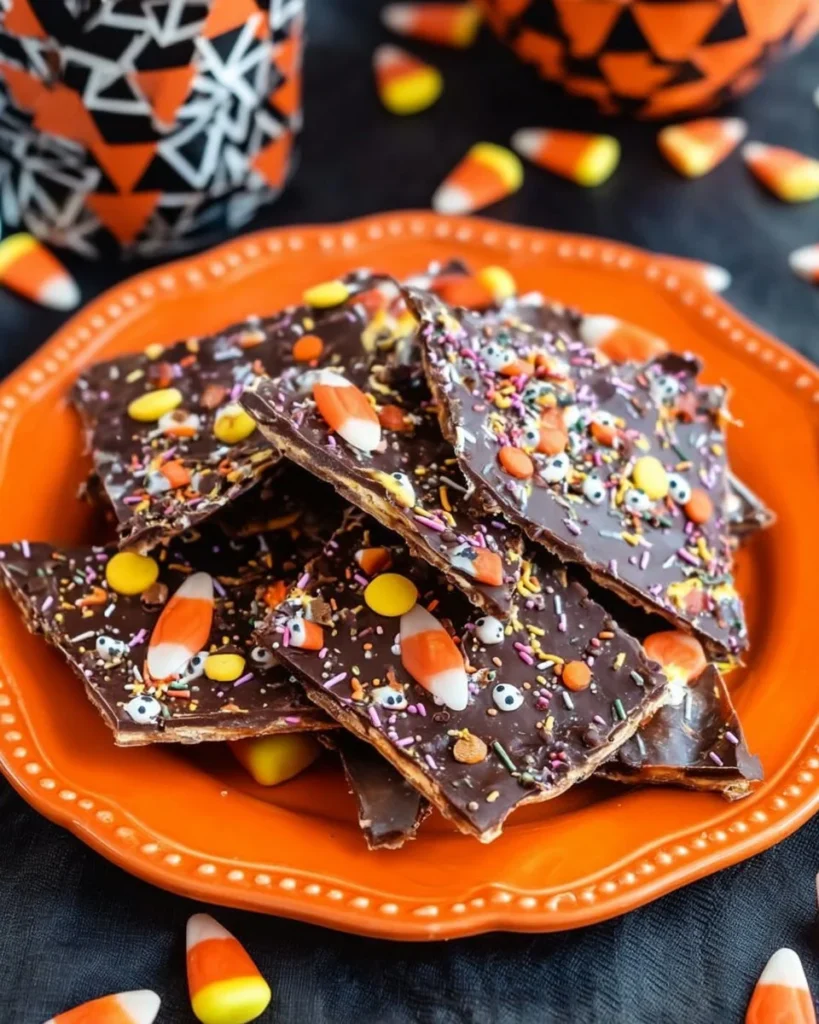

Easy Halloween Crack Candy Recipe: Perfectly Sweet and Scarily Delicious!
Halloween is that magical time of year when everything gets a little spooky—think ghost decorations, pumpkin carving, and, of course, the most deliciously sugary treats! And let me tell you, my journey to discover the wonders of Halloween Crack Candy has been one filled with chaos, laughter, and a sprinkle of sugar! You see, as someone who has lovingly warmed their oven for as long as I can remember, I sometimes have my oops moments in the kitchen. But honestly, that’s where all the fun happens!
This quick and easy dessert is a lifesaver during those hectic October nights packed with planning, parties, and more candy than one household can handle. The first time I made this recipe was one dreary autumn evening when I wanted something that captured the spirit of Halloween without spending half my night stuck in the kitchen. Spoiler alert: It was a hit!
Imagine your kitchen filled with the irresistible aroma of melting butter and brown sugar—a warm hug in a bowl. The crack, crunch, and sweetness of the candy perfectly pair with whatever Halloween movie you’ve chosen for the evening. Seriously, just that imagery makes this recipe worth your time! Plus, this recipe is so flexible that you can truly unleash your creative spirit. Grab your favorite Halloween candies and sprinkle your spooky magic—what’s not to love?
I mean, who wouldn’t want a bite of that crispy saltine cracker base smothered in a gooey caramel-like topping and draped in melted chocolate? It’s almost like comfort food meets a festive celebration. So, whether you’re sharing with friends or having a cozy night in, this easy Halloween Crack Candy will become your go-to treat.
So, grab your apron, and let’s dive into this delightful, slightly chaotic journey of candy making, where every bite is packed with nostalgia and a hint of Halloween mischief!
Why You’ll Love This Recipe
-
Simple and Quick: You can make this in under 30 minutes! Seriously—you’ll think I’m joking, but this is one of those quick family meals that doesn’t require long hours of kitchen prep.
-
Easy Clean-Up: Who wants to battle a mountain of dishes after whipping up a sweet treat? Not me! This recipe uses just one saucepan and a baking sheet, making clean-up a breeze.
-
Picky Eater Approved: If you’ve got kids who turn their noses up at broccoli but can sniff out candy from a mile away, this will easily win them over. It’s sweet and crunchy—what’s not to like?
-
Perfect for Sharing: Going to a party? Need a quick treat? This is great for sharing with friends or saving for a movie night—after all, one batch makes quite a bit!
-
Endless Customizations: The variety of toppings you can use opens doors for creativity! Whether it’s seasonal sprinkles or your favorite candies, the sky’s the limit.
-
Nostalgic: There’s something about this recipe that evokes childhood memories—school bake sales, Halloween parties, or cozy nights with the family. It’s like candy nostalgia all rolled into one bite!
What Makes This Recipe Special?
Not only is Halloween Crack Candy ridiculously easy to make, but it’s also versatile and customizable. You might be wondering why we’re working with saltine crackers, of all things! Here’s a fun fact: those unassuming little crackers provide the perfect crunch. They soak up the buttery, sugary goodness, yet retain that delightful “crack” when you bite into them.
In addition to textures—crunchy, smooth, and chewy—you can go wild with flavors. Think chocolate, peanut butter, caramel, or any Halloween candy you have lurking in your pantry! Last time I made it, I knocked over a bag of gummy worms, which ended up as an unexpected but cute topping—I dubbed it “Halloween on a cracker.”
And let’s be honest—one of the best parts about this recipe is that it’s practically foolproof. Even if you go a little overkill with toppings (whoops!), you can still expect a sweet, crunchy confection that gives you a little sugar buzz. So, what are you waiting for? Grab your baking sheet—let’s get into the ingredients!
Ingredients
To recreate this magical Halloween Crack Candy, gather these goodies:
-
1 sleeve saltine crackers: Saltines provide an unexpected crunch that balances out the sweetness, keeping things interesting.
-
1 cup unsalted butter: The rich, creamy base that combines with the sugar to create that irresistible toffee-like topping.
-
1 cup brown sugar: This not only sweetens the party but adds a lovely caramel flavor that complements the butter perfectly. If you can, use light brown sugar for a milder flavor.
-
2 cups chocolate chips: Go for semi-sweet or milk chocolate—whatever your heart (and taste buds) crave. I personally prefer a mix for that sweet and creamy goodness.
-
Assorted Halloween candies and sprinkles: This is where you can let loose! Snag your favorite treats, whether they be Mini M&M’s, Reese’s pieces, or even something like candy corn—it’s totally your call!
Personal Tips and Tricks
-
Don’t skip the greasing: Make sure your pan is well-lined with aluminum foil. It doesn’t just help with easy removal; it stimulates a whole lot of “thank you” as you devour those pieces instead of wrestling them out of the pan.
-
Pro tip: Resist the urge to eat straight from the jar while making this. I’ve been known to sneak a handful of chocolate chips, and, whoops … who knew baking could be that tempting?
-
Go wild: For a twist, consider using pretzel sticks for an unexpected salty surprise—trust me on this one!
How to Make It Step-by-Step
Let’s get into the nitty-gritty of making this mouthwatering candy. Be prepared for aromas that will tempt you to dive in way too soon!
-
Preheat your oven to 400°F (200°C). First things first: make sure that oven is hot and ready! You don’t want to keep your crackers waiting, or they might get a tad offended.
-
Line a baking sheet with aluminum foil. Honestly, I’ve fought with plastic wrap a million times, and it’s just not worth it! Go foil, and keep it simple—plus, it makes the cleanup easy.
-
Arrange the saltine crackers. Lay those crackers in a single layer, side by side. They’ll act as the crunchy base, and I promise they won’t be in the spotlight for long—they’ll be totally overshadowed by the caramel and chocolate.
-
Melt that butter and brown sugar. Oh boy, here’s where it starts to get divine. In a saucepan, melt the butter and brown sugar over medium heat, stirring constantly until it begins to boil. The sweet aroma is going to fill the kitchen, making you wonder why you don’t make this every week.
-
Pour the mixture over the crackers. Carefully drizzle the buttery goodness over the saltines, ensuring they’re evenly coated. Allow yourself a giddy little smile—you just leveled up snack time!
-
Bake the heavenly creation. Pop the sheet in the oven and bake for 5-7 minutes until bubbly. Keep an eye on it; you want it bubbly but not burnt! The moment those edges start to toast, do a little happy dance—a signal that deliciousness is on its way!
-
Chocolate on top! Pull it out, and immediately sprinkle chocolate chips on top. You need to work fast here, as they’ll start melting the moment they hit the hot surface. Let them sit for 2-3 minutes to melt gloriously, and then take out a spatula to spread that chocolate all around like it’s a warm blanket on a chilly night.
-
Top with candies galore. Now comes the fun part—load on your Halloween candies and sprinkles! Go crazy; this is your chance to get creative. This is also where it’s okay to have a gooey mess—if there’s a little overflow—it just shows love, right?
-
Cool completely. Let your creation cool for a while, then pop it in the fridge if you’re impatient like me! Once it’s solidified, break it into pieces and serve!
Remember, this isn’t a precise science—if you have a few pieces that break into little crumbs—OOPS! Just tuck those away; perfect for eating later or topping some ice cream!
Tips for Best Results
-
Keep an eye on your timing. The difference between chewy and burnt is mere seconds—visual alertness is essential at this stage!
-
Use good quality chocolate. Go ahead and splurge! The better the chocolate, the richer the flavor.
-
Chill before serving. If you want clean breaks when cutting or breaking, let the candy cool for a solid hour!
Ingredient Substitutions & Variations
-
Nut-free: If you want to make this nut-free, simply omit any nuts and go wild with candies that fit your dietary needs.
-
Vegan Twist: Swap the butter for coconut oil and choose dairy-free chocolate chips. This makes everything vegan without sacrificing taste!
-
Add spices. If you want a different flavor punch, consider adding a hint of cinnamon or nutmeg to your buttery mixture before pouring. Bam! You’ve got an autumn infusion going on.
Serving Suggestions
Pair this candy with a glass of cold apple cider while cozying up to your favorite spooky movie. Seriously, this and a rom-com is perfection. Or for the adults, consider enjoying it with a warm pumpkin spice latte—it’s a festive match made in heaven!
For extra spooky fun, serve it on a dark-themed plate with spooky props—think little spider candles or bat-shaped confetti around the edges. Presentation can be a fun way to elevate your sweet treat, especially if you’re sharing with friends!
How to Store and Reheat Leftovers
Let’s be real—what leftovers? But if you do have some leftovers, store them in an airtight container at room temperature. If they get a bit soft, stick them in the fridge for a bit, and they’ll regain some crunch. Just don’t stay away too long; you might just forget they’re there and end up binge-watching series instead of snacking!
Make-Ahead and Freezer Tips
You can make this candy a day or even two before your Halloween party. Just wrap individual pieces in plastic wrap and store away in your fridge. If you’re feeling ambitious and want to get ahead, you can freeze them too. But be prepared—they may not last long when you see them in the freezer!
Common Mistakes to Avoid
-
Don’t let the butter and sugar boil too long! If it darkens too much, you might end up with a toffee that’s too tough, and no one wants to wrestle with their candy.
-
Ensure an even layer of chocolate. If you don’t spread it well, you might bite into a few chocolate-less pieces—not a great surprise.
-
Don’t use too much topping. As tempting as it is to pile on the candy, keep it balanced. Too many toppings can make it tricky to break apart.
Frequently Asked Questions (FAQ)
-
Can I use different types of crackers? Absolutely! You can substitute with graham crackers or Ritz, but remember that the texture and flavor will alter slightly.
-
How long can I store this candy? It lasts about a week at room temperature or longer in the fridge. Just try not to let leftovers linger too long—you’ll be tempted to snack!
-
Can I make this candy gluten-free? You can easily swap to gluten-free saltine crackers, and you’re all set!
Cooking Tools You’ll Need
- Baking sheet
- Aluminum foil
- Saucepan
- Spatula for spreading the chocolate
- Airtight container for storage
Final Thoughts
As we enter one of the sweetest seasons of the year, I hope this Halloween Crack Candy not only brings you joy but inspires fun in the kitchen! This recipe isn’t just about treating your taste buds; it’s about creating special memories—whether you whip it up solo while binge-watching spooky flicks or gather the family to join in on the festivities.
If you enjoyed this recipe, don’t forget to save it on Pinterest or share it with a friend! Happy Halloween, and may your candy corn be plentiful and your saltines always crunchy!
Halloween Crack Candy
Ingredients
Main Ingredients
- 1 sleeve saltine crackers Provides an unexpected crunch.
- 1 cup unsalted butter The rich, creamy base.
- 1 cup brown sugar Use light brown for a milder flavor.
- 2 cups chocolate chips Semi-sweet or milk chocolate, or a mix.
Toppings
- assorted Halloween candies and sprinkles Use your favorites like Mini M&Ms, Reese’s Pieces, or candy corn.
Instructions
Preparation
- Preheat your oven to 400°F (200°C).
- Line a baking sheet with aluminum foil.
- Arrange the saltine crackers in a single layer on the baking sheet.
Cooking
- In a saucepan, melt the butter and brown sugar over medium heat, stirring constantly until it begins to boil.
- Carefully drizzle the melted mixture over the crackers, ensuring an even coating.
- Bake in the oven for 5-7 minutes until bubbly, keeping an eye to prevent burning.
- Remove from oven and immediately sprinkle chocolate chips on top, spreading them to cover as they melt.
- Top with Halloween candies and sprinkles as desired.
Cooling
- Let the candy cool completely before breaking it into pieces for serving.


