
Easy and Delicious Frankenstein Halloween Rice Krispie Treats
As Halloween approaches, my kitchen transforms into a whimsical wonderland. There’s something magical about the season that ignites creativity and a hint of mischief. I remember the first time I attempted to make Halloween-themed treats for my kids’ school party. I thought, "How hard can it be?" Little did I know, my ambitions would turn into kitchen chaos—melted marshmallow madness, debugging a recipe with sticky fingers, and a couple of pans left with more than just a battle scar. That day may as well have been my initiation into the world of festive treats. The heart of it? A simple yet soul-soothing combination of crispy rice goodness and gooey marshmallow magic, dressed up with a spooky flair.
That’s when I discovered this recipe for Frankenstein Halloween Rice Krispie Treats, which feels like a cheat code to Halloween fun. No baking required; just some melting, mixing, and decorating. Oddly enough, this recipe takes me back to my childhood—when weekends were spent in the kitchen after a friend’s sleepover, making sticky, sweet concoctions that would inevitably end with us chaos-wrecked yet grinning from ear to ear. Seriously, there’s a certain charm in a food project that encourages you to embrace the mess.
This recipe embodies comfort in every bite, with a vibrant green hue reminiscent of Frankenstein’s favorite color (sorry, I just can’t resist!) and an easy prep time, making it perfect for a cozy Sunday with the kids. The joy it brings is immense, transforming simple ingredients into a cute, creepy concoction. So light your candle, put on your favorite fall playlist, and let’s get to these fantastically fun Rice Krispie treats that will leave you and your family reminiscing about the magic of the season.
Why You’ll Love This Recipe
- Easy to Make: Even if you’re not a culinary wizard, these are incredibly accommodating to kitchen mishaps.
- Perfect for Kids: The vibrant colors and fun shape will lighten up any Halloween party.
- Picky-Eater Approved: Who can resist a gooey, sweet treat? It’s crispy, chewy, and utterly satisfying.
- Leftover-Friendly: If there are any left (a big if), they can keep for days—if you can resist the urge to devour them all!
- Budget-Friendly: The ingredients are simple and accessible, making it easy on the wallet.
- A Fun Family Activity: Get everyone involved, from mixing to decorating. Plus, it’s a great excuse for some sugar high before bed.
What Makes This Recipe Special?
These Frankenstein Halloween Rice Krispie treats are not just any treats; they’re a canvas for creativity! Each gnarly green-and-black bite not only brings joy but also dizzies you with nostalgia. I’ll never forget laughing with my kiddos as we decorated our first batch, the royal icing eyes practically begged to be put on crooked so they’d look extra spooky. It’s the kind of recipe that welcomes experimentation—perhaps your Frankenstein monster ends up looking more like an abstract art piece.
The chewy marshmallows combine perfectly with the crunch of the Rice Krispies, all coated in a layer of melted green candy. Add in some edible sprinkles, and you’ve got a treat that not only sparks your taste buds but also your imagination. Believe me when I say these little monsters are bound to be a hit at any gathering.
Ingredients
For this fun-filled treat, you’ll need:
- 6 cups Rice Krispie cereal: The backbone of our treats, providing that iconic crunch and texture.
- One 10 oz bag of mini marshmallows: Sweet, gooey, and sticky—the heart of this dessert!
- 4 tbsp unsalted butter: To meld everything fabulously and add a touch of richness.
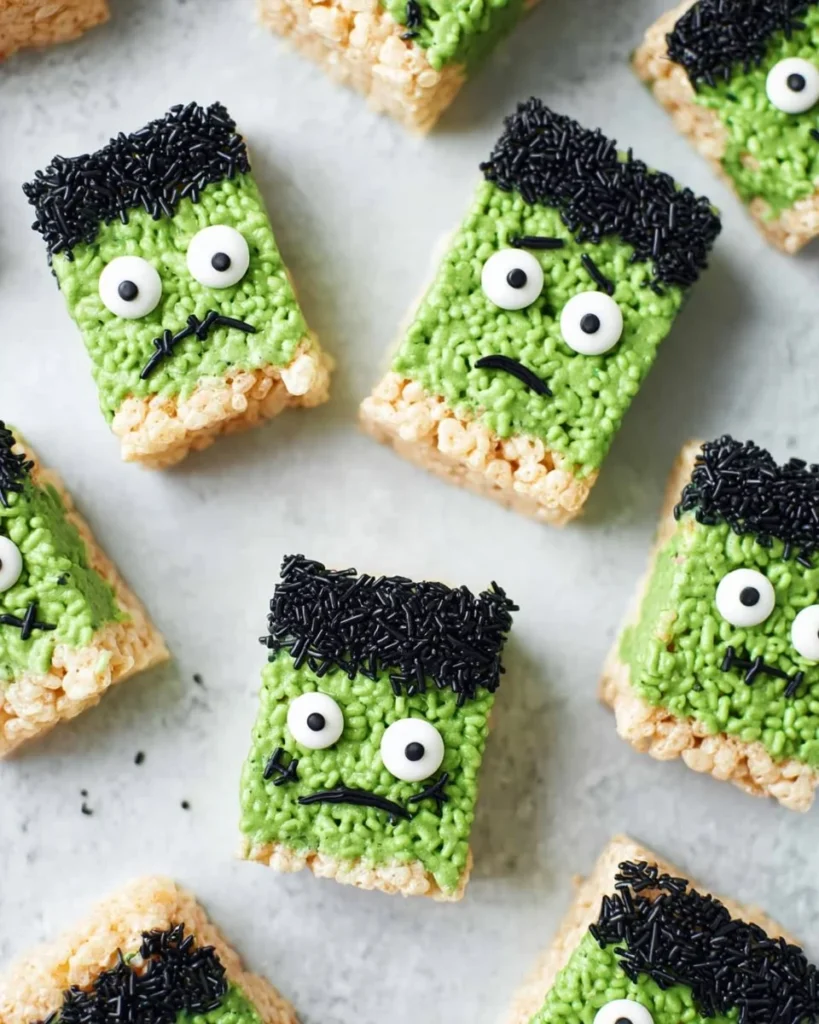
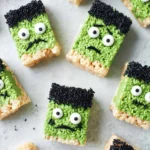
- 10 oz green candy melts: To create that signature Frankenstein hue. Honestly, how can you resist that vibrant green!
- 3 oz black candy melts: For the spooky dimension and the stitches that give our little monster character.
- Royal icing eyes: Because what’s a spooky creation without a pair of big, googly eyes staring back at you?
- Black jimmies sprinkles: To add texture and a bit more fun!
Now for the tips: opt for high-quality ingredients when you can. It makes a difference in taste. I rap my hands on the counter when I realize I’ve used stale marshmallows before—oops! Don’t forget to grease that casserole dish well; nothing’s worse than risking a rice treats massacre during removal.
How to Make It Step-by-Step
Okay, so let’s dive into the joyful (and somewhat chaotic) process of creating our Frankenstein Halloween Rice Krispie Treats. Let’s be real—it’s a path of goo and grins.
-
Butter Up Your Dish: First things first, grab that 9" x 13" casserole dish and butter it generously. I like to think of this step as preparing a cozy bed for our treats.
-
Melt the Butter: Over low-medium heat, toss in your 4 tablespoons of unsalted butter in a large pot. As it begins to melt, the kitchen starts smelling cozy—like a warm hug on a brisk autumn day.
-
Add Marshmallows: Once your butter melts, pour in the 10 oz bag of mini marshmallows. Stir continuously until you achieve a smooth consistency. Honestly, this step is pure magic. The melting marshmallows transform into creamy goo, and it’s a sight to behold.
-
Combine with Rice Krispies: Now comes the fun part: gently fold in 6 cups of Rice Krispie cereal. Use a spatula to mix everything together. Don’t fret if you see a few marshmallows that refuse to blend in; it just adds character! Press the mixture firmly into the prepared casserole dish, smoothing the top.
-
Let it Set: Allow your mixture to cool and set for about 30 minutes. This is the time when I try to stay out of the kitchen. It’s so hard to resist making "taste tests” as you wait!
-
Cut and Prepare to Dip: Once cooled, remove the entire Rice Krispie treat from the dish. I often make this process a bit of a spectacle, requiring a family effort to delicately lift the gooey slab out—there’s danger of it breaking apart, so watch out! Cut into rectangles of varying sizes, and be prepared for a happy dance as you survey your creations.
-
Melt the Green Candy: In a heat-safe bowl set over a pot of simmering water (a double boiler works wonders here), melt the green candy melts. Stir until it’s silky smooth—if your mixture is too thick, adding a teaspoon of vegetable shortening can save the day.
-
Dip Those Treats: Once your candy melts are ready, dip the top of each treat into the colorful green goodness. Roll gently in black jimmies sprinkles, and let them be overtaken by the spookiness!
-
Add Eyes and Stitches: Top each treat with two royal icing eyes—because no monster is complete without a personality! For the finishing touch, melt the black candy melts in the microwave (10–15 second increments, please!). Use a piping bag to carefully add stitches on each treat. Your Frankenstein is practically complete—screams of delight are imminent!
-
Setting the Stitches: Allow everything to set completely before packaging. You wouldn’t want your Frankenstein running away now, would you?
Taking pride in a treat like this brings unhealthy doses of joy. You’ll find the sounds of laughter, along with taste-testing, fill the kitchen as the kids admire their (seemingly) goblin-like creations!
Tips for Best Results
- Get Creative: Don’t be shy! Experimenting with visible toppings—think gummy worms or crushed-up Halloween candies—adds a personal touch.
- Cooling Time Matters: Allow sufficient cooling time before cutting. It minimizes any crumbles and keeps the treats intact.
- Pop it in the Fridge: If you’re in a hurry, placing your assembled Rice Krispie treats in the fridge for a short while helps them firm up faster.
Ingredient Substitutions & Variations
Feel free to get experimental with these treats! Here are a few swaps or variations to consider:
- Nut Butters: For a nutty twist, use peanut butter or almond butter in place of some of the butter when melting your marshmallows.
- Flavored Extracts: Add a splash of vanilla or almond extract to give your marshmallow mix a flavor depth.
- Festive Colors: You can always switch up the colors based on any holiday—you might find love for red for Christmas or orange for fall!
Serving Suggestions
Pair your Frankenstein Halloween Rice Krispie Treats with a big glass of milk, a steaming cup of apple cider, or perhaps some spooky-themed juice. Picture this: you, a plate of treats, and your favorite rom-com, all while basking in the delight of being spellbound by the moment. It’s bliss, I dare say!
How to Store and Reheat Leftovers
Here’s the practical advice I needed when I was a beginner: store leftover treats in an airtight container (preferably separated by parchment paper) at room temperature. They’ll last for about a week if you can resist the temptation. To reheat, try using the microwave in short bursts to regain a bit of gooeyness, but don’t go overboard, or you’ll be left with more marshmallow soup than treat!
Make-Ahead and Freezer Tips
You can also make these ahead of time. The treats freeze surprisingly well! Just wrap them securely, and they can last up to three months. When you’re ready to enjoy, let them thaw at room temperature for a little while, or pop them in the microwave for a quick warm-up.
Common Mistakes to Avoid
- Skipping the Butter: It’s a common rookie mistake. Not greasing the pan or the spatula leads to a sticky disaster!
- Overheating Chocolate: Avoid melting the chocolate too quickly; it’ll seize up on you!
- Not Letting Them Set: I’ve fallen victim to the urge to cut them too soon. Trust me; patience pays off!
Frequently Asked Questions (FAQ)
Can I use regular marshmallows instead of mini ones?
Yes, although mini ones melt more evenly, regular marshmallows work just fine!
How can I make them gluten-free?
Check that your Rice Krispies are gluten-free, and you’re all set!
Can I add more toppings?
Absolutely! Experiment with different sprinkles, crushed candies, or even edible glitter for a festive touch!
Is it possible to use a different mold instead of a casserole dish?
For sure! You can use cookie cutters to shape them after they’ve set, if you want to get fancy.
How do I ensure they don’t turn hard?
Stick to the recipe’s measurements, and store them well to keep them fresh; moisture is your pal here!
Cooking Tools You’ll Need
- Large pot for melting ingredients
- Heat-safe bowl for melting chocolates
- Spatula for mixing
- 9" x 13" casserole dish (butter first!)
- Piping bag for your stitches (or a plastic zip bag with the corner cut off)
- Knife for cutting the treats
Final Thoughts
Making Frankenstein Halloween Rice Krispie Treats was not just about whipping up a delicious seasonal treat—it was a nostalgic experience that connected me to my childhood. If anything, it’s a reminder that simplicity belies joy. There’s something heartening in embracing messes and sweet chaos in the kitchen during this season.
So grab your ingredients, gather your loved ones, and whip up a batch (or two) of these gooey monsters. Honestly, I’d love to see how your Frankenstein turns out, so don’t forget to share! And if you enjoyed this recipe, don’t forget to save it on Pinterest or share it with a friend!
Frankenstein Halloween Rice Krispie Treats
Ingredients
Main Ingredients
- 6 cups Rice Krispie cereal The backbone of our treats, providing that iconic crunch and texture.
- 1 bag (10 oz) mini marshmallows Sweet, gooey, and sticky—the heart of this dessert!
- 4 tbsp unsalted butter To meld everything fabulously and add a touch of richness.
- 10 oz green candy melts To create that signature Frankenstein hue.
- 3 oz black candy melts For the spooky dimension and the stitches.
- 6 pieces royal icing eyes To decorate the treats.
- 1 cup black jimmies sprinkles To add texture and fun!
Instructions
Preparation
- Grease a 9" x 13" casserole dish with butter.
- Melt 4 tablespoons of unsalted butter in a large pot over low-medium heat.
- Add the 10 oz bag of mini marshmallows and stir continuously until smooth.
- Gently fold in 6 cups of Rice Krispie cereal until well combined.
- Press the mixture firmly into the prepared casserole dish and smooth the top.
- Allow to cool and set for about 30 minutes.
- Carefully remove the cooled Rice Krispie treat from the dish and cut it into rectangles.
Decorating
- Melt the green candy melts in a heat-safe bowl set over simmering water until silky smooth.
- Dip the top of each Rice Krispie treat into the melted green candy melts.
- Roll the treats in black jimmies sprinkles.
- Top each treat with royal icing eyes.
- Melt the black candy melts and use a piping bag to add stitches to each treat.
- Allow to set completely before serving.


