
Epic Chocolate Overload Explosion Cake: A Love Story in Layers
Ah, chocolate cake—the ultimate remedy for a bad day, the perfect centerpiece for a celebration, or just a nostalgic reminder of simpler times. Growing up, my family’s kitchen was a playground of all things sweet and indulgent, and the smell of freshly baked chocolate cake wafting through the air is a scent that instantly brings back memories of laughter, family gatherings, and, let’s be real, a few kitchen disasters. One of the recipes that takes center stage in my heart (and kitchen) is the Epic Chocolate Overload Explosion Cake. This cake isn’t just any dessert; it’s an experience, a huge chocolate hug that wraps around you, making everything better.
There’s something so comforting and honest about baking—it’s a blend of magic and chaos. I’d never forget my first attempt at this particular cake. Picture me, bright-eyed and ambitious, trying to impress my friends with a towering chocolate masterpiece. Let’s just say the layers didn’t quite cooperate, and I ended up with more frosting on the floor than on the cake. Oops! But hey, that’s all part of the journey, right? With time and a few mishaps under my belt, I’ve learned the ropes, and now it’s one of my go-to recipes that never fails to impress.
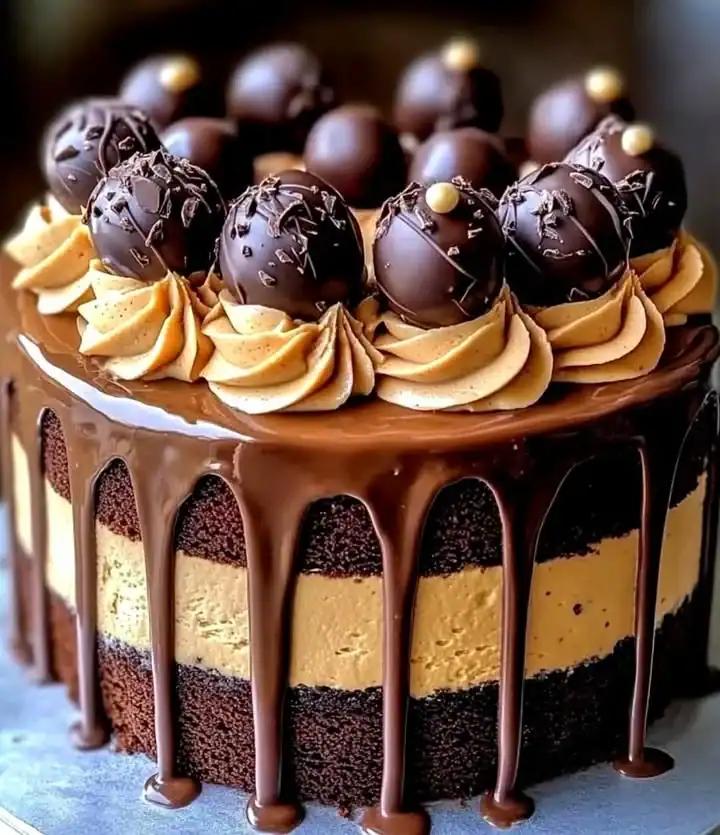
This cake is perfect for any occasion, whether it’s a family gathering, a birthday bash, or simply has a rich chocolate craving—trust me, it’s that versatile. Just imagine slicing into three decadent layers, each filled with rich chocolate ganache, followed by a beautiful drape of ganache that makes the entire cake look like it belongs in a bakery window. It’s a feast for the eyes and the taste buds.
So let’s dive into how to create this chocolate explosion! It just might become your new recipe for easy weeknight dinners or the showstopper at your next gathering.
Why You’ll Love This Recipe
-
Rich Chocolatey Goodness: Each bite is a chocolate lover’s dream. Can you say “heaven”?
-
Easy to Follow: If I can do it, you can definitely do it. This recipe breaks down the somewhat intimidating process into manageable steps.
-
Shares Well: This cake serves a crowd—perfect for gatherings, or just hoarding it all to yourself (no judgment here).
-
Kid-Approved: Picky eaters? No problem! This cake is a surefire hit with children and adults alike, whispering sweet nothings into their taste buds.
-
Endless Variations: Feel free to customize it. Toss in some nuts, swap out for dark chocolate, or layer in some fruit for a pop of flavor.
-
Make-Ahead: You can whip up the layers in advance and assemble them later—less stress for you!
What Makes This Recipe Special?
It’s not just about tossing a few ingredients together; it’s about creating a moment, an experience that fills your home with warmth and joy. The unique twist here is the combination of the hot coffee with chocolate, which deepens the flavor and creates a rich, luscious texture. I remember my first time tasting a chocolate cake enhanced with coffee—you wouldn’t believe the wow factor! It’s like magic, transforming your average chocolate cake into something unforgettable.
And let’s not forget about decoration! The assorted chocolates on top—truffles, bars, and shavings—aren’t just for looks. They add bits of texture and flavor—a true chocolate extravaganza. It’s like a festival of chocolate in every slice!
Ingredients
- 2 cups (250 g) all-purpose flour: The base for our cake layers, giving them structure.
- 1 cup (90 g) unsweetened cocoa powder: Because, hello, chocolate.
- 2 tsp baking powder: For a little lift.
- 1 1⁄2 tsp baking soda: Extra fluffiness, please!
- 1⁄2 tsp salt: To enhance the sweetness and bring the flavors alive.
- 2 cups (400 g) granulated sugar: Sweetness is key in this chocolate adventure.
- 1 cup (240 ml) buttermilk: Adds moisture and a slight tang—a secret weapon for moist cakes.
- 1/2 cup (120 ml) vegetable oil: Makes the cake rich and soft.
- 2 large eggs: They act as the binding agents, helping everything stick together.
- 2 tsp vanilla extract: For flavor depth—trust me, it’s essential.
- 1 cup (240 ml) hot coffee: The game-changer, deepening that chocolate flavor.
- 1 1/2 cups (360 ml) heavy cream: Needed for the luscious ganache!
- 2 cups (340 g) semi-sweet chocolate chips: For that melty ganache.
- Assorted chocolates (truffles, bars, chocolate shards, etc.): For dressing up the final masterpiece.
- Chocolate syrup or drizzle: Because we want maximum chocolate impact!
A little personal tip: always sift your dry ingredients. I learned this the hard way when I ended up with flour lumps in my cake batter—yikes!
How to Make It Step-by-Step
Step 1: Prepping the Pans
First things first—preheat your oven to 350°F (175°C). Grease and line three 8-inch cake pans with parchment paper. Why three? Because we’re going all out with layers today—no shortcuts here!
Step 2: Sifting Dry Ingredients
In a bowl, sift together the flour, cocoa powder, baking powder, baking soda, and salt. Trust me, no one likes cornstarch pockets in their cake! Be friends with your sifter; it’s worth the extra effort.
Step 3: Whisking Wet Ingredients
In another bowl and hopefully a larger one, whisk together the sugar, buttermilk, vegetable oil, eggs, and vanilla extract until it’s smooth. The combination is rich and inviting. Taste a bit of the batter if you dare—just note the egg content!
Step 4: Combine Gently
Gradually mix the dry ingredients into the wet mixture. Sometimes I wish I could bypass this step and just dive into the chocolate pool, but alas, the kitchen isn’t a swimming pool. Mix until it’s all smooth.
Step 5: Add the Coffee
Now for the magic: stir in the hot coffee. Honestly, it smells divine. It’s like you’re stirring up a potion of happiness. The batter might seem a little runny, but that’s perfectly okay. Embrace it.
Step 6: Bake Away
Divide the batter evenly between your three pans. No need to get strict about it—eyeballing it is perfectly fine unless you’re a perfectionist. Bake for about 25-30 minutes, or until a toothpick comes out clean. Your kitchen should start smelling like a chocolate factory—this is when my inner child starts to dance!
Step 7: Cooling Down
Once baked, let them cool in the pans for about 10 minutes before transferring to wire racks to cool completely. Be patient; trust me, it’s worth it!
Step 8: Making the Ganache
While those cakes are cooling, it’s time to make the ganache! Heat the heavy cream until it’s simmering, then pour it over the semi-sweet chocolate chips. Let it sit for a moment before whisking until it’s smooth and delicious. Take a moment to savor the chocolaty aroma—totally a reason to be grateful!
Step 9: Assembling the Cake
Once the layers are fully cooled (this is crucial!), spread a layer of ganache between each cake layer. Push it generously—remember, this is about indulgence!
Step 10: Crumb Coat Time
Next, apply a crumb coat! It sounds fancier than it is. Just a thin layer of ganache spread over the outside to catch all those pesky crumbs. Chill for about 10-15 minutes.
Step 11: Final Frosting
Now, cover it generously with the remaining ganache. Don’t hold back—this is your moment! Use a spatula to create beautiful swirls and drips. You’ll want it to look semi-organized but, let’s be honest, a little chaos is charming too.
Step 12: Decorate with Chocolates
Finally, the fun part! Have a selection of assorted chocolates on hand? Start decorating! Pile those truffles, shards, and chocolate chips as high as you can. It’s like building your own chocolate mountain.
Step 13: Chill Before Serving
Chill the cake for about an hour before slicing into it. It gives the ganache a bit more time to firm up. Use this time to resist the urge and not slice into it prematurely—you’ve come too far for that!
Tips for Best Results
- Use room temperature ingredients for a smoother batter.
- Don’t skip the coffee—it dramatically amplifies the chocolate flavor!
- If you’re feeling daring, toss in some peanut butter between the layers for an unexpected twist.
- For extra moistness, cover the cake in plastic wrap after chilling.
Ingredient Substitutions & Variations
- Gluten-free? Use a 1:1 gluten-free flour blend for a delicious alternative.
- Dairy-free? Swap the buttermilk for almond milk and use coconut cream for the ganache.
- For a touch of fruitiness, consider adding raspberry jam between the layers. It’s like a party in your mouth!
Serving Suggestions
Pair this decadent chocolate goodness with a glass of cold milk or a cup of your favorite warm beverage. Honestly, this cake can be the ultimate companion for a cozy night in with a rom-com or the highlight of your next gathering. A scoop of vanilla ice cream on the side? Yes, please! Perfection.
How to Store and Reheat Leftovers
If you magically end up with leftovers—bless your soul—store them in an airtight container in the fridge. Simply reheat a slice in the microwave for 10-15 seconds. But be careful! You don’t want a melted chocolate lava cake situation on your hands.
Make-Ahead and Freezer Tips
Good news! You can bake the layers in advance and freeze them! Just wrap them tightly in plastic wrap and store them in a freezer bag. They’ll last for a couple of months. Thaw in the fridge overnight before assembling. It’s like having a secret chocolate treasure waiting for you!
Common Mistakes to Avoid
- Overmixing the batter: It might seem tempting to beat it harder, but this can lead to a dense cake. Be gentle!
- Not letting cakes cool: Assembly fails are real; you don’t want melted ganache sliding off!
- Skipping the chill time: Trust me; the ganache needs it to set properly or it can get too runny!
Frequently Asked Questions (FAQ)
-
Can I make this cake in advance?
Absolutely! Bake ahead and assemble when you’re ready. -
What can I substitute for buttermilk?
A mix of milk (plant-based is fine) with a splash of vinegar or lemon juice works great! -
How should I store this cake?
Keep it in the fridge in an airtight container for up to 5 days—if it lasts that long!
Cooking Tools You’ll Need
- Mixing bowls: Various sizes are useful, especially if you’re mixing dry and wet components separately.
- Pans: Three 8-inch round cake pans will give you the perfect layer size.
- Whisk: For those smooth batters.
- Spatula: To spread that ganache nicely.
- Wire racks: For cooling your cakes evenly.
Final Thoughts
Baking the Epic Chocolate Overload Explosion Cake is more than just following a recipe; it’s an adventure! Each step brings memories, laughter, and a little bit of chaos, but it’s all worth it when you sink your fork into that first slice. Remember, cooking is a journey—embrace the mess, the joy, and of course, the chocolate! If you enjoyed this recipe, don’t forget to save it on Pinterest or share it with a friend. Happy baking!
Epic Chocolate Overload Explosion Cake
Ingredients
Cake Layers
- 2 cups all-purpose flour The base for our cake layers, giving them structure.
- 1 cup unsweetened cocoa powder Because, hello, chocolate.
- 2 tsp baking powder For a little lift.
- 1.5 tsp baking soda Extra fluffiness, please!
- 0.5 tsp salt To enhance the sweetness and bring the flavors alive.
- 2 cups granulated sugar Sweetness is key in this chocolate adventure.
- 1 cup buttermilk Adds moisture and a slight tang—a secret weapon for moist cakes.
- 0.5 cup vegetable oil Makes the cake rich and soft.
- 2 large eggs They act as the binding agents, helping everything stick together.
- 2 tsp vanilla extract For flavor depth—trust me, it’s essential.
- 1 cup hot coffee The game-changer, deepening that chocolate flavor.
Ganache
- 1.5 cups heavy cream Needed for the luscious ganache!
- 2 cups semi-sweet chocolate chips For that melty ganache.
Toppings
- Assorted chocolates (truffles, bars, chocolate shards, etc.) For dressing up the final masterpiece.
- Chocolate syrup or drizzle Because we want maximum chocolate impact!
Instructions
Preparation
- Preheat your oven to 350°F (175°C). Grease and line three 8-inch cake pans with parchment paper.
Mixing
- In a bowl, sift together the flour, cocoa powder, baking powder, baking soda, and salt.
- In another bowl, whisk together the sugar, buttermilk, vegetable oil, eggs, and vanilla extract until smooth.
- Gradually mix the dry ingredients into the wet mixture until smooth.
- Stir in the hot coffee until combined.
Baking
- Divide the batter evenly between the three prepared pans.
- Bake for 25-30 minutes, or until a toothpick comes out clean.
- Let them cool in the pans for about 10 minutes before transferring them to wire racks to cool completely.
Making Ganache
- Heat the heavy cream until simmering, then pour it over the chocolate chips. Let it sit, then whisk until smooth.
Assemble
- Once the layers have cooled, spread a layer of ganache between each cake layer.
- Apply a crumb coat of ganache over the outside of the cake and chill for 10-15 minutes.
- Cover the cake generously with the remaining ganache.
- Decorate with assorted chocolates.
- Chill the cake for about an hour before slicing.


