
The Best Big Mac Crunchwrap Supreme Recipe
It was a rainy Tuesday afternoon when I first tried my hand at replicating a Big Mac Crunchwrap Supreme. The pitter-patter of rain against the window reminded me of my childhood, curling up under blankets after school with a bowl of something comforting. As I meandered through the kitchen, feeling a bit nostalgic, I felt compelled to mix a bit of fast-food magic with my own home cooking. You know, just a cozy little experiment to break the mundane dinner routine.
Honestly, I had my doubts. I mean, how can one concoction blend the delightful glory of a Big Mac and the convenience of a Crunchwrap? Well, let me tell you—when that tortilla met the sizzling beef patty, everything clicked into place. Before I knew it, I was surrounded by the most tantalizing scents filling my kitchen: savory beef, oozing cheese, crisp lettuce, and all of that divine Big Mac sauce. It felt like a warm hug in the middle of a rainy day—comforting but somehow exciting at the same time.
And let’s be real: Who doesn’t have a soft spot for fast food? A little guilty pleasure we keep hidden, like that secret stash of chocolate you thought nobody would find—except now, you can make it at home! This recipe hits all the feel-good notes while still being a mix of healthy comfort food and a quick family meal. As we dive deeper into this recipe, I’ll walk you through the journey of crafting this satisfying wrap at home, including the hiccups and oops moments. Fair warning: the first time I did this, it looked like a cross between a toddler’s art project and an explosion in a tortilla factory. But trust me, it’s all part of the magic.
Why You’ll Love This Recipe
- Ease of Preparation: Seriously, this isn’t rocket science. You can whip this up even on chaotic weeknights, making it the perfect solution for easy weeknight dinners.
- Picky Eater Approved: The Big Mac flavors are hard to resist, and I can tell you, even the selective eaters in your life will be demanding seconds.
- Comforting and Filling: Imagine wrapping yourself in a blanket of flavors. It feels like a cozy night in with your favorite show.
- Meal Prep Friendly: Pack a few of these to have on hand for healthy eating throughout the week. Perfect for busy schedules and meal prep microwave lunches.
- Versatile: You can easily modify the ingredients based on what you have at home, making it a budget-friendly recipe that’s never boring.
- Leftovers: If you’re anything like me, you’ll want to make enough for leftovers. They taste just as good heated up the next day!
What Makes This Recipe Special?
You’d think after all this time, I would have mastered IKEA furniture assembly, but no. My culinary experiments still often resemble jigsaw puzzles with missing pieces. However, it was this simple yet indulgent recipe that made me finally feel like a kitchen rockstar! Each layer of this wrap brings something new—layers of flavor, textures, and nostalgia.
The key here, my friends, is in that glorious Big Mac sauce. It’s the magical element that ties everything together and reminds you of biting into a freshly made burger after a long day. The mix of creamy mayonnaise, tangy ketchup, mustard, and a bit of relish creates a flavor explosion that’s downright delicious. Combine that with the sizzling beef patty and melty cheese, and you’ve got yourself a masterpiece.
Now, let’s gather our ingredients and get cracking on this culinary adventure!
Ingredients
- 1 large tortilla – The base of our masterpiece. It holds everything together and turns this burger-favorite into a portable delight. I usually go for whole wheat; brings a nice touch!
- 1 beef patty – Grab some good-quality beef (I usually go for grass-fed because why not treat yourself?), or if you’re feeling adventurous, turkey or veggie patties are an excellent substitutions.
- 1 slice of cheddar cheese – I mean, did you even have a childhood if you didn’t melt a slice of cheddar on something? Its sharpness is a perfect complement!
- 1 slice of American cheese – Because multiple cheeses are a win-win! Plus, when it melts, it brings all the creamy goodness we desire.
- Lettuce (shredded) – A necessary crunch! It represents all things fresh and vibrant while keeping it light.
- Pickles (sliced) – You can’t overlook the tangy crunch of pickles; it’s just THAT essential.
- Onion (diced) – I love adding a bit of sharpness, but you do you! If raw onions aren’t your jam, sautéed onions work just as well.
- Big Mac sauce – This one needs no explanation. But if you’re feeling fancy, a DIY version made from mayo, ketchup, mustard, and relish is definitely a win!
- Optional toppings – Think tomatoes for juiciness, or even crispy bacon (or turkey bacon!) if you want to go all out.
Oh! A quick note: If you don’t want to dive into the kitchen for Big Mac sauce mixing, there are some store-bought options available. But to be honest, nothing beats the homemade touch.
How to Make It Step-by-Step
Alright, let’s get into the nitty-gritty! Make sure to have some upbeat music in the background; it’s essential for cooking shenanigans.
Step 1: Cook the Beef Patty
Fire up your trusty skillet over medium heat. Let it warm up for a minute before introducing the lovely beef patty. The sound of it hitting the pan is music to my ears. Seriously, listen to that sizzle! Cook it for about 3-4 minutes on each side until it’s beautifully browned and cooked through.
Now, here comes my usual blunder—don’t forget to flip it! Nothing screams chaos like a well-intentioned beef patty that has decided to stick to your pan like it’s forming a long-term relationship. If you’re like me and dread the sticking, a splash of oil can work wonders here!
Step 2: Prepare the Tortilla
Once your patty is cooked, remove it from the skillet and let it rest while you prepare the tortilla. Place it flat on a clean surface. Here’s where you get creative.
Step 3: Layering the Ingredients
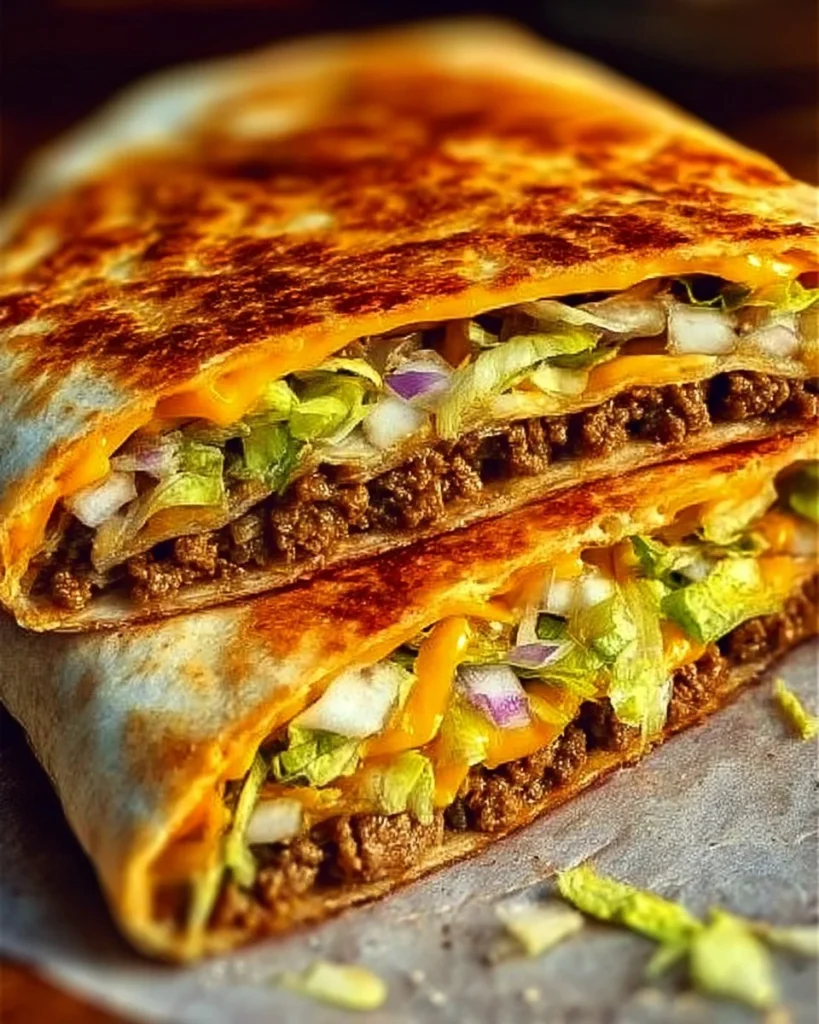
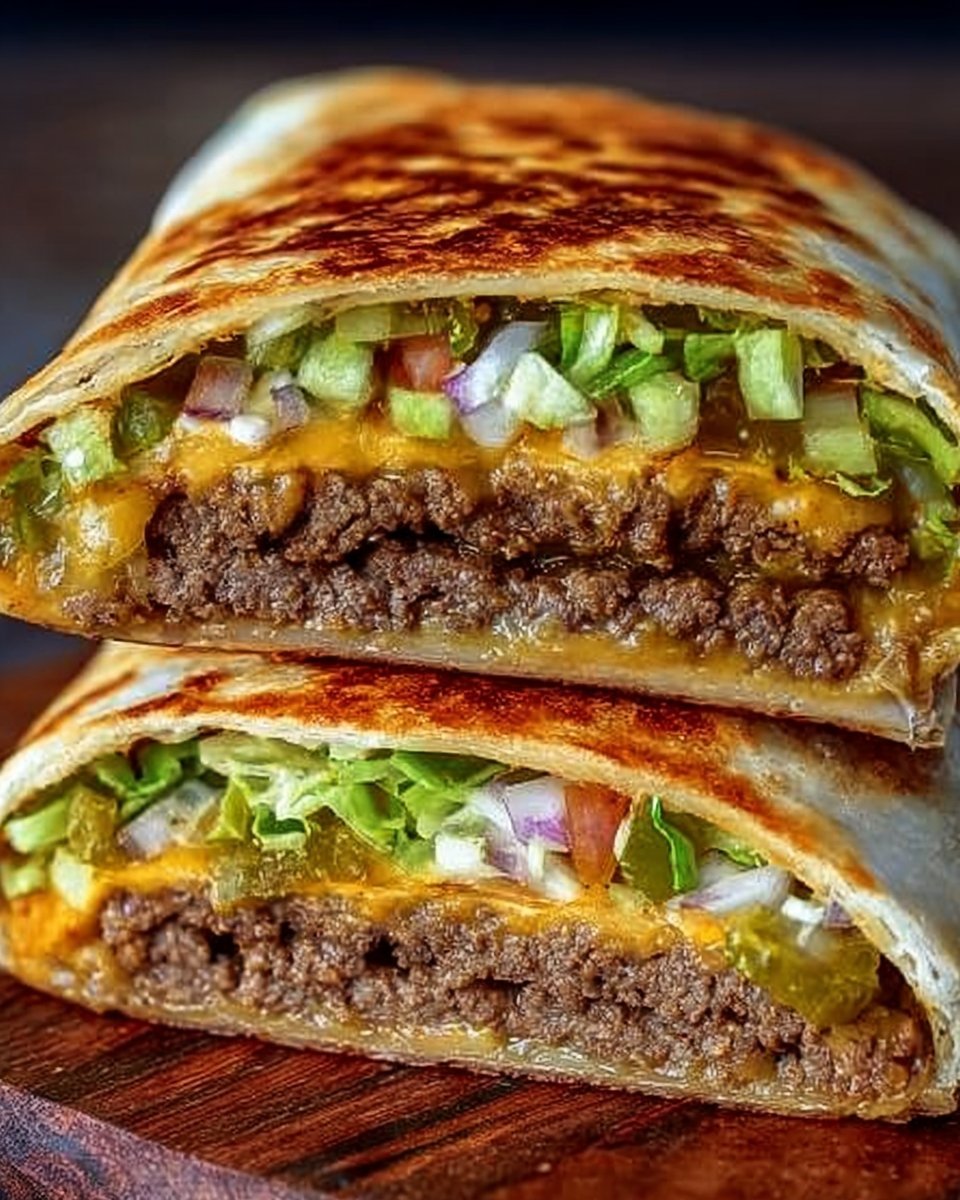
Start with the cheese! Place that luscious slice of cheddar right in the center, followed by the beef patty. You want that cheese to melt just a bit from the heat of the patty, giving it that oh-so-delicious ooze factor. Next comes a generous amount of lettuce, a few pickle slices, and the diced onions.
Now, drizzle that Big Mac sauce over everything—don’t be stingy! This is where the magic happens.
Step 4: Folding the Wrap
Here’s where things can get a little tricky. Fold the edges in, like you’re wrapping a gift (but again, it might not look perfect, and that’s okay!). Bring the bottom of the tortilla up over the filling, followed by the sides, and then finish by tucking the top down. Bam! If the wrap looks a bit wild, take a moment to appreciate your kitchen courage.
Step 5: Crispy Time!
Place the assembled wrap seam-side down back in the skillet. Cook for about 2-3 minutes on each side until it gets that satisfying golden-brown crunch. Seriously, watch it like a hawk! You want crispy, not charred.
Oops moment alert! The first time I made this, I walked away for one minute too long, and what was once a beautiful wrap turned into a dark patch of mystery. Now, I stand vigil by the stove as the aromas waft through the air.
Step 6: Slice and Serve
Remove from heat and let it cool for a minute or two before slicing in half. Trust me, it’s super tempting to dive right in, but nobody likes burning their mouth during a food adventure.
Tips for Best Results
- Quality Ingredients: Always opt for the freshest veggies and quality meat or substitutes. It truly makes a world of difference.
- Don’t Rush It: Give each layer the attention it deserves; don’t just pile it on. It will come back to haunt you when you’re trying to fold a burst tortilla.
- Experiment: Feel free to swap around the toppings based on what you love or have lying around. This is your wrap; make it a reflection of you!
Ingredient Substitutions & Variations
Want to switch it up? Here are some fun variations:
- Protein Swaps: Try using ground turkey or chicken for a healthier twist, or opt for black bean patties for a plant-based take.
- Cheese Options: Pepper jack for an extra kick or goat cheese for creamy goodness can elevate your Crunchwrap!
- Flavor Twists: Add some jalapeños for heat, or sprinkle taco seasoning on your beef patty for a different flavor profile.
Serving Suggestions
What pairs better than a Crunchwrap and a cozy home? You could do a side of sweet potato fries or a light salad sprinkled with a bit of feta or avocado. Honestly, my go-to is pairing it with some fun, fizzy drinks. A root beer float or some classic lemonade feels like a party in my mouth. But hey, your favorite beverage works perfectly too!
To be real, savoring this alongside a romance movie or binge-worthy series is where the magic happens. Picture yourself curled up, surrounded by cozy blankets, and with a side of joy in every bite!
How to Store and Reheat Leftovers
If you’ve managed to hold yourself back and have leftover wraps (an impressive feat!), simply wrap them in foil or parchment paper to keep the crunch intact. They can be stored in the fridge for up to two days.
When it’s time to revisit the deliciousness, pop it in a skillet over medium heat until crispy again—don’t microwave! This is a crime against the Crunchwrap. We want that heavenly golden bite, remember?
Make-Ahead and Freezer Tips
If you’re on top of your game, these wraps can be prepped ahead! Assembling and freezing them before cooking works wonders. If you’re super organized, make several at once! Layer, wrap, and seal them in plastic wrap before tossing them in a freezer bag. When you get that craving, simply thaw in the fridge overnight and crisp up in a skillet.
Common Mistakes to Avoid
- Soggy Tortilla: Avoid overfilling! Too much filling makes for a soggy mess. Balance is key.
- Not Preheating: Skipping the preheat on your skillet can lead to uneven cooking.
- Skipping Resting Time: Letting your beef patty rest before assembling helps maintain juiciness. Don’t rush it; trust me!
Frequently Asked Questions (FAQ)
Can I use a whole wheat tortilla?
Absolutely! Whole wheat wraps are a fantastic alternative that adds a nutty flavor.
Can I use turkey for the patty?
For sure! More protein with less fat. Just adjust cooking time if using a thinner patty.
What if I can’t find Big Mac sauce?
You can easily whip up a DIY version with mayo, ketchup, relish, and mustard—no problem!
Cooking Tools You’ll Need
- A good-quality skillet (non-stick is ideal for no-fuss flipping)
- Spatula for flipping and assembling
- Knife for slicing veggies and cutting the wrap in half
- Mixing bowl (if making a homemade sauce)
Final Thoughts
As I take a moment to reflect on this recipe, I’m reminded that cooking isn’t just about creating food. It’s about crafting memories. Whether it’s a rainy day in your cozy kitchen or a gathering with family, these Crunchwraps can unite people over flavor and laughter.
I hope you take a leap into this Crunchwrap adventure and make it your own! Embrace the chaos, enjoy the mess, and don’t forget to share snippets of your journey. If you enjoyed this recipe, don’t forget to save it on Pinterest or share it with a friend! Happy cooking!

Big Mac Crunchwrap Supreme
Ingredients
For the Crunchwrap
- 1 large tortilla Whole wheat is recommended for a nice touch.
- 1 piece beef patty Grass-fed is preferred for quality.
- 1 slice cheddar cheese Sharp cheddar works best.
- 1 slice American cheese Adds creamy texture.
- 1 cup lettuce (shredded) Provides crunch.
- 3 slices pickles Essential for tang.
- 2 tablespoons onion (diced) Can use raw or sautéed.
- 4 tablespoons Big Mac sauce Store-bought or homemade.
- to taste optional toppings Consider tomatoes, bacon, or turkey bacon.
Instructions
Preparation
- Heat a skillet over medium heat.
- Cook the beef patty for 3-4 minutes on each side until browned and cooked through.
- Remove the patty and let it rest. Prepare the tortilla on a flat surface.
Assembly
- Place cheddar cheese in the center of the tortilla, followed by the beef patty.
- Add shredded lettuce, pickle slices, diced onions, and drizzle with Big Mac sauce.
- Fold the tortilla edges in and then the bottom and top to enclose the filling.
Cooking
- Cook the assembled wrap seam-side down in the skillet for 2-3 minutes on each side until golden brown.
- Remove from heat and let cool for a minute before slicing in half.


