
Easy Bat Cupcakes: A Spooktacular Treat for Any Occasion
When it comes to celebrating Halloween, I have a soft spot for spooky treats. But let’s be honest: I’m no pastry chef, and every year, I find myself panicking over burnt cookies or lopsided cakes while trying to embrace the holiday spirit. But this year, I discovered the perfect recipe for Bat Cupcakes that I can’t wait to share! They’re easy, delicious, and are sure to enchant everyone at the party. Plus, they’re filled with a delightful surprise—what’s not to love?!
The first time I tried making these batty delights, I envisioned a calm, serene kitchen filled with delicious scents. Instead, I was faced with the chaotic whirlwind of flour clouds, a mysteriously sticky kitchen counter, and a cupcake batter explosion! But you know what? The mess was totally worth it, and my kids were giggling the whole time. There’s something magical about baking that brings people together, whether it’s a family gathered in the kitchen or friends sipping hot cocoa while waiting for the treats to bake. The warm oven, the rich aroma of cocoa, and the anticipation of that first bite—trust me, it’s a vibe!
The beauty of these Bat Cupcakes is their unique charm. Not only are they a sweet treat with a surprising chocolatey filling (jam or Nutella works wonders!), but they also fit perfectly into any Halloween-themed gathering or even a cozy movie night. These cupcakes bring a touch of whimsy and nostalgia—kind of like that time I tried to impress my friends with my “baking skills” and ended up concocting a chocolate lava cake (the cake exploded, and we spent the evening eating the remnants with spoons). Oops!
So grab your apron, turn on some Halloween tunes, and let’s dive into the delightfully messy world of baking Bat Cupcakes!
Why You’ll Love This Recipe
- Easily customizable: You can make these cupcakes fit any season or occasion. Just switch up the decoration!
- Decadent surprise: You get the delightful filling in the middle, which makes them extra exciting.
- Kid-approved: My kids can’t resist them, and I’m pretty sure yours won’t either!
- Perfect for leftovers: They keep well for a few days, and you can store them in the fridge for a quick sweet fix.
- Simple ingredients: You probably have most of the ingredients already, so no late-night grocery runs!
- A feel-good experience: Baking can be therapeutic, and sharing treats is a lovely way to lift someone’s spirits.
What Makes This Recipe Special?
What makes these Bat Cupcakes truly special is not only the flavor but the memories they create in the kitchen. The combination of all-purpose flour and cocoa powder provides a rich and delectable base. Adding the touch of butter gives that melt-in-your-mouth texture we all crave! Plus, the surprise filling really elevates the cupcake from ordinary to extraordinary—especially when you choose Nutella!
As the cupcakes rise in the oven, the aroma of chocolate fills the air, bringing a cozy and inviting atmosphere into your home. Honestly, is there anything better than the smell of baking chocolate? When they come out of the oven, you’ll want to dig right in, but patience is a virtue here; they need to cool before decorating!
Ingredients
1 cup all-purpose flour
This is the base of your cupcake, lending structure and a tender crumb. Make sure to spoon the flour into your measuring cup and level it off for precise measurements.
1/2 cup cocoa powder
This adds a deep chocolate flavor that makes these cupcakes irresistible. If you can, grab some high-quality cocoa powder for that rich taste.
1 cup sugar
The sugar sweetens and helps create a lovely texture when creamed with the butter, giving your cupcakes that nice rise too.
1/2 cup butter, softened
Butter is essential for creating that tender crumb we all know and love. Always use softened butter to get that light and fluffy texture when creaming it with sugar.
2 large eggs
Eggs add moisture and structure to the cupcakes. If you’re out of eggs, an equal amount of unsweetened applesauce can work as a substitute.
1/2 cup milk
Milk helps create a moist cupcake and balances the dry ingredients. You can also use almond milk or any alternative you prefer.
1 teaspoon vanilla extract
This enriches the flavor profile of our cupcakes and adds a lovely sweetness.
1 teaspoon baking powder & 1/2 teaspoon baking soda
These leavening agents work together to create that fluffy texture.
1/4 teaspoon salt
Just a pinch enhances the sweetness and gives balance to our chocolate flavors!
Jam (or Nutella) for filling
Trust me; the gooey surprise inside elevates these cupcakes. Go for the jam if you’re looking for a fruity touch, or choose Nutella to indulge!
Chocolate cream for decoration
This frosting not only looks rich and inviting but also complements the chocolate flavor of the cupcakes perfectly.
How to Make It Step-by-Step
Here comes the fun part! Grab your ingredients, pour a glass of milk (or a cheeky glass of wine, no judgment here), and let’s get started.
-
Preheat your oven to 350°F (175°C) and line a muffin tin with cupcake liners. I always forget this step and end up with a kitchen filled with batter, oops! Don’t be like me—get this step done first!
-
In a large mixing bowl, cream together the softened butter and sugar with an electric mixer until it’s light and fluffy. You want it to be so fluffy it feels like a cloud! I usually get caught up in the fluffy adventure, and before I know it, I’ve got a little whipped sugar on my nose.
-
Beat in the eggs, one at a time. This is the part where I try not to dump both in at once, which I’ve definitely done in the past—an eggy disaster that I won’t soon forget! Then, stir in the vanilla extract, and enjoy the aroma.
-
In another bowl, combine the flour, cocoa powder, baking powder, baking soda, and salt. This dry mixture is important, so give it a good whisk before adding it to the wet ingredients.
-
Gradually add the dry mixture to the wet ingredients, alternating with the milk. Your batter should end up being smooth and luscious. And yes, I will admit—I’ve been known to lick the bowl at this point. Don’t judge!
-
Spoon the batter into the lined muffin cups, filling them about halfway. You don’t want them to overflow, although there’s something oddly comforting about a cupcake that looks like it’s trying to escape! Trust me; they rise enough.
-
Now, here’s the fun part: add a spoonful of jam or Nutella into the center of each muffin cup. I recommend being generous—you want that melty filling to burst out, so go for it!
-
Top each cupcake with more batter to fill them about 3/4 full. This is the moment where I always get a little messy and have to clean up splatters. But what’s a little chaos in the kitchen, right?
-
Bake for 18-20 minutes or until a toothpick comes out clean (which means no batter, folks!). They should smell heavenly and look like little puffed pillows of joy.
-
Let them cool completely before decorating with delicious chocolate cream. This is crucial; otherwise, your frosting could melt down the sides, which is not the vibe we’re going for.
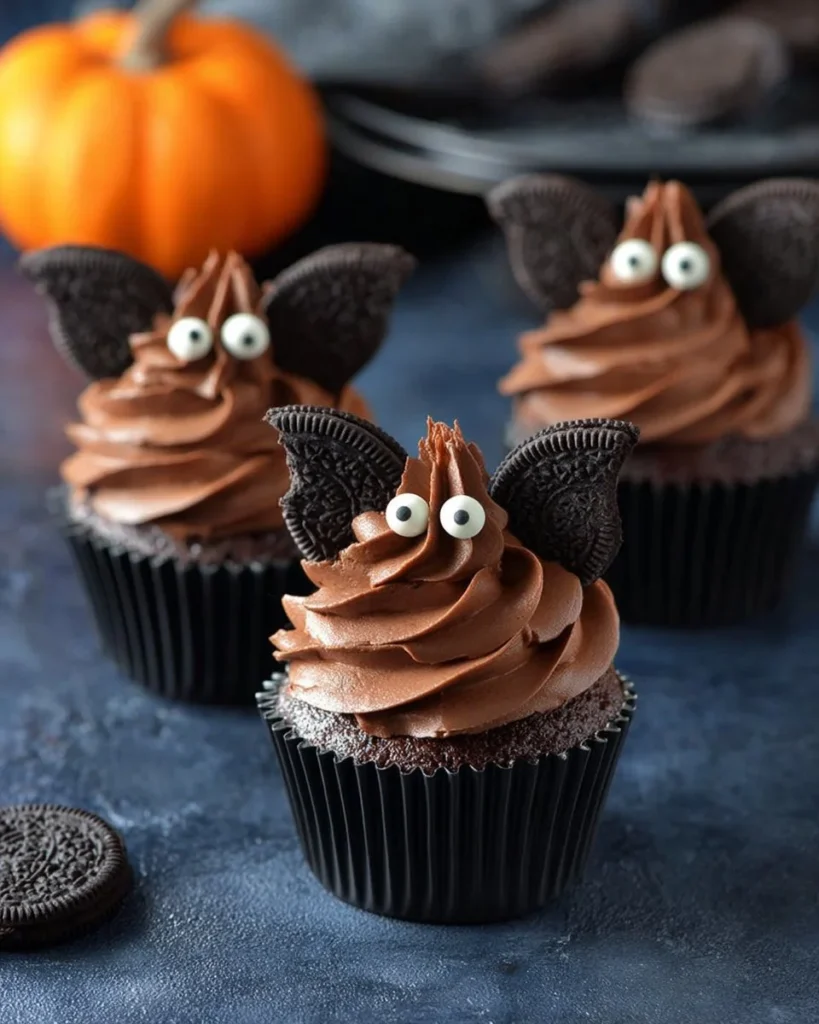
Once they’re frosted, feel free to add some Halloween-themed decorations—little bat toppers, sprinkles, or anything that brings the spooky vibes to life!
Tips for Best Results
- Room temperature ingredients work wonders! Having eggs and butter at room temperature helps with the creaming process, leading to fluffy cupcakes.
- Don’t overmix the batter—it leads to dense cupcakes. Just mix until combined, and then stop.
- If you want to get creative, try adding a pinch of espresso powder to your cocoa for a deeper flavor—trust me, it’s amazing!
- Make sure to check your oven’s temperature; an oven thermometer can be a lifesaver. Nothing worse than cupcakes that take longer than expected to bake!
Ingredient Substitutions & Variations
- Dairy-free: Use coconut oil instead of butter and almond or oat milk instead of regular milk.
- Gluten-free: You can swap the all-purpose flour for a gluten-free flour blend.
- Flavor upgrades: Toss in some chocolate chips or nuts! Maybe a sprinkle of cinnamon for a fall twist.
- Different fillings: Peanut butter works great too! Or, if you’re feeling adventurous, mix in some marshmallow fluff.
Serving Suggestions
These Bat Cupcakes are perfect on their own, but pair them with a warm cup of spiced apple cider or a cozy hot chocolate for an indulgent treat. And let’s be real—curling up with a bat cupcake and a rom-com is just pure perfection! You might even want to have a little cupcake decorating station for the kids or a fun Halloween party activity!
How to Store and Reheat Leftovers
These cupcakes last about three days at room temperature in an airtight container. Honestly, if they last that long! But if you find yourself with extras, pop them in the fridge for an additional day or two.
If you need to reheat, just zap them in the microwave for about 10 seconds—be careful not to overdo it, or you’ll end up with a rubbery cupcake, and nobody wants that!
Make-Ahead and Freezer Tips
You can prepare the cupcake batter ahead of time and keep it in the fridge for about 2 days. When you’re ready to bake, simply let it sit out for a bit to come to room temperature before filling those liners!
For longer storage, freeze the baked and cooled cupcakes (without frosting) in an airtight container for up to three months. Just let them thaw at room temperature before you whip up the frosting!
Common Mistakes to Avoid
- Overmixing: This leads to tough cupcakes. Mix just until combined.
- Not preheating your oven: Always preheat! This helps achieve the perfect rise.
- Skipping the cooling step: If you frost too soon, you’ll end up with melted frosting. Patience is key!
Frequently Asked Questions (FAQ)
Q: Can I use a different flavor of cake mix?
A: Absolutely! Feel free to explore different flavors like vanilla or spice cake mix. You can even infuse them with different fillings.
Q: Can I use a chocolate cake mix instead of making it from scratch?
A: Yes, if you’re in a pinch, a box mix will work. Just follow the instructions for adding in the jam or Nutella!
Q: What if I don’t have cupcake liners?
A: No worries! Just grease your muffin tin well, and they should pop out just fine.
Q: How can I tell when the cupcakes are done?
A: The tops should bounce back when lightly pressed, and a toothpick inserted into the center should come out clean.
Q: What’s the best way to transport these cupcakes?
A: Keep them in a sturdy container. If they’re frosted, use cupcake carriers or layers of wax paper to prevent sticking.
Cooking Tools You’ll Need
- Mixing bowls (large and medium)
- Electric mixer (or a wooden spoon, if you’re feeling adventurous!)
- Measuring cups and spoons
- Muffin tin
- Cupcake liners
- Toothpicks for testing doneness
- Cooling rack
Final Thoughts
The joy of crafting these adorable Bat Cupcakes is genuinely unmatched. Whether you’re serving them at a Halloween gathering or simply satisfying your afternoon sweet tooth, these cupcakes are meant to spread joy. The moments spent with loved ones in the messy kitchen, the thrill of surprising them with that gooey filling, and the simple pleasures of whipping up something from scratch, remind us all what home and nostalgia feel like.
If you enjoyed this recipe, don’t forget to save it on Pinterest or share it with a friend! Happy baking, everyone—may your kitchen adventures be less chaotic than mine!
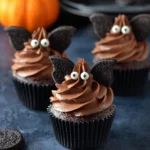
Bat Cupcakes
Ingredients
Cupcake Batter
- 1 cup all-purpose flour Spoon and level for accurate measurement.
- 1/2 cup cocoa powder Use high-quality cocoa powder for best flavor.
- 1 cup sugar Helps create a lovely texture.
- 1/2 cup butter, softened Essential for a tender crumb.
- 2 large eggs Can substitute with unsweetened applesauce.
- 1/2 cup milk Can use almond milk or any preferred alternative.
- 1 teaspoon vanilla extract Enhances flavor.
- 1 teaspoon baking powder
- 1/2 teaspoon baking soda
- 1/4 teaspoon salt Balances sweetness.
Filling and Decoration
- Jam or Nutella for filling Generous amounts for gooey surprise.
- Chocolate cream For frosting and decoration.
Instructions
Preparation
- Preheat your oven to 350°F (175°C) and line a muffin tin with cupcake liners.
- In a large mixing bowl, cream together softened butter and sugar until light and fluffy.
- Beat in the eggs one at a time and stir in vanilla extract.
- In another bowl, combine flour, cocoa powder, baking powder, baking soda, and salt.
- Gradually add the dry mixture to the wet ingredients, alternating with the milk until smooth.
- Spoon the batter into the lined muffin cups, filling them about halfway.
- Add a spoonful of jam or Nutella into the center of each muffin cup.
- Top with more batter to fill the cups about 3/4 full.
Baking
- Bake for 18-20 minutes or until a toothpick comes out clean.
- Let them cool completely before decorating with chocolate cream.
Decorating
- Once frosted, add Halloween-themed decorations as desired.


