

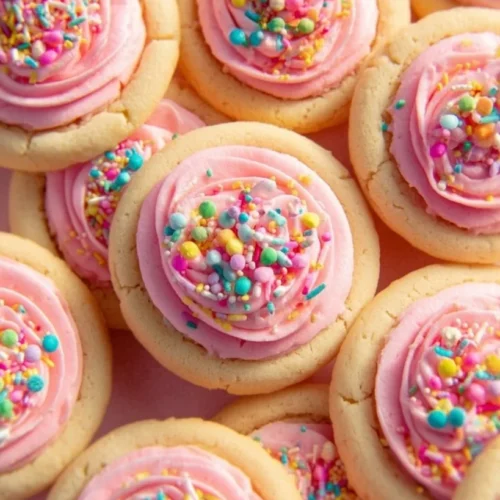
Easy Sugar Cookie Cups: A Comforting Treat for Any Occasion
There are few things that bring as much joy and comfort as a baking day in the kitchen. Picture it: the sun streaming through your window, the rich smell of vanilla and warm cookies wafting through the air, and a couple of sassy tunes bumping in the background. Ah, pure bliss! One cherished recipe that I find myself returning to for those nostalgic baking days is Sugar Cookie Cups.
Honestly, I stumbled upon this treasure of a recipe during a particularly lazy afternoon. My kids, in a frenzy from the sugar high of leftover birthday cake from last week, decided they needed more treats. And so, as a dedicated mom (with a side dash of desperation), I rifled through my old recipe binder for something fabulous yet simple. Cue the Sugar Cookie Cups! Not only are they ridiculously easy to whip up, but they also possess this delightful balance of soft, chewy cookie hugged by the sweetest, smoothest cream cheese frosting. It’s like a hug in a cup—how can you get any better than that?
Every time I make these, I am transported back to my childhood, where cookies meant family gatherings, laughter, and spontaneous dance-offs in the kitchen with my siblings. Oops, maybe that last part was more of a "me" moment, and they’ve grown to be the occasional audience. The memories of baking together and all those cookie catastrophes sure do make me giggle. Who hasn’t had a cookie sheet turn into a mini disaster on occasion? But hey, imperfect cookies are still cookies, am I right?
As I reminisce about the good ol’ days, these Sugar Cookie Cups remind me of the importance of comfort food. They tell a story of family warmth, sweethearts, and cozy gatherings. Plus, they’re versatile! You can decorate them for any occasion—sprinkles for birthdays, elegant patterns for holidays, or even simple pastel hues for a spring brunch. So, grab your apron and let’s get baking!
Why You’ll Love This Recipe
These Sugar Cookie Cups tick so many boxes that they’ve gained an unofficial “family favorite” badge in our house. Here’s why you’ll absolutely love this recipe:
- Quick & Easy: From mixing the batter to baking, you can whip these babies up in no time!
- Picky-Eater Approved: Honestly, what kid (or adult) can say no to cookies topped with fluffy frosting?
- Perfect for Meal Prep: Make a batch over the weekend and enjoy them throughout the week as a sweet treat. You could even pack ‘em in lunchboxes!
- Customizable: Change up the frosting flavor, colors, and toppings based on what you’re feeling. The world is your sugary oyster.
- Comfort in a Cup: Each bite feels like a warm hug, perfect for those chilly evenings when all you want to do is snuggle under a blanket and indulge in something sweet.
What Makes This Recipe Special?
The beauty of these Sugar Cookie Cups is not just in their taste but in their memories too. Each ingredient plays a role in crafting that nostalgic nostalgia. The blend of butter and sugar brings back memories of holiday baking bathed in laughter and spilled flour. The almond extract adds a unique twist, a subtle yet comforting flavor, making these unlike your typical sugar cookies.
And let’s not forget the frosting! Cream cheese mixed with powdered sugar? Oh boy, it doesn’t get better than this creamy, dreamy goodness. As you whip it up, the smell wafts through your kitchen, drawing family members like moths to a flame. It’s a sweet magnet! Plus, it’s a reminder of all those late-night bakes with friends, where we would frost cookies and engage in deep philosophical debates about unicorns—not that I recall any answers to those burning questions.
Ingredients
For these irresistible Sugar Cookie Cups, you’ll need the following delightful ingredients:
- 3/4 cup salted butter (softened): The star of the show, providing richness and that melt-in-your-mouth quality.
- 3/4 cup granulated sugar: Sweetness that balances everything out.
- 1 large egg: For binding and a little structure to the cookie.
- 1 1/2 teaspoons vanilla extract: The smell of vanilla just makes everything feel a tad more cozy!
- 1/2 teaspoon almond extract: Oops, you might think this is an extra step, but trust me; it amps up the flavor!
- 2 cups all-purpose flour: The base of your cookie dough. Don’t skip this; it gives those lovely, chewy edges.
- 1 teaspoon baking powder: For the perfect rise—no one wants flat cookies!
- 1/2 teaspoon baking soda: Helps in achieving that soft texture.
- Sprinkles: Because no cookie cup is truly complete without a sprinkle shower!
- 2 ounces cream cheese (softened): For the luscious frosting, oh my goodness.
- 3 cups powdered sugar: Sweetening up your frosting to perfectly complement your cups.
- 1/4 cup butter: Because frosting needs butter for that silky texture.
- 2 tablespoons milk: Adjust the icing’s consistency to perfection.
- 1/4 teaspoon vanilla extract: A little extra flavor in your frosting is never a bad thing!
- Pink or red food coloring gel (optional): For those themed occasions, pink frosting is totally worth it.
A quick note: If cream cheese isn’t your thing, feel free to use any frosting base you adore! You might want to try buttercream if you’re up for a flavor adventure.
How to Make It Step-by-Step
Now, let’s get down to the nitty-gritty! Don’t be intimidated; this is where the fun happens.
-
Preheat the Oven: Start by preheating your oven to 350°F (175°C). This is a critical step, as you want your cookie cups to bake evenly.
-
Panic and Grease the Muffin Pans: Channel your inner baking goddess and spray two regular muffin pans with nonstick cooking spray. It’s crucial; nobody wants cookie cups stuck to the pan trying to escape. Trust me, I’ve experienced that kind of heartbreak.
-
Mix the Butter and Sugar: In a large bowl (or a stand mixer if you feel like flexing your kitchen muscles), cream together the softened salted butter and granulated sugar until light and fluffy for about 3-4 minutes. The smell alone will melt your heart. Don’t forget to scrape down the sides of the bowl with a rubber spatula, like the dedicated baker you are!
-
Add the Egg and Extracts: Next, beat in the egg, vanilla extract, and almond extract. You want a smooth mixture that fills the room with mouth-watering aromas. Once blended, try to resist the urge to eat the dough. Oops, let’s be honest, sometimes I sneak a taste.
-
Whisk Dry Ingredients: In another medium bowl, whisk together the all-purpose flour, baking powder, and baking soda. This step is crucial for ensuring that your dry ingredients are evenly mixed.
-
Combine Wet and Dry Mixtures: Gradually add the flour mixture to the wet ingredients, mixing until just combined. Pro tip: don’t over-mix, or you’ll end up with dry cookie cups. We want them soft and chewy!
-
Form the Cookie Cups: Here comes the satisfying part—press about 2 tablespoons of cookie dough into the bottom of your greased muffin pans. Make sure to press dough halfway up the sides; this is where the frosting will sit later—so make ‘em deep cups!
-
Bake: Pop them into the oven and bake for about 12 minutes. I like to set a timer, but honestly, I find peering through the oven window pretty thrilling. The moment they are golden and puffy, swoop them out and let cool for at least 15 minutes.
-
Create the Cup Shape: Here’s the fun part: use the back of a spoon or the top of a round spice jar to gently press down in the center of your cookie "shells," forming a cup. Oops, if you press too hard, just reshape it; after all, they’re homemade!
-
Cool Completely: Let them cool completely in the pan—patience is a virtue, my friends.
-
Frosting Time: While the cups chill, soften the cream cheese and butter in a medium bowl using your electric mixer until smooth. Add the powdered sugar, vanilla extract, and milk, mixing until the frosting reaches your desired consistency. If you want it to be cute, add in some gel food coloring too!
-
Frost Your Cups: Now, grab a piping bag fitted with a star tip (or just a good ol’ spoon if you’re feeling casual) and swirl that creamy goodness into each cookie cup. Top them off with sprinkles for that perfect finishing touch.
Alright, let’s take a moment to appreciate these beauties—you did it! A few flour stains on your shirt are a small price to pay for these divine treats.

Tips for Best Results
- Room Temperature Ingredients: Make sure to let your butter and cream cheese soften to room temperature. This will give you that smooth consistency that we’re all dreaming of!
- Don’t Overmix: I cannot stress this enough. Overmixing the dough may lead to tough cookies. Be gentle.
- Chill the Dough: If you have the time, chill the dough for about 30 minutes before baking. It can help the cookies keep their shape.
- Taste Testing is Advised: I always taste my frosting as I go. Too sweet? Oops, add a pinch of salt to balance it.
Ingredient Substitutions & Variations
The beautiful part about baking is that you can always tailor recipes to fit your whims. Here’s how you can switch things up:
- Gluten-Free: Substitute the all-purpose flour with a gluten-free blend. Just make sure it is a 1:1 substitute.
- Dairy-Free: Use vegan butter and a dairy-free cream cheese. It works just as well; trust me!
- Flavored Frosting: Experiment with different flavors such as lemon, chocolate, or even coffee. Just mix in flavor extracts with your base!
- Seasonal Touches: Add seasonal spices like nutmeg or pumpkin spice for autumn vibes.
Directions
- Preheat the oven to 350°F (175°C) and grease two regular muffin pans.
- Cream together the butter and sugar until light and fluffy; scrape down the sides of the bowl.
- Add egg and extracts; mix until smooth.
- Whisk the flour, baking powder, and baking soda in a separate bowl.
- Combine the dry mixture with the wet mixture; don’t over-mix.
- Press 2 tablespoons of cookie dough into the muffin pan.
- Bake for 12 minutes and cool for 15 minutes. Press centers to form cup shapes.
- Beat cream cheese and butter; add powdered sugar, vanilla, and milk for frosting.
- Pipe frosting into cookie cups and finish with sprinkles.
There’s absolutely nothing better than curling up with a warm cookie cup and a rom-com that makes your heart flutter. Don’t forget the milk!
Pairing Ideas (Drinks, Sides, etc.)
For a perfect pairing, I recommend a tall glass of cold milk or a warm cup of cocoa on a chilly day. If you want to get adventurous, have these sweet cups while binge-watching your favorite series. Trust me; your taste buds will thank you!
How to Store and Reheat Leftovers
So, what if you have some leftovers (which honestly is a question I hardly want to ponder)? You can store your cookie cups in an airtight container in the fridge for up to a week. No, they won’t last that long—who are we kidding?
Reheating wouldn’t hurt if you want that warm gooey delight again. Just pop them in the microwave for 10-15 seconds. Be careful not to overheat; nobody likes a rubbery cookie.
Make-Ahead and Freezer Tips
You can assemble the cookie cups ahead of time. Just freeze the baked cups without frosting. When you’re ready, take them out, whip up that dreamy frosting, and decorate them!
Freezing the frosting? That’s totally doable too! Just store it in a sealed container. When ready to use, let it thaw in the fridge, and give it a little remix before piping it.
Common Mistakes to Avoid
- Skipping the Cooling: Don’t rush the cooling process—pressing and frosting warm cookie cups will lead to a gooey mess.
- Measurement Mistakes: Baking is a science! Make sure to measure your ingredients correctly. Too much flour? Oops, cookie chaos!
- Ignoring Oven Thermostat: Ovens can be quirky; always double-check that your temperature is accurate!
Frequently Asked Questions (FAQ)
-
Can I use margarine instead of butter?: Yes! Though it may slightly alter the flavor and texture, your cookie cups will still be delicious.
-
Why did my cookie cups overflow?: It’s likely that your dough was too runny—check the measurements!
-
Can I make these mini?: Absolutely! Just adjust the dough measurement and baking time to fit smaller muffin pans.
Cooking Tools You’ll Need
- Muffin pans
- Mixing bowls (a large one and a medium one)
- Electric mixer or hand mixer
- Rubber spatula
- Measuring cups and spoons
- Piping bag and star tip (optional, but highly recommended!)
Final Thoughts
As I sit here savoring the final cookie cup, I reflect on what made this bake so special—the warm memories, laughter, and an utterly delicious treat to share. These Sugar Cookie Cups have become a reminder that baking can bridge generations, each recipe a thread weaving family connections.
I’d love to hear how these turned out for you! If you put your spin on this recipe, drop a note in the comments below.
And if you enjoyed this recipe, don’t forget to save it on Pinterest or share it with a friend! Happy baking!
Sugar Cookie Cups
Ingredients
For the Cookie Cups
- 3/4 cup salted butter (softened) The star of the show, providing richness.
- 3/4 cup granulated sugar Balances sweetness.
- 1 large egg For binding.
- 1 1/2 teaspoons vanilla extract Adds cozy aroma.
- 1/2 teaspoon almond extract Enhances flavor.
- 2 cups all-purpose flour Base for cookie dough.
- 1 teaspoon baking powder For rise.
- 1/2 teaspoon baking soda For a soft texture.
- Sprinkles For decoration.
For the Frosting
- 2 ounces cream cheese (softened) Base for luscious frosting.
- 3 cups powdered sugar To sweeten frosting.
- 1/4 cup butter For silky texture of frosting.
- 2 tablespoons milk Adjusts frosting consistency.
- 1/4 teaspoon vanilla extract Extra flavor for frosting.
- Pink or red food coloring gel (optional) For themed occasions.
Instructions
Preparation
- Preheat the oven to 350°F (175°C) and grease two regular muffin pans.
- In a large bowl, cream together the softened butter and granulated sugar until light and fluffy for 3-4 minutes.
- Beat in the egg, vanilla extract, and almond extract until smooth.
- In another bowl, whisk together the flour, baking powder, and baking soda.
- Gradually add the dry mixture to the wet mixture, mixing until just combined.
- Press about 2 tablespoons of cookie dough into the bottom of each muffin pan.
- Bake for 12 minutes and let cool for at least 15 minutes.
- Use the back of a spoon to press down in the center to form a cup shape.
- Let the cookie cups cool completely.
Frosting
- In a medium bowl, beat cream cheese and butter until smooth.
- Add powdered sugar, vanilla, and milk, mixing until you reach the desired frosting consistency.
- If desired, mix in gel food coloring.
- Pipe frosting into each cookie cup and top them off with sprinkles.


