

Strawberry Custard Delight Cake: A Delicious Recipe Guide
There’s something about a cake that can turn any ordinary day into a special occasion. I remember the first time I tried making a custard cake—a complete disaster, honestly. There was flour everywhere, and I still have a funny story about the epic battle I had with a stubborn cake pan that decided it wanted to cling to my cake like a toddler to their favorite toy. But that muddled experience set me on a delicious path that led me to discover Strawberry Custard Delight Cake. This recipe is a lovely reminder of summer picnics, family gatherings, and just pure kitchen love.
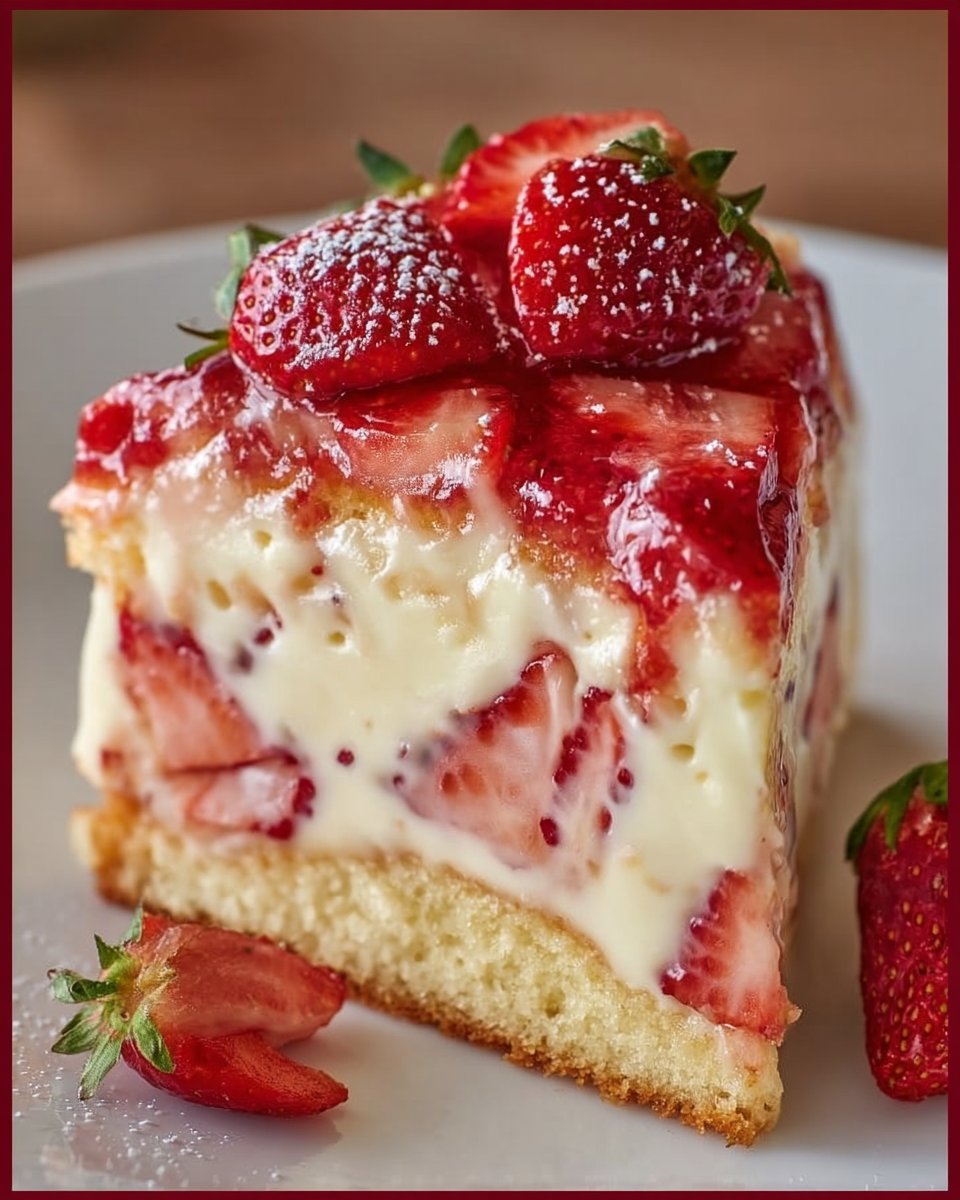
Now, let me set the scene. Picture this: it’s a warm afternoon in mid-June, the sun is shining through the kitchen window, and the aroma of strawberries mixed with the buttery scent of baking cake fills the air. It’s a cozy vibe that makes you want to grab a slice and plop down with your favorite book. What I love most about this Strawberry Custard Delight Cake is that it’s an embodiment of comfort. You’ll find comforting layers of fluffy cake and creamy custard, topped with fresh strawberries—a totally irresistible combination!
What really pulls at my heartstrings with this recipe is the nostalgia it brings. Each bite takes me back to my grandmother’s kitchen, where she always had a homemade cake waiting for me after school. Her cakes were never perfect, but they were always made with love. I wanted to recreate that feeling, and this Strawberry Custard Delight Cake is my homage to those cherished memories. The joy of baking, the laughter of family gathered around the table, and the fleeting beauty of those sun-kissed summer days are all captured in this cake.
Now, don’t get me wrong; baking can be a bit messy (okay, fine—very messy). I’ve had my share of kitchen chaos and “oops” moments that leave flour clouds floating in the air like a baking fairy decided to play tricks. But here’s the thing: baking is messy, and it’s okay! That’s part of the joy, right? The secret is to embrace the fun while creating a delicious delight that brings smiles all around.
You’ll love diving into this recipe; trust me! This Strawberry Custard Delight Cake is both a work of art and a culinary pleasure, with vibrant colors and mouthwatering flavors. Plus, this cake is perfect for sharing—whether it’s a birthday, a potluck, or just a cozy night in with your favorite rom-com. So, let’s dive into perfection, one layer at a time!
Why You’ll Love This Recipe
- Fluffy Layers: Each cake layer comes out light and airy, a perfect contrast to the smooth custard.
- Fresh Strawberries: Adds bright color and natural sweetness that perfectly complements the creamy custard.
- A Crowd-Pleaser: It’s amazing for gatherings! Everyone loves cake, and this one is sure to impress.
- Great for Leftovers: Trust me, it’s just as delicious the next day—if you have any left!
- Kid-Friendly Fun: Get the kids involved! They’ll love layering and decorating, making it a lovely kitchen bonding moment.
- Makes Your Kitchen Smell Incredible: Seriously, your neighbors might just come knocking to find out what you’re baking!
What Makes This Recipe Special?
One of the most delightful aspects of the Strawberry Custard Delight Cake is the custard filling. It’s rich yet light and incredibly rewarding to make! The beauty lies in the contrast between the layers of soft vanilla cake and velvety custard, punctuated with bursts of strawberry flavor that make each bite special. You’ll find that baking the cake and crafting the custard isn’t just a process—it’s an experience that turns your kitchen into a warm, inviting space. Plus, who can resist that glossy layer of whipped cream and fresh strawberries on top? It’s like the cherry on a sundae, but in cake form.
Now, let’s roll up our sleeves and dive into making this fabulous cake because it’s time to make your family smile!
Ingredients
- 2 ½ cups all-purpose flour: This gives structure to the cake while allowing it to remain moist.
- 2 ½ tsp baking powder: A crucial ingredient that helps your cake rise beautifully.
- ½ tsp salt: This enhances the flavors of the cake; trust me, don’t skip it!
- 1 cup unsalted butter (softened): The key to a rich, buttery flavor and moist cake.
- 1 ½ cups granulated sugar: Sweetens the deal, providing that lovely sweetness we crave.
- 4 large eggs: These give the cake its structure and richness.
- 1 tsp vanilla extract: Because vanilla is life! It adds warmth and depth of flavor.
- 1 cup milk: This keeps the batter moist and helps create that tender crumb.
- 2 cups whole milk (for custard filling): The base for the luscious custard.
- ½ cup granulated sugar (for custard filling): Sweetens the custard to perfection.
- 3 tbsp cornstarch: Thickens the custard without making it too heavy.
- 4 large egg yolks: Enriches flavor and creates that creamy texture.
- 2 tbsp unsalted butter (for custard filling): Adds richness and silkiness to the custard.
- 1 tsp vanilla extract (for custard filling): A flavorful touch that complements the strawberries.
- 2 cups fresh strawberries (diced, plus whole for topping): The star ingredient—sweet, juicy, and vibrant!
- Whipped cream (for decorating): Light and fluffy topping that makes it all complete!
Now, here’s a tip: always, always use fresh strawberries! I once tried using frozen ones, and let’s just say it was a muddy mess on my plate. Fresh strawberries not only look gorgeous, but they also provide that burst of natural flavor that you can’t replicate. And if you want to jazz things up, consider adding some lemon zest or a splash of citrus to brighten the flavor of the custard—tasty tweaks like these make all the difference!
How to Make It Step-by-Step
Let me guide you through the delightful process of creating your Strawberry Custard Delight Cake. Grab your ingredients, preheat the oven, and let’s channel our inner bakers!
-
Preheat Your Oven: Set that baby to 350°F (175°C). It’s time for your cake to shine!
-
Prepare the Cake Pans: Grease and flour two 9-inch round cake pans. This is crucial—nobody wants a cake that refuses to leave the pan!
-
Mix the Dry Ingredients: In a bowl, whisk together the flour, baking powder, and salt. This helps distribute the leavening agents consistently throughout the batter.
-
Cream the Butter and Sugar: Now head over to your mixing bowl and cream together softened butter and sugar until it’s light and fluffy. I mean fluffy—like a cloud! It usually takes about 3 to 5 minutes of mixing. The texture should be pale and creamy, and you can hardly see the sugar grains anymore.
-
Add the Eggs and Vanilla: Beat in the eggs one at a time, mixing well after each addition. Then, stir in that delightful vanilla extract. Ah, the heavenly scent of vanilla wafting through your kitchen—honestly, is there anything better?
-
Combine the Wet and Dry Ingredients: Alternate adding the dry mixture and the milk to the creamed butter and sugar mixture. Start with a third of the dry ingredients, mix just until combined, then add half of the milk. Repeat until everything is incorporated. The batter should be smooth and feel a bit thick yet pourable. If you get a little lumpy up in there, no worries! A few lumps never hurt anyone—don’t stress!
-
Divide and Bake: Divide the batter between the two prepared pans and smooth the tops with a spatula. Bake for 25–30 minutes, or until a toothpick inserted in the center comes out clean. You’ll know they’re done when the kitchen smells amazing and the tops are beautifully golden brown. Let them cool in the pans for about 10 minutes, then transfer them to a wire rack to cool completely.
-
Make the Custard Filling: In a saucepan, heat 2 cups of whole milk until it’s warm—don’t let it boil; we’re not making scrambled eggs here! While that’s happening, whisk together sugar, cornstarch, and egg yolks in a heatproof bowl. Slow and steady, pour the warm milk into your egg mixture while whisking constantly. This is the key to avoiding scrambled bits.
-
Thickening the Custard: Return the mixture to the saucepan and cook over medium heat, stirring continuously. You’ll feel it thicken up—this is your moment! Now, it should bubble a bit, but make sure to keep stirring (don’t walk away, please!) until it reaches a pudding-like consistency. Once thick, remove from heat and stir in butter and another splash of vanilla extract.
-
Cool the Custard: Cover the custard with plastic wrap, making sure it touches the surface to avoid a skin forming. Let it cool at room temperature while you patiently pray your cakes cool down too.
-
Layering the Cake: Once everything is cooled, it’s time to assemble! Carefully slice each cake layer in half horizontally, resulting in four delicate layers. Place the first layer on a serving plate and spread a generous amount of custard on top. Sprinkle some diced strawberries over the custard—yes, pile them on like you’re building a fruit tower!
-
Repeat and Build: Add the next layer of cake, spread more custard, and sprinkle with more strawberries. Repeat this process until all layers are stacked.
-
Finishing Touches: Spread the remaining custard on top of the cake and arrange halved strawberries on top for a stunning final touch. I love piping some whipped cream around the edges to add a little flair—it just makes it look so gourmet! Now, this is perfection.
-
Chill Out: For the best flavor, let your gorgeous creation chill in the fridge for at least 1–2 hours before serving. It allows all those flavors to meld together beautifully. Trust me; it’s worth the wait!
Tips for Best Results
- Room Temperature Ingredients: Make sure your butter, eggs, and milk are at room temperature. This helps in mixing better and creating a smoother batter.
- Don’t Overmix: When combining wet and dry ingredients, mix just until combined. Overmixing can lead to a dense cake—nobody wants that!
- Fresh Strawberries: As mentioned, always use fresh strawberries for the best flavor and texture. If they’re a bit too ripe, you can macerate them with a little sugar to enhance their sweetness.
- Decorating: Get creative with decorations! You can use mint leaves to garnish or even drizzle some chocolate over the top for an extra treat.
Ingredient Substitutions & Variations
Life sometimes throws us curveballs (like realizing you’re out of an ingredient), so here are a few swaps if you’re missing something:
- Milk: You can use almond milk or any other plant-based milk to keep things dairy-free. Just be sure to choose one that’s unsweetened to better control the sweetness.
- Butter: If you lack butter, vegetable oil can work in a pinch. Use about 3/4 cup of oil for every cup of butter.
- Eggs: For a vegan version, you can substitute each egg with 1/4 cup of unsweetened applesauce or 1 tablespoon of flaxseed meal mixed with 2.5 tablespoons of water (let it sit for a few minutes to thicken).
- Strawberries: If it’s out of season, feel free to substitute fresh strawberries with raspberries or blueberries—mixing berries gives a colorful and delightful flavor twist!
Serving Suggestions
When serving this cake, nothing beats pairing it with a light drink like a refreshing mint lemonade or a cup of calming chamomile tea. Picture this: the sun setting, you and your loved ones enjoying a slice, laughter ringing through the air, and a feel-good rom-com playing softly in the background. That’s vibe goals right there!
For those special occasions, consider serving it alongside a scoop of vanilla ice cream for an indulgently yummy dessert. The creaminess of the ice cream against the refreshing strawberries and smooth custard is pure bliss.
How to Store and Reheat Leftovers
If you happen to have leftovers (which is a rare event in my household), store slices in an airtight container in the fridge for up to 3 days. Just know that the longer it sits, the softer the cake will get with the custard—I actually love how fluffier it becomes!
If you want to reheat it, a quick 10–15 seconds in the microwave should do the trick, but serve it chilled for the best flavor experience!
Make-Ahead and Freezer Tips
You can bake the cake layers ahead of time and freeze them for up to 3 months. Just make sure they’re tightly wrapped in plastic wrap and aluminum foil. When you’re ready to assemble, just thaw them at room temperature while you prepare the custard.
The custard can also be made beforehand and stored in the fridge for up to 2 days. Assemble your cake just before serving for that fresh, delightful experience!
Common Mistakes to Avoid
- Underbaking the Cakes: Always do the toothpick test! If it’s underbaked, your cake can turn out mushy.
- Not Cooling Completely: If the cakes aren’t wholly cooled before you layer them with custard, you might end up with a melty mess. Patience is key!
- Skipping the Chilling Time: Don’t skip chilling; it helps the flavors fuse together for an out-of-this-world experience.
- Overmixing the Batter: Resist the urge to mix, mix, mix after you add flour. It will lead to a dense cake.
Frequently Asked Questions (FAQ)
Q: Can I use gluten-free flour?
A: Absolutely! Just substitute the all-purpose flour with a gluten-free blend, and you’re good to go. Just ensure it has xanthan gum for binding.
Q: How do I know if my custard is thick enough?
A: It should coat the back of a spoon, and if you run your finger through it, it should hold its shape. If it doesn’t, keep cooking slowly.
Q: Can this be made in advance?
A: You can bake the cake layers and make the custard ahead of time but assemble the cake just before you plan to serve it for the best flavor and texture.
Q: What if I don’t like strawberries?
A: No worries! Swap them out for any seasonal fruit—peaches, blueberries, or even a mixed berry medley works wonderfully.
Cooking Tools You’ll Need
- Two 9-inch round cake pans
- Mixing bowls
- Whisk
- Rubber spatula
- Saucepan
- Wire cooling rack
- Plastic wrap
Final Thoughts
Baking a Strawberry Custard Delight Cake is more than just following a recipe; it’s about creating memories and filling your home with warmth and joy. Each step, from whipping up the egg mixture to layering the final creation, is an opportunity to embrace the messy, beautiful chaos of cooking.
So, whether you’re celebrating a special occasion or simply indulging in a well-deserved treat, this cake will surely bring a smile to your face and joy to your heart.
If you enjoyed this recipe, don’t forget to save it on Pinterest or share it with a friend! It’s a delightful journey worth taking. Happy baking, everyone!
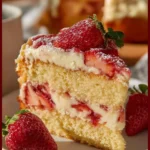
Strawberry Custard Delight Cake
Ingredients
For the Cake
- 2.5 cups all-purpose flour This gives structure to the cake while allowing it to remain moist.
- 2.5 tsp baking powder A crucial ingredient that helps your cake rise beautifully.
- 0.5 tsp salt Enhances the flavors of the cake; trust me, don’t skip it!
- 1 cup unsalted butter (softened) The key to a rich, buttery flavor and moist cake.
- 1.5 cups granulated sugar Sweetens the deal, providing that lovely sweetness we crave.
- 4 large eggs Gives the cake its structure and richness.
- 1 tsp vanilla extract Adds warmth and depth of flavor.
- 1 cup milk Keeps the batter moist and helps create that tender crumb.
For the Custard Filling
- 2 cups whole milk The base for the luscious custard.
- 0.5 cups granulated sugar Sweetens the custard to perfection.
- 3 tbsp cornstarch Thickens the custard without making it too heavy.
- 4 large egg yolks Enriches flavor and creates that creamy texture.
- 2 tbsp unsalted butter Adds richness and silkiness to the custard.
- 1 tsp vanilla extract A flavorful touch that complements the strawberries.
For the Topping
- 2 cups fresh strawberries (diced, plus whole for topping) The star ingredient—sweet, juicy, and vibrant!
- whipped cream Light and fluffy topping that makes it all complete!
Instructions
Preparation
- Preheat your oven to 350°F (175°C).
- Grease and flour two 9-inch round cake pans.
- In a bowl, whisk together flour, baking powder, and salt.
- Cream together softened butter and granulated sugar until light and fluffy.
- Beat in the eggs one at a time, mixing well after each addition, then stir in the vanilla extract.
- Alternately add the dry mixture and milk, starting with the dry ingredients until incorporated.
Baking the Cake
- Divide the batter between the prepared pans and bake for 25-30 minutes.
- Let the cakes cool in the pans for about 10 minutes, then transfer to a wire rack to cool completely.
Making the Custard Filling
- In a saucepan, heat 2 cups of whole milk until warm (do not boil).
- Whisk together sugar, cornstarch, and egg yolks in a heatproof bowl.
- Slowly pour the warm milk into the egg mixture while whisking constantly.
- Return the mixture to the saucepan and cook over medium heat, stirring continuously until it thickens.
- Remove from heat, stir in butter and vanilla extract, then cool the custard.
Assembly
- Carefully slice each cake layer in half horizontally to create four layers.
- Layer the cake, spreading custard and diced strawberries between each layer.
- Spread remaining custard on top and arrange halved strawberries.
- Chill in the fridge for 1-2 hours before serving.


