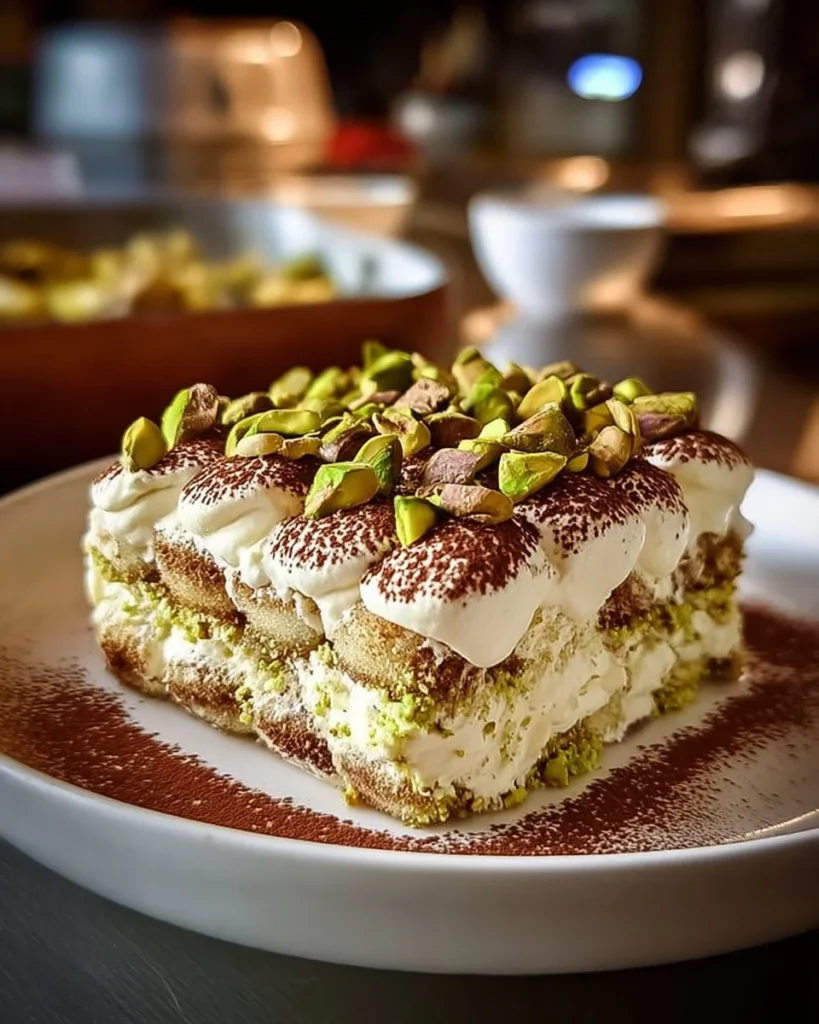

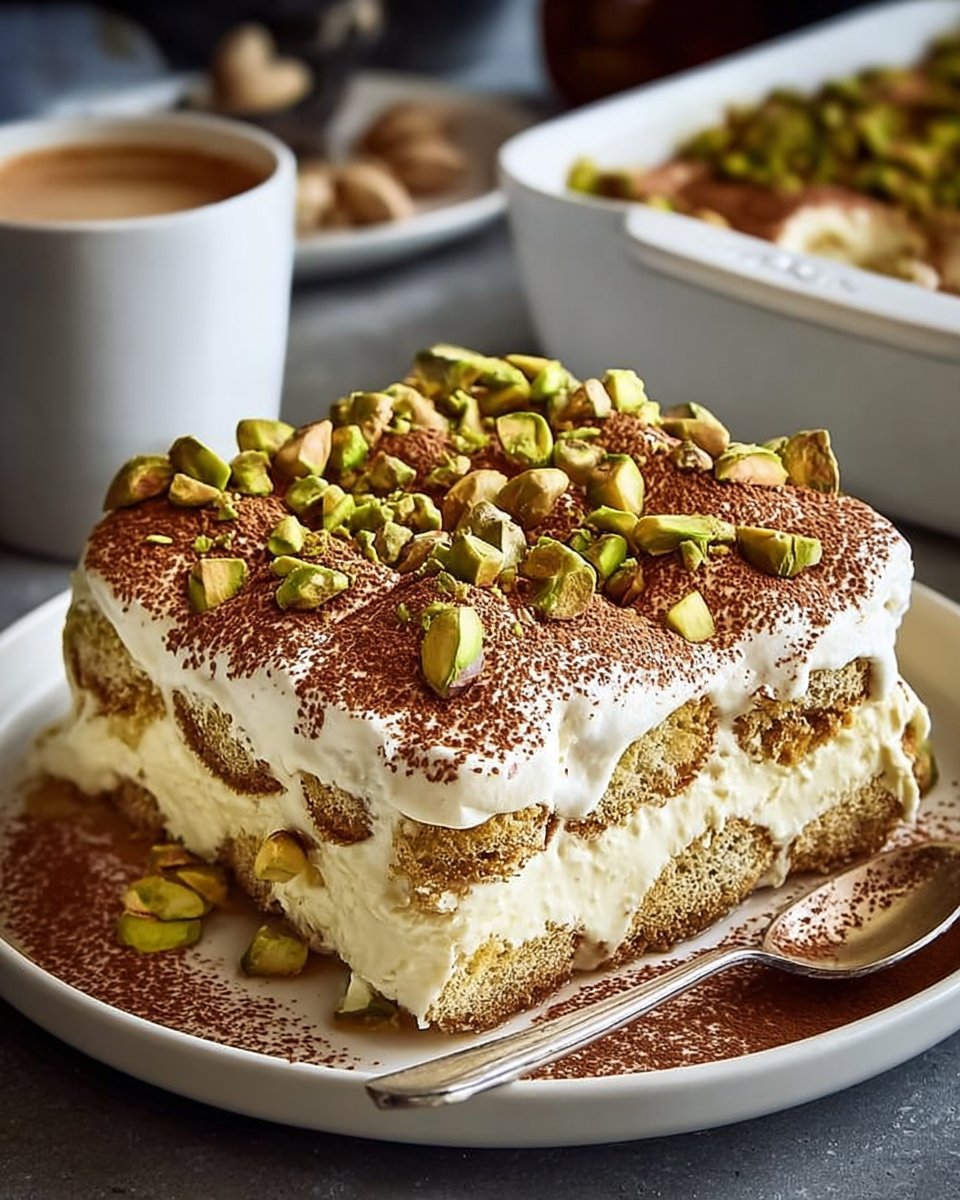
Easy Pistachio Tiramisu: A Unique Twist on a Classic Dessert
When it comes to desserts, few things excite me as much as a rich, creamy tiramisu. Honestly, it’s one of those desserts that can turn a mundane day into a special occasion. So, you can imagine my delight when I stumbled upon the idea of pistachio tiramisu. The combination of flavors sounded vibrant and rich, and I was more than eager to give it a shot.
The first time I attempted this recipe, I was feeling adventurous on a cozy summer evening. Picture this: a warm breeze wafting through the kitchen window, the smell of brewed coffee filling the air, and my beloved music playlist softly playing in the background. I had my trusty apron on, a slightly stained one from previous kitchen mishaps (don’t judge!), and I was ready to create something magical. Spoiler alert: it did not go off without a hitch. My first attempt resulted in a slightly lumpy mascarpone mixture, but hey, that’s how you learn, right?
This pistachio tiramisu means the world to me for several reasons. For starters, it’s not just a dessert; it’s a celebration of flavors and textures that get better with time. The creamy mascarpone, the crunch of pistachios, and the coffee-soaked ladyfingers meld beautifully, bringing back memories of family gatherings and lazy Sunday afternoons. Tiramisu always felt like a warm hug on a plate, but this version? It brings a whole new level of comfort. Plus, who doesn’t love the vibrant green of pistachios adding a pop of color?
So let’s dive in and embark on this journey of creating a delectable pistachio tiramisu, shall we?
Why You’ll Love This Recipe
- Unique Flavor Twist: Bold and nutty pistachios paired with coffee make a perfect flavor combo.
- Easy to Prepare: This dessert may look fancy, but it’s surprisingly easy—perfect for quick family meals or special occasions.
- Make-Ahead Magic: You can whip this up in advance and let it chill, making it ideal for entertaining.
- Picky Eater Approved: Even those who are normally hard to please will enjoy this delicious concoction.
- Comfort in Every Bite: Honestly, it feels like a hug in a bowl, perfect for cozy nights in.
- Stays Fresh: It keeps well in the fridge, so leftovers (if there are any) are a treat for the next day.
What Makes This Recipe Special?
Let’s talk about why this pistachio tiramisu gets me so excited. Firstly, pistachios add a delightful crunch and a slightly nutty taste that is so comforting. Unlike your usual tiramisu that relies on just coffee and cocoa, this version enhances the classic Italian dessert with rich, earthy flavors while keeping that luscious creaminess intact.
And then there’s the process of layering. It’s like building a delicious masterpiece. With each dip of the ladyfingers, there’s a satisfying squish, almost like you’re assembling a flavor-packed castle. Plus, the moment you take that first bite and that creamy mascarpone melts in your mouth is pure bliss!
If you’ve never attempted to make tiramisu, I promise you this isn’t as overwhelming as it may seem. The steps are simple, and hey, even if things don’t go as planned (remember my lumpy mascarpone?), it still tastes incredible!
Ingredients
- 1 ½ cups pistachios, shelled: These little gems pack a nutty flavor and contribute to that distinctive green color.
- 1 ½ cups heavy cream: This is what makes your tiramisu luscious and smooth.
- 1 cup mascarpone cheese: Essential for that creamy base, it adds richness to the dessert.
- ½ cup powdered sugar: Just the right sweetness to balance the flavors.
- 1 teaspoon vanilla extract: This enhances the overall flavor profile.
- 2 large eggs, separated: We use these to get that airy texture. Ah, the magic of egg whites!
- 1 ½ cups strong brewed coffee, cooled: This is a classic tiramisu element, don’t skimp on quality!
- 2 tablespoons dark rum: This adds a layer of depth; if you’re not a fan, you can skip it or replace it with a splash of vanilla extract.
- 24 ladyfingers: These light cookies soak up the coffee and create the structure of the dessert.
- Cocoa powder, for dusting: A sprinkle on top gives that classic tiramisu finish.
Pro Tips
- Invest in good quality mascarpone. It really makes a difference in richness and flavor.
- When mixing the eggs, be gentle. You’ll want to preserve that airiness!
- For a nut-free version, simply skip the pistachios and use cocoa instead.
How to Make It Step-by-Step
Now, let’s get into the nitty-gritty of how to make this easy pistachio tiramisu. Grab your apron, and let’s make some magic!
-
Crush the Pistachios: Right off the bat, toss those pistachios into your food processor. It’s a wonderful sight when they turn into a fine, fragrant powder. Transferring them to a bowl will also keep things organized while you whip up the other components. You may even want to reserve some for garnish later!
-
Whip the Cream: In a large mixing bowl, pour in that heavy cream. Using an electric mixer, whip it on medium speed until stiff peaks form. (Trust me, you’ll want to stop before you reach butter status! Oops, been there.) Just envision the creamy texture ice cream dreams are made of.
-
Mix the Mascarpone: Grab another bowl and add the mascarpone cheese, powdered sugar, and vanilla extract. Whisk everything until it’s smooth and creamy. This is your flavor base, and I could honestly eat it straight out of the bowl!
-
Whisk the Egg Yolks: In a separate bowl, whisk the egg yolks until they’re pale and slightly thickened. This part may feel a bit labor-intensive, but it’s worth it in the end. Plus, you’ll get a workout!
-
Combine: Gently fold those egg yolks into the mascarpone mixture until fully combined. This step is crucial—be gentle, or you’ll lose that delightful fluffiness.
-
Fragile Folding: Now, fold the whipped cream into the mascarpone-egg yolk mixture with a spatula. Picture these fluffy clouds enveloping each other in perfect harmony—no need to rush, take your time!
-
Pistachio Time: Add the ground pistachios to this divine mixture and give it another gentle fold. The color is going to look so inviting!
-
Whip the Egg Whites: In a clean bowl, whisk the egg whites until stiff peaks form. Again, keep it gentle when you incorporate them into the mixture. This is where the airy texture comes from!
-
Prepare the Coffee Mixture: Pour the cooled coffee into a shallow dish and stir in the dark rum. You want this ready for dipping the ladyfingers—a vibrant canopy of coffee goodness awaits!
-
Dunk the Ladyfingers: Quickly dip each ladyfinger in the coffee mixture. But pro tip: don’t let them soak! A quick dip on each side will do—moistened but still holding their shape. Layer them tightly in your serving dish.
-
Layering Magic: Spread half of the pistachio mascarpone mixture over the layer of ladyfingers, smoothing it out evenly. Repeat the whole dipping and layering process again with another set of ladyfingers and the remaining mascarpone mixture.
-
Chill Out: Cover the tiramisu with plastic wrap and refrigerate for at least 4 hours—trust me, overnight is better! The flavors meld together beautifully, and it only gets better with time.
-
Dust and Serve: When you’re ready to serve, take it out of the fridge, dust the top generously with cocoa powder, and slice it up. (I usually lick the spoon clean while serving—don’t judge!)
Tips for Best Results
- Timing is Key: Give yourself enough time for the tiramisu to set—ideally overnight will yield the best flavor and texture.
- Room Temperature Ingredients: Let your mascarpone and cream come to room temperature to ensure they mix correctly without lumps.
- Chill Everything: Serving the tiramisu cold enhances the texture and flavor, making each bite heavenly.
Ingredient Substitutions & Variations
- Nut-Free Version: If you have nut allergies, swap out pistachios for more cocoa powder or crushed cookies for texture.
- Alcohol-Free: Skip the dark rum and add a little more vanilla extract for flavor.
- Flavor Variations: Try using flavored coffee or add a hint of cardamom or orange zest for an aromatic twist. Honestly, the possibilities are endless!
Serving Suggestions
This pistachio tiramisu shines all on its own, but a few pairing ideas can elevate the experience even further. How about serving it with a light espresso or a fruity berry compote? Maybe even a scoop of vanilla ice cream on the side for extra indulgence?! Honestly, this dessert paired with a rom-com while curling up on the couch is truly perfection.
How to Store and Reheat Leftovers
If there are any leftovers (which, let’s be real, is rare), store them in an airtight container in the fridge. The pistachio tiramisu will stay fresh for up to 3 days. Just be sure to dust the cocoa powder on top just before serving for that fresh-off-the-counter vibe. Reheating isn’t recommended since tiramisu is best enjoyed chilled.
Make-Ahead and Freezer Tips
This dessert is perfect for meal prep! You can whip it up a day or two in advance, and it’ll get better as it sits. Just avoid freezing it, as the creaminess can get a bit weird when defrosted. If you need to prep ahead for a party, make it the day before, and you’re all set!
Common Mistakes to Avoid
- Soaking Ladyfingers: Don’t let those ladyfingers soak too long! A quick dip is key to keeping their shape.
- Over-whipping: Be cautious when whipping cream and egg whites. Stiff peaks are good, but too much whipping can ruin the texture.
- Not Enough Chill Time: Don’t skip the chilling time! Giving the tiramisu time to set is essential for that unified flavor.
Frequently Asked Questions (FAQ)
Can I substitute the mascarpone cheese?
While it’s best to use mascarpone for traditional tiramisu, you can use cream cheese in a pinch. Just keep in mind that the flavor will differ.
How long does tiramisu last?
Stored in the fridge, it can last for 3 days, but I doubt it’ll last that long in your house!
Can I make this gluten-free?
Absolutely! Just use gluten-free ladyfingers, and you’re ready to go!
Cooking Tools You’ll Need
- Food processor
- Mixing bowls
- Electric mixer
- Spatula
- Shallow dish for dipping
- Serving dish (you can use a glass dish for aesthetic appeal!)
Final Thoughts
As I sit here reminiscing about my first time making this pistachio tiramisu, I can’t help but smile. It’s not just a dessert; it’s a journey filled with learning and delight. The trials and triumphs in the kitchen are what make cooking fun and meaningful. So I invite you to give this recipe a try—these flavors, the textures, the memories just waiting to happen! If you enjoyed this recipe, don’t forget to save it on Pinterest or share it with a friend! Happy cooking!

Pistachio Tiramisu
Ingredients
For the Cream Mixture
- 1 ½ cups pistachios, shelled Packs a nutty flavor and contributes to the green color.
- 1 ½ cups heavy cream Makes your tiramisu luscious and smooth.
- 1 cup mascarpone cheese Essential for the creamy base.
- ½ cup powdered sugar Balances the flavors.
- 1 teaspoon vanilla extract Enhances the flavor.
- 2 large eggs, separated Helps achieve an airy texture.
For the Coffee Mixture
- 1 ½ cups strong brewed coffee, cooled A classic tiramisu element.
- 2 tablespoons dark rum Adds depth; optional.
For Assembly
- 24 pieces ladyfingers Light cookies that soak up the coffee.
- Cocoa powder, for dusting For the classic tiramisu finish.
Instructions
Preparation
- Crush the pistachios in a food processor until they turn into a fine powder.
- In a large mixing bowl, whip the heavy cream on medium speed until stiff peaks form.
- In another bowl, whisk mascarpone cheese, powdered sugar, and vanilla extract until smooth.
- Whisk the egg yolks until pale and slightly thickened, then gently fold them into the mascarpone mixture.
- Fold the whipped cream into the mascarpone-egg yolk mixture gently.
- Add ground pistachios to the mixture and fold to combine.
- In a separate clean bowl, whisk egg whites until stiff peaks form and gently fold them into the mixture.
Assembly
- Combine cooled coffee and dark rum in a shallow dish.
- Dip ladyfingers quickly into the coffee mixture and layer in your serving dish.
- Spread half of the pistachio mixture over the ladyfingers, smoothing it out evenly.
- Repeat the dipping and layering process with the remaining ladyfingers and the pistachio mixture.
- Cover with plastic wrap and refrigerate for at least 4 hours or ideally overnight.
- Dust the top with cocoa powder before serving.


