
Introduction
The first time I made hummus at home, I forgot to put the blade in my food processor. Yep. Chickpeas, tahini, lemon, garlic—all perfectly staged—then I hit the button and heard the saddest little whir as the bowl spun and absolutely nothing blended. Oops. I laughed, fixed it, and ten minutes later I was dragging warm pita through the silkiest, lemony hummus I’d ever tasted. Honestly, the kitchen smelled like sunshine and garlic got married and moved into my house.
I learned this version on a weeknight when I needed something fast to round out dinner. You know those easy weeknight dinners you promise yourself you’ll stick to? This is the side-dip-sauce that actually makes them happen. It’s bright with lemon, luxuriously creamy from tahini, and just garlicky enough to whisper “hi” without shouting. It leans into healthy comfort food in that magical way: feels cozy, tastes fresh. I kept dipping, then scooped some onto a plate with cucumbers and grilled chicken, and suddenly my “whatever” dinner turned into one of those quick family meals that gets quiet at the table because everyone is busy eating.
Hummus is pantry-friendly and wildly adaptable. It slides into a protein meal plan with ease (chickpeas + tahini = legit plant protein), loves being part of best meals to prep on Sundays, and works for healthy eating for two without feeling like diet food. I’ve tucked it into school lunches, prepped it for meal prep microwave lunches with leftover chicken and rice, and even served it next to a lighter, homemade riff on a full english breakfast with roasted tomatoes, mushrooms, and toast. And because it’s so fast, it fits perfectly with budget-friendly recipes that still taste special.
To be real, store-bought hummus is fine—but homemade is a small glow-up that tastes like you know a secret. The texture is creamier, the lemon is brighter, the garlic is fresher. It feels like you’re being taken care of by Future You who planned ahead… even if Present You is blending with one sock on and the dog gently judging from the doorway. This bowl covers late-night snacking, party platters, and good meal prep plans alike, and you can season it to match any mood. Smoky paprika? Yes. Roasted red peppers? Absolutely. Extra lemon because the day required it? Always.
Why You’ll Love This Recipe
- It takes 10 minutes and one machine, which makes it ideal for easy weeknight dinners and spur-of-the-moment gatherings.
- Ultra-smooth and customizable: add more lemon, more garlic, or a pinch of cumin to hit your perfect spot of healthy comfort food.
- Protein-rich and satisfying, a friendly player in high protein meals and high macro meals when you’re balancing plates and goals.
- Budget-friendly pantry staples mean flavor without fuss—perfect for cheap meal plans for 2 or feeding a crowd.
- Meal-prep hero: lasts up to five days and transforms lunches into no prep healthy lunches you’ll actually look forward to.
- Feels like a hug in a bowl, whether you’re dipping carrots, spreading on sandwiches, or spooning it beside grilled chicken.
What Makes This Recipe Special?
Two tiny technique moves change everything. First, whip the tahini and lemon juice together before anything else. The mixture turns pale and fluffy, almost like frosting, and lays the foundation for that café-level creaminess. Second, use cold water to finish the blend; it lightens the texture and makes the hummus shockingly velvety. Add in fresh garlic, a little cumin, and your best everyday olive oil and you have the kind of hummus that earns a permanent spot in your fridge and on your best meal prep plans list. It’s naturally dairy-free and plant-based, so it also fits a vegan meal prep plan without extra effort.
Ingredients
Chickpeas (a 15-ounce can or cooked from dry) are the heart. I love the convenience of canned—rinsed thoroughly—but if you’ve got a batch cooked on the weekend, use them. Cooked-from-dry chickpeas give a deeper flavor and softer texture. If you’re chasing ultra-smooth, peel the skins. It’s oddly soothing, like popping bubble wrap, and yes, I do it when I want that cloud-like finish.
Tahini brings body and that gentle sesame richness that makes hummus hummus. Not all tahini tastes the same; some are nutty and smooth, others a bit bitter. I reach for a brand that pours easily and tastes balanced straight off the spoon. If yours feels thick, don’t worry—the lemon and water will loosen it into bliss.
Fresh lemon juice is non-negotiable. It brightens everything and keeps the dip from tasting flat. I use about ¼ cup (one large lemon), and sometimes I add an extra squeeze at the end because my taste buds are bossy.
Garlic is the oomph. One small clove is lovely; two gets bold. And please use fresh. Pre-minced can taste sharp or a little stale. If you’re sensitive, microplane it so the flavor blends without harsh chunks. The kitchen will smell like you meant to be fancy.
Olive oil adds silk and sheen. Two tablespoons into the blend, plus a drizzle on top for that restaurant look. Use a decent extra-virgin—you’ll taste it.
Ground cumin is optional but so good. It adds warmth and depth, like background music you notice only when it’s missing.
Salt wakes everything up. Start with about ½ teaspoon, then taste and adjust. Chickpeas are quietly sweet; salt helps them sing.
Cold water is your texture secret. A few tablespoons while the processor runs transforms the mixture from thick to silky.
For the finish: paprika or sumac, and fresh parsley if you want color. Sumac’s lemony sparkle is perfect. Paprika adds gentle smokiness. Both are ridiculously pretty for photos (hello, Pinterest).
Don’t do this: don’t dump in all the water at once (you’ll over-thin it), don’t use old garlic (bitter city), and don’t skip the tahini-lemon “whip stage.” Those three missteps are the difference between “this is fine” and “wow, I could eat this with a spoon.”
How to Make It Step-by-Step
- Set up your station.
Pull out your food processor, a spatula, and all the ingredients. This recipe is famously quick, which is wonderful unless you have to sprint back to the pantry for the cumin while the machine roars on your countertop. I pre-open the can, rinse the chickpeas, and pat them dry so I don’t add extra water by accident. - Whip the tahini and lemon juice.
Add ¼ cup tahini and ¼ cup fresh lemon juice to the processor. Hit “on” for 50–60 seconds. Watch the color shift from tan to pale cream. The sound changes too—softer as it incorporates air. I swear the mixture starts to smell almost buttery. This step is like putting air in a pillow; it sets you up for the fluffiest hummus. - Flavor base time.
Scrape down the sides. Add 1 small minced garlic clove, 2 tablespoons extra-virgin olive oil, ½ teaspoon ground cumin, and ½ teaspoon salt. Process again for 30 seconds. Taste with the tip of a spoon. If you already feel your shoulders drop a little in happiness, you’re on track. - Add the chickpeas in stages.
Dump in half the chickpeas and blend for a full minute. It’ll look thick and sandy at first, then smooth out. Scrape the sides, add the remaining chickpeas, and blend again for 1–2 minutes. The processor’s gentle hum is kind of meditative, like it’s telling you dinner is happening and everything will be fine. - Finish with cold water.
With the machine running, drizzle in 2–3 tablespoons cold water, a little at a time, until the hummus loosens into a creamy swirl. You’re aiming for a texture somewhere between whipped cream cheese and soft pudding. If it starts to climb the sides, stop and scrape, then keep going. Honestly, watching it transform never gets old. - Taste and tune.
Add another pinch of salt if needed. Want more brightness? Another squeeze of lemon. Craving heat? A pinch of cayenne. This is where you make it yours. I usually add a micro-splash of olive oil (½ teaspoon) if I want it extra glossy for photos. - Spoon and garnish.
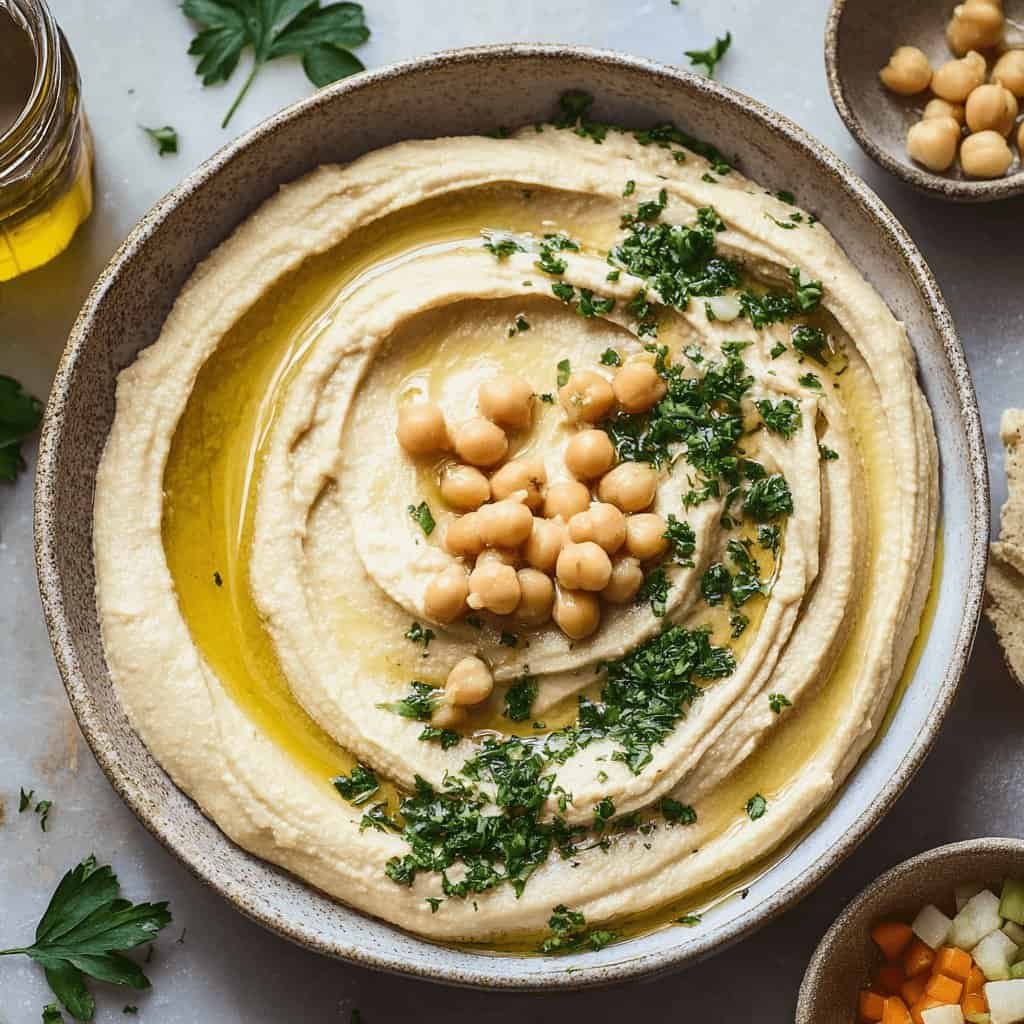
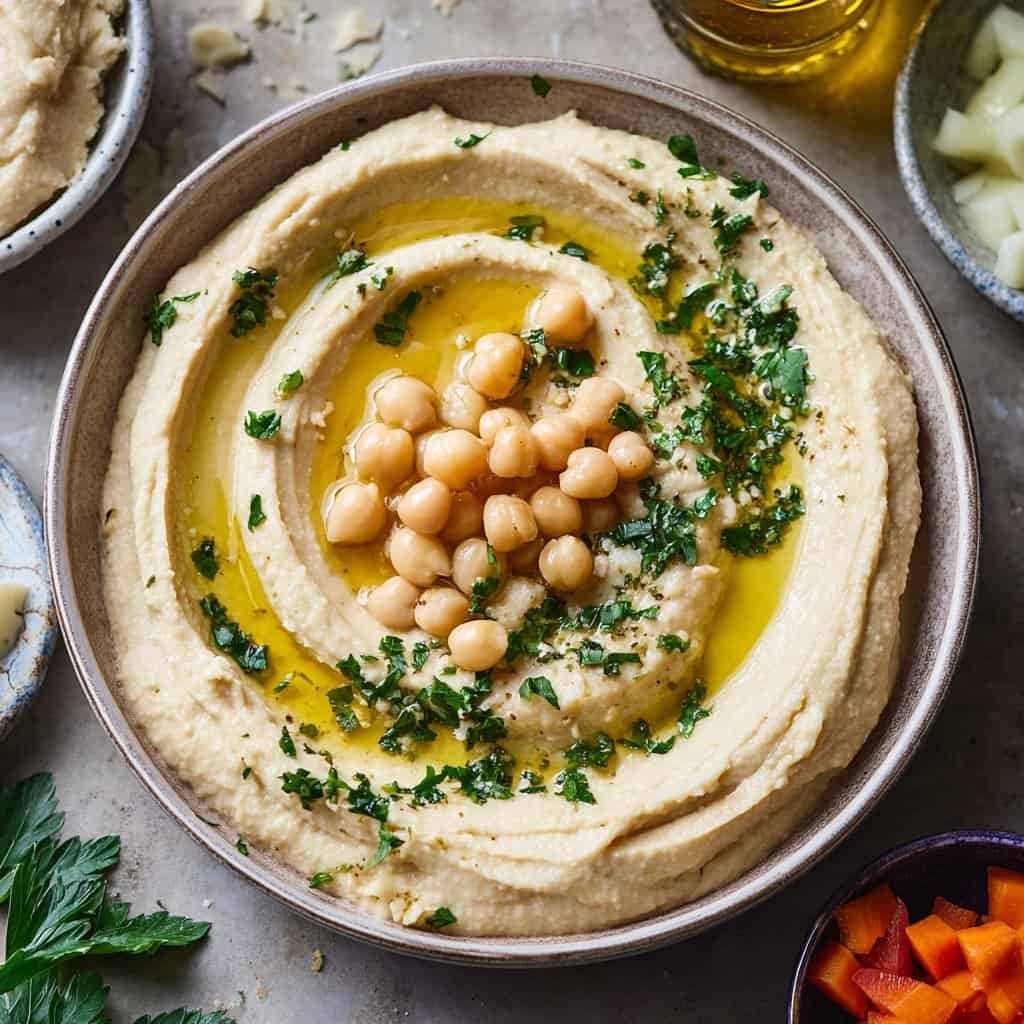
Swirl into a shallow bowl, dragging the back of a spoon to make a little well in the center. Drizzle with olive oil, dust with paprika or sumac, and scatter chopped parsley. Then try not to eat it all before you take it to the table. To be real, I almost always “quality control” with at least three chips. - Serve with everything.
Pita, cucumbers, carrots, bell peppers, grilled chicken, leftover roasted veggies—it’s the universal friend. The creamy texture pairs beautifully with high protein pre made meals and even perks up ready made protein meals when you need a fresh element on the side. If you’re following a keto meal plan or dabbling in no prep keto meals, use it as a dip for crunchy, low-carb veg.
Lesson learned moments? I’ve added too much water more than once. If that happens, blend in a spoonful of tahini and a few extra chickpeas, then season again. If your garlic is shouty, a touch more lemon smooths it out. And if you drop a spoon right into the running processor—don’t. (We don’t talk about that evening.)
Tips for Best Results
- Use cold water. It aerates the tahini and brightens the texture.
- Peel chickpeas for café-smooth hummus. Not required, but worth it when you want restaurant-level silk.
- Balance the acid. Lemon at the start for structure, a small extra squeeze at the end for brightness.
- Don’t rush the blend. Full minutes matter; under-blending leaves it grainy.
- Taste with your dipping vehicle. If you serve with salty pita chips, stop short of adding too much salt.
- Garnish smartly. A gentle olive oil drizzle and a spice sprinkle make it feel special—even if dinner is a mash-up of best high protein frozen meals and a handful of vegetables from the crisper.
Ingredient Substitutions & Variations
- Roasted Red Pepper Hummus: Blend in ½–¾ cup roasted red peppers and a pinch of smoked paprika. Gorgeous color, subtle sweetness.
- Spicy Hummus: Add ½–1 teaspoon harissa or cayenne to taste. Great next to grilled chicken for low calorie chicken meal prep.
- Herb Hummus: Toss in a big handful of cilantro or basil and a squeeze of lemon—fresh, green, bright.
- Avocado Hummus: One ripe avocado adds buttery smoothness and fits nicely into high carb high protein low fat meals when you’re balancing macros with lean protein.
- Beet Hummus: Add ½–1 cup cooked beets for a vibrant magenta that looks like it was born for Pinterest.
- No Tahini? Try 2–3 tablespoons cashew or almond butter. Different flavor, still luscious.
- Extra Protein: Swirl in a few tablespoons of Greek yogurt if it suits your protein eating plan. Not traditional, undeniably creamy.
Serving Suggestions
Pile hummus into a wide bowl and give it a pretty spoon-swoop. Serve with warm pita or flatbread, cucumber slices, bell pepper strips, cherry tomatoes, and crunchy carrots. It’s perfect with grilled chicken, fish, or falafel, and it makes grain bowls feel complete—think quinoa, roasted veggies, and a big dollop of hummus on top. Movie night? Hummus, pita chips, and crisp veggies plus a rom-com is perfection. For healthy meal plans for two or solo lunches, tuck it into wraps with leftover chicken and greens. It’s the easiest way to elevate best dinner prep meals without extra cooking.
Pairing Ideas (Drinks, Sides, etc.)
- Drinks: Sparkling water with lemon, iced mint tea, or a citrusy spritzer.
- Sides: Roasted cauliflower, lemony couscous, or a chopped salad with cucumbers and tomatoes.
- Mains: Grilled chicken skewers, pan-seared salmon, or baked tofu for a spot in your best vegan meal prep.
- Extras: Drizzle with chimichurri or tahini sauce for a zesty finish; sprinkle toasted pine nuts when you want crunch.
How to Store and Reheat Leftovers
Spoon leftovers into an airtight container and refrigerate for up to five days. Hummus tastes best cold or room temperature, so there’s no need to reheat. If it tightens in the fridge, stir in a teaspoon of water or a splash of olive oil and a squeeze of lemon to revive the creaminess. I portion it into small containers for premade lunch meals that slip into bags next to vegetables and pita. If it separates a bit, just stir—totally normal. For ready meals for 2 nights, use it as an instant side that balances richer mains.
Make-Ahead and Freezer Tips
You can make hummus up to 24–48 hours ahead; the flavors mingle and mellow in the best way. To freeze, pack into freezer-safe containers, smooth the top, and press plastic wrap directly onto the surface before sealing. Freeze up to three months. Thaw in the fridge overnight, then stir in a touch of lemon juice and water to bring it back to life. This trick supports those weeks when low calorie premade meal delivery looks tempting—homemade hummus is your fast, fresh counterpoint.
Common Mistakes to Avoid
- Skipping the tahini-lemon whip. That’s the secret to ultra-smooth texture.
- Adding all the water at once. Go slowly to avoid soupy hummus.
- Under-salting. Taste with your dippers and adjust.
- Using bitter tahini or old garlic. Fresh, quality ingredients matter in a no-cook recipe.
- Over-blending with garnishes inside. Add paprika or herbs at the end; blending them can muddy the color and flavor.
Frequently Asked Questions (FAQ)
How long does homemade hummus last?
Up to five days in the fridge, sealed tight. Stir in a splash of olive oil or water if it thickens.
Can I freeze hummus?
Yes. Freeze for up to three months, thaw in the refrigerator, and refresh with lemon and a teaspoon of water. Works great for best meals to prep weekends.
Why isn’t my hummus smooth?
Blend longer, whip tahini with lemon first, and add cold water gradually. For the silkiest texture, peel the chickpeas.
Can I make hummus without tahini?
Absolutely. Use a mild nut butter, a spoon or two of olive oil, or even a bit of Greek yogurt if it fits your protein meal plan. The flavor will shift, but it’ll still be delicious.
What should I serve with it?
Pita or flatbread, fresh veggies, crackers, grilled meats, or as a spread in wraps. It’s also fantastic dolloped onto high protein high carb low fat meals like chicken-and-rice bowls.
Why does my hummus taste bitter?
Likely from the tahini or older garlic. Use a good tahini brand, fresh garlic, and balance with lemon and salt.
Cooking Tools You’ll Need
- Food processor (a high-speed blender works in a pinch).
- Spatula for scraping the sides.
- Measuring cups and spoons.
- Citrus juicer or reamer.
- Serving bowl and spoon for swooping and garnishing.
Final Thoughts
There’s something deeply soothing about a bowl of homemade hummus on the table. It makes even random Tuesday dinners feel considered, like you pressed pause and said, “We deserve something good.” The lemon feels bright, the garlic feels grounding, and the creamy texture feels—the only word is generous. It’s a staple that supports your plans, from hello fresh low calorie menu inspiration to your own best meal prep healthy routine, from healthy boxed meals nights to spontaneous picnics. And it never asks for much in return—just a squeeze of lemon, a scoop of tahini, and a quick spin in the processor.
If you make it, add your signature. More lemon, extra cumin, a swirl of chili crisp—there’s no wrong move here. Share it with the people you love, or tuck a container into the fridge just for you. I promise it will make your week softer around the edges and your meals brighter in the middle.
If you enjoyed this recipe, don’t forget to save it on Pinterest or share it with a friend!
Homemade Hummus
Ingredients
- 1 can (15 oz) chickpeas, drained and rinsed
- 1/4 cup fresh lemon juice (about 1 large lemon)
- 1/4 cup tahini
- 1 small garlic clove, minced
- 2 tablespoons extra-virgin olive oil, plus more for serving
- 1/2 teaspoon ground cumin
- 1/2 teaspoon fine salt, or to taste
- 2 to 3 tablespoons cold water, as needed
- paprika or sumac, for garnish (optional)
- fresh parsley, chopped (optional)
Instructions
- In a food processor, combine tahini and lemon juice. Process for 1 minute until pale and creamy.
- Scrape down the sides. Add garlic, olive oil, cumin, and salt; blend until well combined.
- Add half of the chickpeas and process 1 minute. Scrape the bowl, add remaining chickpeas, and blend 1–2 minutes more until mostly smooth.
- With the processor running, slowly drizzle in 2 to 3 tablespoons cold water until the hummus becomes silky and creamy.
- Taste and adjust lemon and salt as desired. Spoon into a bowl, swirl the top, drizzle with olive oil, and garnish with paprika or parsley if using.


