
Easy Halloween Chocolate Chip Cookies
Ah, Halloween. The time of year when the air turns crisp, the leaves crunch beneath your feet, and it’s perfectly acceptable to consume your weight in candy. There’s something about the glow of jack-o’-lanterns and pots of bubbling chili simmering on the stove that make this season feel magical. But let’s be real here; one of the best treats of the season is, hands down, Halloween Chocolate Chip Cookies.
I remember the first time I attempted to bake these delightful goodies. It was a chilly October night, leaves swirling in the wind outside as I rummaged through my pantry, half-hoping to find chocolate chips hidden in the back like a lost treasure. With a little clumsiness (okay, a lot), I gathered my ingredients. In my whimsy, I accidentally spilled flour everywhere. Yep, my kitchen looked like a flour bomb exploded – but you know what? That mess was just part of the fun.
The warm, buttery aroma of freshly baked cookies wafting through my home created a cozy ambience that nothing else could replicate. I didn’t expect that mixing in Halloween sprinkles could make such a difference, but after tasting that first cookie — oh, it was a revelation! Soft, chewy, with pockets of gooey chocolate and pops of festive color. It was love at first bite, and it definitely felt like a hug in a dessert form.
Why You’ll Love This Recipe
- Quick and Easy: This recipe is straightforward, with no complicated techniques. Just mix, chill, bake, and devour.
- Irresistible Flavor: These cookies are not just your average chocolate chip cookies; the addition of Halloween sprinkles makes them pop with color and fun.
- Picky-Eater Approved: Kids and adults alike will love them. You can easily sneak these into lunchboxes or serve them for a spooky movie night!
- Perfect for Sharing: Bake a batch and share them at your next scare-fest, or keep them all to yourself (no judgment here!).
- Flexible Recipe: You can customize it based on what you have at home or how you’re feeling. Part of the joy of baking is making it your own!
- Makes Your Home Smell Amazing: Seriously, if you haven’t smelled cookies baking, have you even lived?
What Makes This Recipe Special?
Besides the nostalgic warmth it brings back from childhood memories, this recipe encapsulates all the cozy vibes associated with fall. Imagine curling up on the couch with a warm cookie after a long day outside. It’s the kind of cookie that tells a story, the chocolate chips melting in your mouth like tiny little bursts of happiness. Adding sprinkles infuses a bit of whimsy—who says Halloween treats can’t be both fun and comforting?
Ingredients
Here’s what you’ll need to whip up these easy Halloween Chocolate Chip Cookies:
- 1/2 cup unsalted butter, melted: This is the heart of the cookie dough. It adds richness, giving you that soft chewy texture you crave.
- 1/3 cup granulated sugar (67 g): For that sweet base that balances well with chocolate.
- 1/2 cup packed light brown sugar (100 g): The molasses in the brown sugar gives a slight depth of flavor along with moistness to the cookies—a must-have!
- 1 large egg: This binds everything together and gives the cookies a nice rise.
- 1 teaspoon vanilla extract: Vanilla brings warmth and personality to your cookies.
- 1/2 teaspoon salt: Don’t skip on the salt; it enhances all the flavors and balances the sweetness.
- 1/2 teaspoon baking soda: This is what helps those cookies spread out perfectly while baking.
- 1 1/2 cups all-purpose flour (186 g): This gives structure to the cookies; you want just enough for a chewy bite.
- 1 1/2 cups chocolate chips: Chocolate—it’s the best part! Use semi-sweet, dark, or even a combo to really amp up the goodness.
- 1/2-3/4 cup Halloween sprinkles: Because let’s face it, everything’s better with sprinkles! They add a festive touch, which is what Halloween is all about.
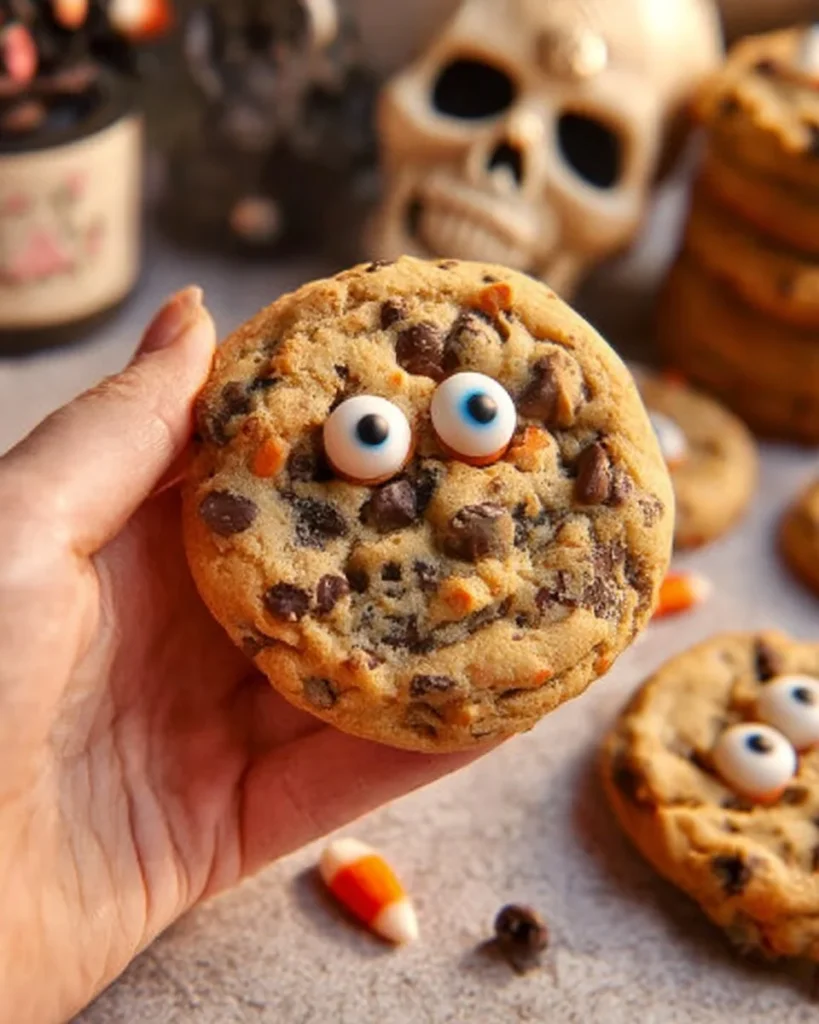
- Candy eyes (optional): For an extra scary touch, pop some on before the cookies cool. The kids will go wild!
How to Make It Step-by-Step
Here’s how to bring these delicious cookies to life in your kitchen. Get ready for an adventure!
-
Preheat and Prepare: Start by preheating your oven to 350℉. While the oven warms up, line two baking sheets with parchment paper. Let’s minimize the chances of cookies sticking – that’s a kitchen nightmare waiting to happen!
-
Mix That Butter and Sugar: In a large bowl, combine the melted butter, granulated sugar, and brown sugar. I usually use a whisk, but honestly, a fork can do the job too. Mix until you achieve a smooth and creamy texture. Just imagine the sweet scents blending – it’s heavenly!
-
Add the Egg and Vanilla: Crack that egg right into the bowl, and plop in the vanilla extract. Give it a gentle whisk until it’s all combined. The mixture should be glossy and a little thicker.
-
Dry Ingredients Unite: Now, it’s time for the flour, salt, and baking soda to join the party. Carefully add them in and mix on low speed. Avoid the urge to over-mix; you’re looking for just combined. Too much mixing can lead to tough cookies—yikes!
-
Folding Fun: Here’s where the magic happens. With a spatula or large spoon, gently fold in the chocolate chips and sprinkles. I could keep it simple, but I go big or go home! Adding that extra bit of color makes it special.
-
Chillin’ Time: Use a cookie scoop or two tablespoons to form balls of dough. Place them on the parchment-lined baking sheets. Don’t worry about spacing too much since we want them cold, not baked at this moment. Cover the sheets with plastic wrap and chill in the fridge for 1.5 to 2 hours. If you can wait, you can also let them chill overnight—perfect for schedule-friendly baking!
-
Bake Away: Once you’re ready to bake, place the chilled cookie dough balls on a fresh baking sheet, ensuring they’re about 2 inches apart. Bake for 11-13 minutes—check for golden edges while keeping those centers gooey!
-
Candy Eyes, Optional: Here comes the fun part! As soon as you pull those cookies from the oven, if you’re using candy eyes, pop them on the cookies. They’ll melt just enough to stick without being over-the-top.
-
Cool and Devour: Let the cookies cool for a few minutes before transferring them to a wire rack. Now’s the toughest part—waiting for them to cool down to eat! But trust me, it will be worth it.
Tips for Best Results
- Don’t Skip the Chill Time: Chilling the dough is key. It helps the cookies stay thicker while baking. You don’t want flat, sad cookies!
- Use Good Chocolate Chips: Investing in high-quality chocolate chips will elevate these cookies. You want gooey melted chocolate, not chalky bits.
- Add More Sprinkles: You can never have too many sprinkles, right? Just be careful with how many you add; too many can overwhelm the balance of cookie goodness.
- Know Your Oven: Every oven is quirky, so keep an eye on your cookies near the end of the baking time to prevent them from overcooking.
Ingredient Substitutions & Variations
Want to mix things up a bit? Here are some fun swaps:
- Gluten-Free: Use a 1:1 gluten-free baking flour in place of regular flour. Results may vary, but it’s often a great swap.
- Dairy-Free: Substitute the butter with coconut oil or a vegan butter spread. Just make sure to check that your chocolate chips are dairy-free.
- Sprinkle Varieties: Use Halloween-themed sprinkles or mix them with colorful chocolate candies for a whimsy upgrade.
- Nuts for Crunch: If you like a bit of crunch, consider adding nuts like walnuts or pecans (but do this only if you know your audience is nut-friendly).
Serving Suggestions
Feel like these cookies just won’t last until dessert? Pair them with a glass of cold milk, or maybe some warm apple cider for that perfect autumn twist. For a cozy night in, these cookies alongside a predictable rom-com are just the perfect combination, allowing you to enjoy all the warming flavors of fall.
You could also stack them up for Halloween parties! How fun would it be to have a cookie decorating station? Grab some frosting and extra sprinkles, and let the little ones get creative.
How to Store and Reheat Leftovers
Let’s talk about the inevitable—leftovers. If you somehow have any! Store your cookies in an airtight container at room temperature for up to a week. They’ll stay soft and chewy if you separate layers with parchment paper.
If you need to reheat them, just pop them in the microwave for 10-15 seconds. Honestly, there’s nothing quite like a warm cookie. Just be careful not to overheat them; you don’t want a melted chocolate explosion in there.
Make-Ahead and Freezer Tips
Want to whip up a batch for later? You can freeze the dough! Scoop the dough balls onto a baking sheet, freeze until solid, and then transfer them to a freezer-safe bag. They’ll last up to three months. When cookie cravings strike, just bake them straight from frozen, adding a couple more minutes to the bake time. It’s like you’ve got a secret stash of deliciousness waiting just for you!
Common Mistakes to Avoid
- Skipping the Chilling: I cannot stress this enough. Skipping the chill time will not yield the cookie bliss you seek.
- Overmixing the Dough: Stick to mixing until just combined. It prevents tough cookies—soft is the goal, not rocks!
- Not Using Enough Chocolate: There’s no such thing as too many chocolate chips! Make it your own, but don’t skimp on the essential goodness.
Frequently Asked Questions (FAQ)
Can I make these cookies without eggs?
Yes! You can use a flax egg (1 tablespoon ground flaxseed mixed with 2.5 tablespoons water) or a commercial egg substitute.
What’s the best way to measure flour?
Spoon the flour into your measuring cup and level it off with a knife. Don’t scoop it directly! It leads to packing; you’ll end up with dense cookies.
Can I use mini chocolate chips?
Absolutely! Mini chocolate chips will provide more pockets of chocolatey goodness, and they’re adorable, to be honest.
Cooking Tools You’ll Need
- Mixing bowls
- Measuring cups and spoons
- Spatula
- Baking sheets
- Parchment paper
- Whisk or fork
Final Thoughts
Baking these Halloween Chocolate Chip Cookies is about more than just satisfying your sweet tooth. It’s a reminder of cozy nights filled with laughter, love, and maybe a little light chaos. So, grab your loved ones, preheat that oven, and enjoy the sweet, sweet smells that fill your home.
If you’ve enjoyed this recipe, don’t forget to save it on Pinterest or share it with a friend. Happy baking, my fellow cookie lovers!

Halloween Chocolate Chip Cookies
Ingredients
For the Cookie Dough
- 1/2 cup unsalted butter, melted Adds richness and chewy texture.
- 1/3 cup granulated sugar Provides sweetness.
- 1/2 cup packed light brown sugar Adds depth of flavor and moistness.
- 1 large egg Binds the ingredients together.
- 1 teaspoon vanilla extract Enhances flavor.
- 1/2 teaspoon salt Balances sweetness.
- 1/2 teaspoon baking soda Helps cookies to spread.
- 1 1/2 cups all-purpose flour Provides structure.
- 1 1/2 cups chocolate chips Use semi-sweet or dark for richness.
- 1/2-3/4 cup Halloween sprinkles Adds festive touch.
- Optional candy eyes For decoration.
Instructions
Preparation
- Preheat the oven to 350°F (175°C) and line two baking sheets with parchment paper.
- In a large bowl, combine melted butter, granulated sugar, and brown sugar until smooth.
- Add the egg and vanilla extract, whisking until combined.
- Mix in the flour, salt, and baking soda until just combined.
- Fold in chocolate chips and Halloween sprinkles gently.
- Scoop the dough into balls and place on the prepared baking sheets. Cover with plastic wrap and chill for 1.5 to 2 hours.
Baking
- Place chilled dough balls on a fresh baking sheet, about 2 inches apart.
- Bake for 11-13 minutes until golden around the edges and gooey in the center.
- If using candy eyes, place them on the cookies just after pulling them from the oven.
- Allow cookies to cool on the baking sheets for a few minutes before transferring to a wire rack.


