

Irresistible Chocolate Chip Cheesecake Cookies in 12 Minutes
Imagine walking into your kitchen after a long day and being enveloped in the sweet, buttery smell of chocolate chip cheesecake cookies baking in the oven. Honestly, there’s nothing quite like it! It’s a comforting aroma that can instantly lift your spirits and wrap you in a warm hug. These Irresistible Chocolate Chip Cheesecake Cookies are not just any cookies – they are a combination of rich cheesecake and classic chocolate chip goodness.
Let me tell you about the moment I stumbled upon this particular recipe. I was scrolling through Pinterest, as one often does when faced with the kitchen chaos of making dinner and satisfying a sweet tooth. You know those evenings when you didn’t plan anything for dinner (oops!) and the kids are asking for snacks while you’re trying to figure out how to whip something semi-edible? Yeah, it was one of those nights. I was searching for easy weeknight dinners when I began to feel a tug at my heart for something sweet. And thus, the tale of the 12-minute cookie began.
Picture me, my kitchen lit by the golden glow of my overhead lights, flour dust covering my favorite coffee mug, and a curious cat weaving through my feet, looking for occasional scraps. I was yearning for something comforting, and these cookies filled that desire effortlessly. Seriously, the best part? With just a few ingredients, I was able to create a batch of cookies that had hints of cheesecake flavor, popped with chocolate chips, and turned my chaotic evening into a cozy, delightful experience.
The real beauty of these cookies is how they make you feel. They evoke memories of family gatherings, late-night study sessions with friends, or even just a quiet moment with a book and a cup of tea. Which is why I can promise you – once you taste these, every chaotic moment you endure in the kitchen will feel totally worth it.
Why You’ll Love This Recipe
- Quick and Easy: These cookies are prepped in just 12 minutes. Seriously, you won’t be spending your night in the kitchen.
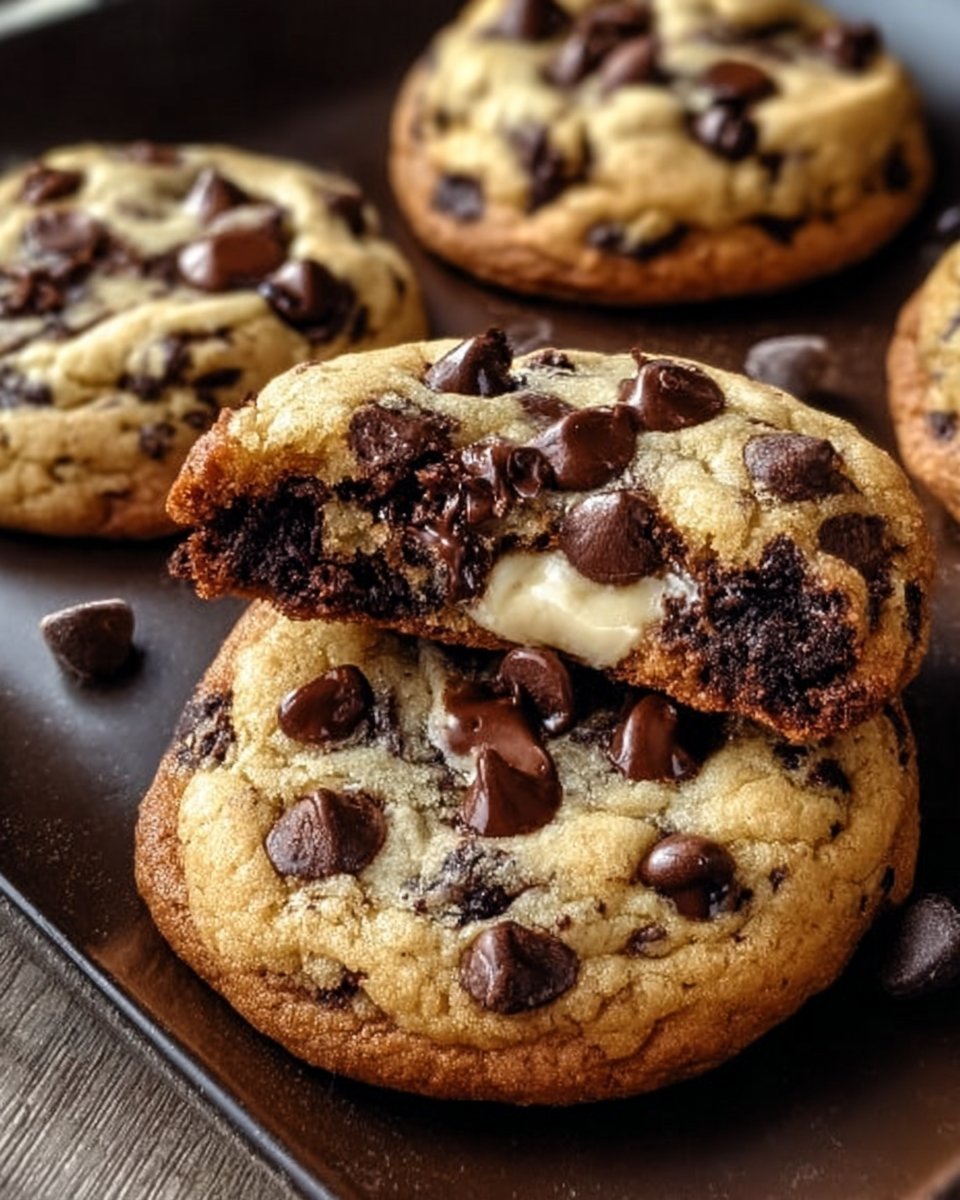
- Decadent Flavor: With the cream cheese base, they have a slightly tangy flavor that complements the sweetness of the chocolate beautifully.
- Perfect for Meal Prep: I can’t stress enough how they can be easily adapted for future munching. Just batch bake and have them on hand for those sweet cravings!
- Kid Approved: If you’ve got picky eaters at home (don’t we all?), these cookies are a sure hit. The blend of textures and flavors leaves no one complaining.
- Versatile: You can add your own twist—maybe throw in some walnuts, or switch out the chocolate chips for your favorite candies? The sky’s really the limit!
Just thinking about these cookies brings a smile to my face. They are like a little bite of joy that feels like a warm hug on a cold day!
What Makes This Recipe Special?
The real charm of these cookies lies in their texture. They are soft and chewy on the inside while the edges have a slight crispness. You get the whole cheesecake experience without the fuss of a full cheesecake. And don’t you just love the combination of cream cheese and chocolate? It’s indulgent without being overwhelming, making it the kind of treat that keeps you coming back for more.
And who can forget the all-important baking tip? When you’re blending those ingredients together, the airiness is key. Just imagine yourself swirling that cream cheese until it’s completely smooth and ready to mingle with the sugars. This mix is what brings out the cookie’s fluffy texture. Honestly, I remember the first time I didn’t cream it enough—it turned into a dense, sad little cookie. Lesson learned the hard way, my friends!
Ingredients
Let’s dive into the ingredients you’ll need for these delightful cookies:
- ½ cup Butter (softened, unsalted): I prefer using unsalted butter to maintain control over the saltiness of the cookies.
- 8 oz Cream Cheese (softened): Here lies the heart of that cheesecake flavor.
- ½ cup Granulated Sugar: For sweetness that balances out the cream cheese.
- ½ cup Brown Sugar: It adds a subtle depth and moisture to the cookies.
- 1 tsp Vanilla Extract (high-quality): Always go for high-quality vanilla—trust me, it makes a difference!
- 1 large Egg (at room temperature): This helps to create a smooth batter and brings everything together.
- 1 ½ cups All-Purpose Flour: The backbone of your cookie for that chewy texture.
- 1 tsp Baking Soda (fresh): Because who wants flat cookies? Not me!
- ½ tsp Salt: A necessary addition to elevate all the flavors.
- 1 cup Chocolate Chips (reserve some for topping): Chocolate is life. And the extra chips on top? Yes, please!
Pro tip: Make sure your butter and cream cheese are truly softened. Oh man, I once made the mistake of not properly softening the butter, and it was a disaster! The cookies turned out flat and sad. So, take that extra few minutes to let them do their thing.
How to Make It Step-by-Step
Alright, buckle up because we’re about to embark on a delicious journey to cookie heaven!
-
Gather Your Ingredients: Start by laying out all your ingredients in front of you. A little organization goes a long way. If there’s anything that keeps me sane when cooking, it’s having everything within arm’s reach. Plus, no spills and mess means I get to enjoy my cookies faster!
-
Cream the Butter and Cream Cheese: Grab your mixing bowl and combine the softened butter and cream cheese using an electric mixer or a whisk. You’ll want to beat them together until they are light and fluffy. I’m talking about the kind of texture that might even fool a passerby into thinking you’re a professional baker. Honestly, it took me a while to realize how important this step was. The fluffier, the better!
-
Add in the Sugars: Next, toss in both the granulated and brown sugar. Beat them into the creamed mixture until it’s well combined and smooth. Don’t skimp on this part; you want to make sure those sugars are fully mixed in and help aerate your batter. Seriously, the smell wafting out will have everyone gathering around—even the pets!
-
Mix in the Egg and Vanilla: Now, crack that egg into the bowl and add the vanilla extract. Mix until you can’t see any trace of the egg. It’s like a party in there—everyone’s getting along nicely.
-
Combine the Dry Ingredients: In a separate bowl, whisk together the all-purpose flour, baking soda, and salt. Gradually add this mixture to the wet ingredients, mixing just until everything is combined. Pro tip: Don’t overmix! We don’t want tough cookies. Just mix until all the flour is incorporated, even if there are a few lumps. Embrace those lumps!
-
Fold in the Chocolate Chips: Here comes the fun part! Fold in the chocolate chips with a spatula. But don’t forget to reserve some for the topping. You’ll want those little gems peeking out, tempting all who walk by your kitchen. Ugh, it’s going to be tough to avoid munching on those chips straight out of the bag!
-
Scoop and Bake: Preheat your oven to 350°F (175°C) and line a baking sheet with parchment paper. Use a cookie scoop or a tablespoon to drop mounds of dough onto the baking sheet, leaving space for them to spread. Honestly, I’ve experimented with various sizes, and I can confidently say medium-sized cookies work best. Top with those reserved chocolate chips. Cook for about 10-12 minutes or until the edges are golden. You’ll know it’s time when your kitchen starts smelling like a pastry shop.
-
Cool and Enjoy: Let those beauties cool on the baking sheet for a few minutes before transferring them to a wire rack to cool completely. Or, who am I kidding? Dive right in! The first bite, with that gooey chocolate melting in your mouth? Divine!
Tips for Best Results
- Room Temperature Ingredients: Don’t skip this! It leads to a more harmonious batter.
- Mixing Time: Keep an eye on your mixing time; overmixing leads to tough cookies. We want soft and chewy here!
- Checking for Doneness: Every oven is different. Mine tends to run a bit hot, so I recommend keeping an eye on your cookies after the 9-minute mark. You want the edges set but the centers slightly soft.
- Storage: Store in an airtight container, or share with your neighbors before they vanish into thin air!
Ingredient Substitutions & Variations
- Allergy-Friendly: If you’re dealing with allergies, you can swap out the butter for a vegan butter alternative and use dairy-free cream cheese.
- Flavor Upgrades: Consider experimenting with flavored chocolate chips like mint chocolate, white chocolate, or even peanut butter chips!
- Seasonal Twists: Love pumpkin spice? Toss in some pumpkin spice seasoning along with the flour during the fall. Got some leftover peppermint candy canes during the holidays? Crush those up and mix them in!
Serving Suggestions
Pair these cookies with:
- A cold glass of milk: Seriously, there’s something timeless about cookies and milk—it’s like the classic romance of the dessert world.
- Coffee or tea: Enjoy them while cozying up with a good book. This and a heartwarming rom-com? Perfection!
- Ice cream: Yes, you can make an epic ice cream sandwich with these cookies. You’re welcome!
How to Store and Reheat Leftovers
If you happen to have any cookies left (which is highly unlikely), just pop them in an airtight container. They’ll stay fresh for about 3-5 days. You can also freeze them! Just place the baked cookies in a single layer on a baking sheet until frozen, then transfer them to a freezer bag for up to three months. To reheat, simply pop them in the microwave for about 10-15 seconds.
Make-Ahead and Freezer Tips
You can also make the dough ahead of time! Prepare the cookie dough and scoop it onto a baking sheet, freeze the balls, and once frozen, store them in a freezer bag. When you’re feeling like a cookie, you can bake them straight from the freezer; just add a couple of extra minutes to the baking time.
Common Mistakes to Avoid
- Skipping the Softening Step: Trust me, you do not want cookie dough that’s hard to mix.
- Overbaking: Remember, cookies will continue to cook after you pull them from the oven. Too much time means crunchy treats, not chewy ones.
- Not letting them cool properly: Don’t rush this step! Those cookies need a moment to solidify into their dreamy shapes.
Frequently Asked Questions (FAQ)
- Can I substitute cream cheese for anything? Yes, mascarpone could be a great substitute, but keep in mind it has a different flavor profile.
- What type of chocolate works best? Semi-sweet chocolate chips are my go-to, but dark chocolate or even white chocolate could bring interesting flavors!
- Can I chill the dough? Absolutely! Chilling the dough for 30 minutes helps the cookies maintain their shape.
Cooking Tools You’ll Need
- Electric mixer or good old-fashioned whisk
- Mixing bowls (big and small)
- Measuring cups and spoons
- Parchment paper for easy cleanup
- Baking sheets
Final Thoughts
Each time I whip up these Irresistible Chocolate Chip Cheesecake Cookies, I’m reminded of those kooky kitchen nights—sometimes chaotic, always filled with laughter, and inevitably resulting in something delicious. It’s the little moments like these that remind me food is more than just something to eat; it’s a way to connect, to share, and to create lasting memories.
So, whether it’s for a family gathering, a cozy night in, or simply because you deserve a treat, whip up these cookies. I’d love to hear about your baking adventures! If you enjoyed this recipe, don’t forget to save it on Pinterest or share it with a friend!

Chocolate Chip Cheesecake Cookies
Ingredients
Main Ingredients
- ½ cup Butter (softened, unsalted) Using unsalted butter helps control saltiness.
- 8 oz Cream Cheese (softened) Essential for the cheesecake flavor.
- ½ cup Granulated Sugar
- ½ cup Brown Sugar Adds depth and moisture to the cookies.
- 1 tsp Vanilla Extract (high-quality) Opt for high-quality for the best flavor.
- 1 large Egg (at room temperature) Helps create a smooth batter.
- 1 ½ cups All-Purpose Flour Gives the cookie its chewy texture.
- 1 tsp Baking Soda (fresh) Prevents flat cookies.
- ½ tsp Salt Enhances flavor.
- 1 cup Chocolate Chips (reserve some for topping) Chocolate is a must; extra for topping adds texture.
Instructions
Preparation
- Gather your ingredients and preheat your oven to 350°F (175°C).
- Cream the softened butter and cream cheese together until light and fluffy.
- Add granulated and brown sugars to the creamed mixture, and mix until well combined.
- Mix in the egg and vanilla extract until there are no traces of the egg.
- In a separate bowl, whisk together flour, baking soda, and salt. Gradually add to the wet mixture, mixing until just combined.
- Fold in the chocolate chips, reserving some for topping.
- Scoop mounds of dough onto a lined baking sheet, leaving space for spreading, and top with reserved chocolate chips.
- Bake for 10-12 minutes or until edges are golden. Let cool on the baking sheet for a few minutes before transferring to a wire rack.


