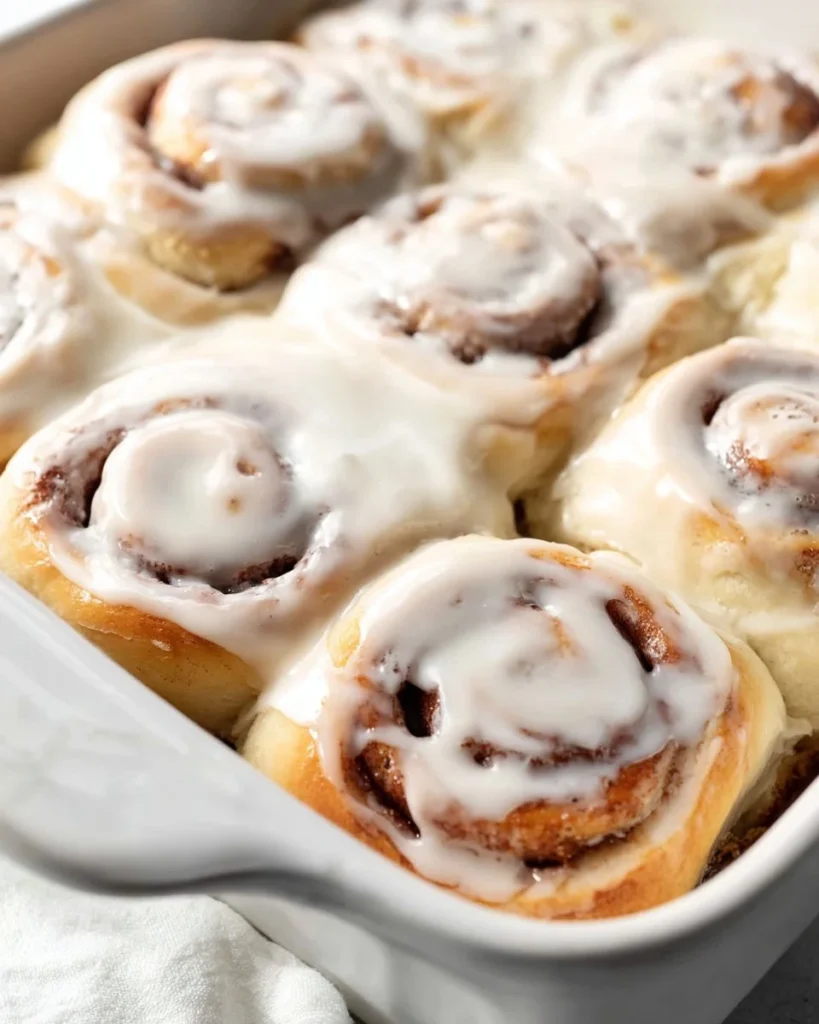

The Best Homemade Cinnamon Rolls: A Cozy Baking Adventure
Ah, cinnamon rolls. The mere thought of them instantly conjures warm memories of family gatherings, cozy winter mornings, and the delectable aroma wafting through the house as they bake. For me, baking cinnamon rolls has always been synonymous with love and comfort. My first attempt was a chaotic whirlwind—a battle between me, my dough, and an unexpectedly aggressive rise. Let’s just say I got flour everywhere and learned that the right amount of patience can turn mere ingredients into something magical.
Growing up, weekends at my grandmother’s house were never complete without her famous cinnamon rolls. She had a way of making the process feel effortless, rolling, rising, and icing like a true pro. When she passed down her recipe, I was both excited and intimidated. "Can I really make them like she did?" I questioned as I nervously sifted the flour. Spoiler alert: my first batch resembled something more like baked blobs than the beautiful spirals I hoped for! Oops! But after some trial and error—thank you, YouTube tutorials—I finally cracked the code. Now, whenever I whip up these best homemade cinnamon rolls, it feels like I’m wrapping my family in a warm hug.
This recipe is the epitome of easy weeknight dinners transformed into a weekend baking extravaganza, and it holds a special place in my heart. It’s perfect for a chilly morning when you want to bring a little joy to the day. There’s nothing quite like pulling out a tray of gooey, cinnamon-swirled goodness from the oven, especially when you top them with that creamy icing that melts into each crevice. Honestly, there are few things in life as delightful as this.
If you’re ready to embark on a delightful brunch journey that will not only fill your belly but also make your heart swell, stick around. I promise, these cinnamon rolls will become a staple in your home, even more so than your quick family meals.
Why You’ll Love This Recipe
-
Total Comfort Food: These cinnamon rolls are the definition of comfort food. The warm and cozy vibe they bring signals that it’s time to unwind and enjoy life.
-
Picky-Eater Approved: Everyone loves a good cinnamon roll! They’re like a universal language of sweet comfort. If you have picky eaters around, this recipe will charm them into happiness.
-
Great Leftovers: If, by some miracle, you have any left over (which is rare in my house), they taste fantastic the next day. A quick reheat in the microwave makes them just as good as fresh!
-
Perfect for Meal Prep: These rolls can transition from breakfast to dessert, and they freeze beautifully, making them ideal for healthy meal plans for two or for solo indulgence on a cozy night.
-
Impressive but Easy: Don’t be fooled by their beauty; they’re surprisingly straightforward to whip up. I promise you’ll feel like a baking rockstar when you serve these.
-
The Perfect Pairing: These rolls go well with a steaming cup of coffee, tea, or even hot chocolate. They set the right mood for any gathering.
What Makes This Recipe Special?
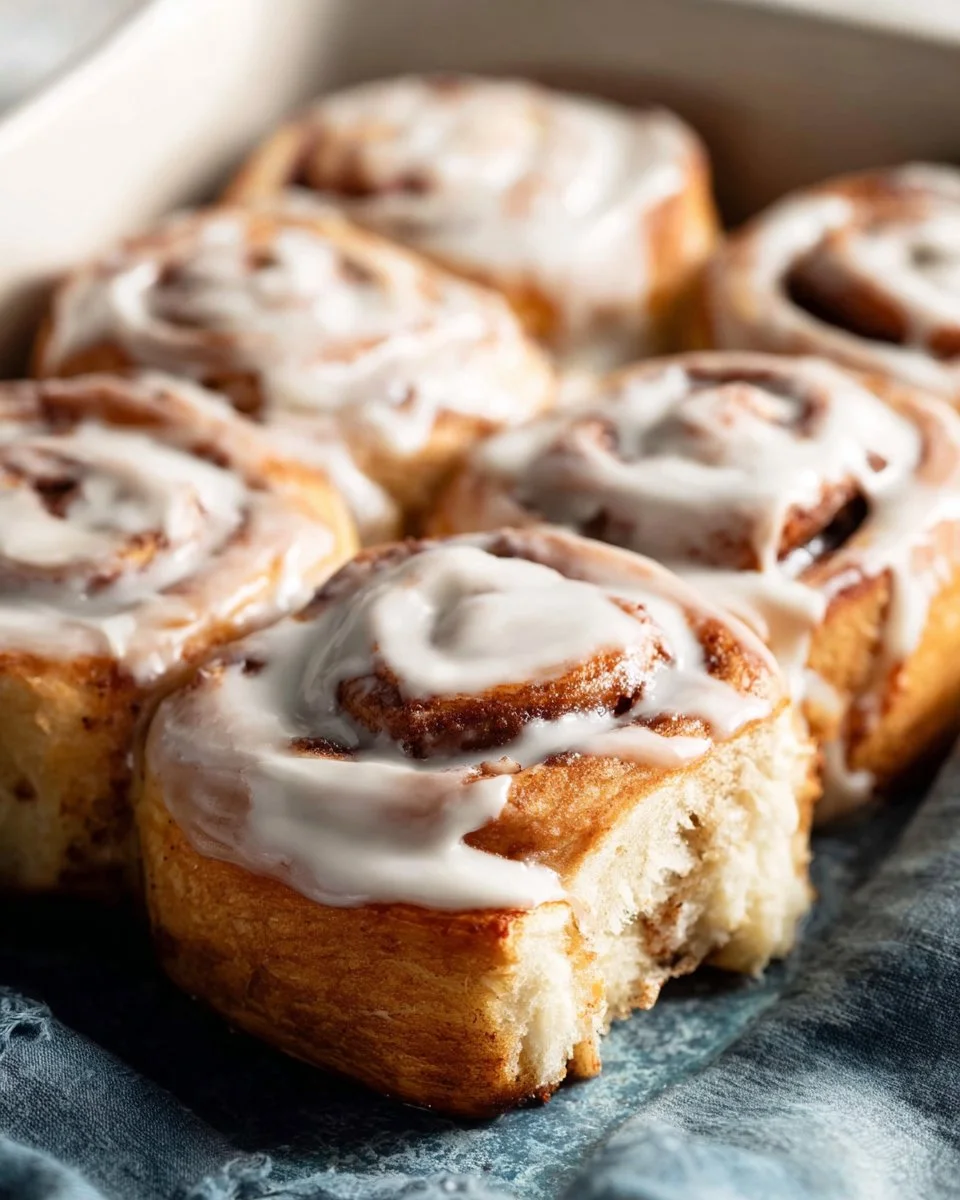
These are not just any cinnamon rolls; they’re a nostalgic trip down memory lane. The combination of warm, buttery dough rolled with rich brown sugar and cinnamon creates a flavor explosion that my grandmother mastered.
What truly makes these rolls stand out is the icing. It’s a luscious blend of cream cheese and vanilla that adds a tangy sweetness, coating each roll in delightful decadence. Honestly? It’s like the cherry on top—if cherries were made of cream cheese and sugar!
The dough itself is soft and springy, making it the perfect canvas for holding those swirls of cinnamon magic. Adding a bit of patience and love transforms simple ingredients into a warm hug for your taste buds. Plus, I’ve got a few tricks up my sleeve that ensure your rolls are perfect every time.
Ingredients
For the Dough:
- 4-5 cups (520g-650g) all-purpose flour: This is the backbone of the rolls. Spoon and level for accuracy!
- 1/4 cup (50g) granulated sugar: Adds a touch of sweetness to the dough, making for a delicious base.
- 2 1/4 teaspoons (1 package) instant yeast: The magic ingredient that helps your rolls rise beautifully.
- 1/2 teaspoon salt: Essential for enhancing flavors.
- 3/4 cup (180mL) water: Needed for the yeast to activate.
- 1/2 cup (120mL) whole milk: Adds richness to the dough.
- 1/4 cup (60g) unsalted butter (cut into 4 slices): This buttery goodness makes the rolls tender.
- 1 large egg: Binds everything together and adds moisture.
For the Filling:
- 6 tablespoons (85g) unsalted butter (very soft): Creates layers of flavor and moisture.
- 3/4 cup (150g) packed brown sugar: This brings that rich, caramel-like flavor that makes cinnamon rolls so special.
- 1 1/2 tablespoons ground cinnamon: The star of the show!
For the Icing:
- 4 oz (115g) full-fat block cream cheese (room temperature): This gives your icing a velvety creaminess.
- 5 tablespoons (70g) unsalted butter (room temperature): More buttery goodness for the icing.
- 1 1/2 cups (195g) powdered sugar: This is what sweetens up your icing to perfection.
- 1 teaspoon pure vanilla extract: A hint of vanilla ties the flavors together beautifully.
Each ingredient here plays an essential role, and I recommend using high-quality substitutes whenever possible. For example, I love using King Arthur Flour for my dough because it gives perfect results every time. Pro tip: you may want to avoid using skim milk here; the whole milk is key for that rich flavor and texture.
How to Make It Step-by-Step
-
Combine the Dry Ingredients: In a large bowl, combine 3 cups of flour (start with this; we’ll adjust later if needed), sugar, yeast, and salt. Give it a good whisk and set it aside. The smell of fresh flour is already promising!
-
Heat the Wet Ingredients: Grab a medium microwave-safe bowl and combine the water, milk, and sliced butter. Heat it in the microwave in 10-second bursts until the butter melts and everything feels warm—think warm cocoa cozy vibes without being scalding hot. If you overheat, just know it’ll affect the yeast.
-
Add the Egg: Whisk the egg right into the warm mixture. This process makes it easier to blend everything together later.
-
Mix It Up: Pour the warm, eggy mixture over the dry ingredients. With a wooden spoon, mix until you have a very thick and sticky dough. Don’t be alarmed if it feels like a wet mess; that’s the plan!
-
Incorporate More Flour: Gradually add that last cup of flour, mixing until it starts forming a ball. This is where the magic happens, so get in there with your hands if you want to feel the dough come together (just be prepared for a little mess!).
-
Knead the Dough: On a lightly floured surface, knead the dough until it’s smooth, elastic, and slightly tacky. This will take about 5 minutes. If you poke the dough and it springs back, you’re on the right track!
-
Let It Rest: Cover the dough and let it rest for about 20 minutes. This process is known as autolyse; it relaxes the gluten and makes rolling it out easier.
-
Roll It Out: Once rested, turn the dough out onto a floured surface and roll it into a 14×10 inch rectangle. It doesn’t have to be perfect, but try to stretch it out evenly—that way each roll will have an even amount of filling.
-
Spread the Butter and Filling: Spread the softened butter over the dough, leaving about a 1/2 inch border. Sprinkle the brown sugar evenly over the butter, then the ground cinnamon. Your kitchen will start smelling amazing—seriously.
-
Roll It Up: Starting from the long side of the rectangle, roll it into a log, trying to keep it tight (but not too tight!).
-
Trim the Ends: Cut off about 1/2 an inch from each end—it makes for a prettier roll when you slice.
-
Slice Your Rolls: Using a serrated knife or unflavored dental floss, cut the log into 12 even rolls. The floss trick is a game changer—no squishing, just clean cuts!
-
Arrange in the Pan: Place those beauties, cut side up, in a greased 9×13 inch baking dish. They can touch a bit—that’s normal!
-
Second Rise: Cover the rolls and let them rise in a warm spot for about 45 minutes until they double in size. No peeking, but trust me, this is where the magic happens!
-
Bake to Perfection: Preheat your oven to 350°F (175°C). Once the rolls have risen, bake them for 25-30 minutes, until golden brown on top.
-
Prepare the Icing: While the rolls are baking, mix up your icing. In a medium bowl, beat cream cheese, butter, powdered sugar, and vanilla extract until smooth and creamy.
-
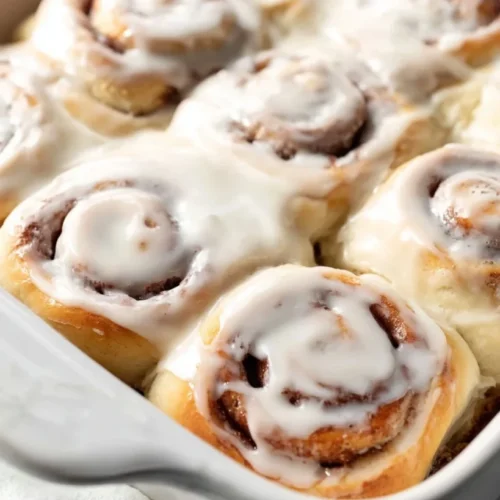
Ice Those Rolls: Let the rolls cool for a few minutes, then generously spread the icing over the warm rolls. Trust me, you want the icing to melt slightly into every nook and cranny for maximum gooeyness.
Tips for Best Results
-
Don’t rush the rising time: Allow the dough to rise until it’s fluffy and has doubled in size. Patience is key here!
-
Temperature: Make sure your butter and egg are at room temperature. This helps them blend seamlessly into the dough.
-
Flour Amount: Don’t add too much flour early on. You can always add more during kneading if it’s too sticky.
-
Rolling Technique: When rolling the dough, try to roll tightly but not overly so—this helps create those beautiful layers.
-
Watch the Baking: Keep an eye on your rolls towards the end of baking to prevent over-browning. If the tops get too dark, cover them loosely with foil.
Ingredient Substitutions & Variations
-
Dairy-Free Alternative: Swap the milk for almond milk and use vegan butter to make this delicious treat dairy-free!
-
Gluten-Free Flour: If you’re gluten-free, replace the all-purpose flour with a 1-to-1 gluten-free baking flour. Just make sure it has xanthan gum included for best results.
-
Add-Ins: Feel free to mix in chopped nuts or raisins into your filling for some extra crunch or chewiness.
-
Flavor Twists: Experiment with other spices like nutmeg or cardamom for a unique twist. Cinnamon isn’t the only spice in town, after all!
Directions
The best part about these rolls? They pair wonderfully with plenty of beverages. Enjoy them with a side of fresh fruit or a cup of rich coffee for that perfect full English breakfast vibe. Honestly, me and a rom-com with these rolls at hand? Just perfection!
How to Store and Reheat Leftovers
If you manage to have leftovers (which is rare!), store them in an airtight container at room temperature for 2-3 days. To reheat, simply pop them in the microwave for 15 seconds, and you’ll be back in cinnamon roll heaven in no time.
Make-Ahead and Freezer Tips
You can easily prepare the dough the night before! Let it rise as per instructions, then shape your rolls, place them in the baking dish, cover, and refrigerate overnight. In the morning, just let them sit at room temperature for about 30 minutes, then bake. Alternatively, you can freeze them before the second rise. Just wrap your sliced rolls tightly in plastic wrap and they’ll keep for up to 3 months. Thaw overnight in the fridge and let rise before baking.
Common Mistakes to Avoid
-
Overworking the Dough: Kneading too much can make the rolls tough—aim for a happy, soft texture instead.
-
Skipping the First Rise: This leads to dense rolls that are less than desirable. Don’t skip it!
-
Too Much Flour: Adding too much flour at once can lead to dry cinnamon rolls. Be light-handed!
Frequently Asked Questions (FAQ)
Can I use active dry yeast instead of instant yeast?
Yes, you can! You just need to activate it first in warm water for about 5-10 minutes before adding it to your mixture.
What if my dough doesn’t rise?
Make sure your yeast is fresh. If it’s outdated, it might not activate properly. Also, check if your environment is warm enough for the dough to rise.
Can I use less sugar?
You can scale back on sugar, but keep in mind that it does contribute to the flavor and moisture of the rolls.
Cooking Tools You’ll Need
- Large mixing bowl
- Wooden spoon (or dough whisk for the pros)
- Microwave-safe bowl
- Rolling pin
- Measuring cups and spoons
- Serrated knife or unflavored dental floss
- 9×13 inch baking dish
Final Thoughts
Baking these best homemade cinnamon rolls has become a cherished ritual in my home. Each time I pull out the mixing bowl and roll up my sleeves, I’m taken back to my grandmother’s kitchen, surrounded by warmth and love. This recipe isn’t just about the finished product; it’s about the rays of happiness they bring to your table and those you share them with.
So, if you decide to take on this delightful baking adventure, remember: embrace the messiness of it all, imperfections included. Cooking is about the experience and your journey. I can’t wait to hear how your cinnamon rolls turn out!
If you enjoyed this recipe, don’t forget to save it on Pinterest or share it with a friend! Let’s keep the joy of baking alive, one sticky cinnamon roll at a time.
Homemade Cinnamon Rolls
Ingredients
For the Dough
- 4-5 cups all-purpose flour Spoon and level for accuracy!
- 1/4 cup granulated sugar Adds a touch of sweetness to the dough.
- 2 1/4 teaspoons instant yeast Helps your rolls rise beautifully.
- 1/2 teaspoon salt Essential for enhancing flavors.
- 3/4 cup water Needed for the yeast to activate.
- 1/2 cup whole milk Adds richness to the dough.
- 1/4 cup unsalted butter (cut into 4 slices) Makes the rolls tender.
- 1 large egg Binds everything together.
For the Filling
- 6 tablespoons unsalted butter (very soft) Creates layers of flavor.
- 3/4 cup packed brown sugar Brings caramel-like flavor.
- 1 1/2 tablespoons ground cinnamon The star of the show!
For the Icing
- 4 oz full-fat block cream cheese (room temperature) Provides velvety creaminess.
- 5 tablespoons unsalted butter (room temperature) More buttery goodness.
- 1 1/2 cups powdered sugar Sweetens up your icing.
- 1 teaspoon pure vanilla extract Ties the flavors together.
Instructions
Preparation
- In a large bowl, combine 3 cups of flour, sugar, yeast, and salt. Whisk and set aside.
- Heat water, milk, and sliced butter in the microwave until warm, being careful not to scald it.
- Whisk the egg into the warm mixture.
- Pour the warm mixture over the dry ingredients and mix until a thick and sticky dough forms.
- Gradually add the last cup of flour until the dough starts forming a ball.
- Knead the dough on a floured surface until smooth and slightly tacky, about 5 minutes.
- Cover the dough and let it rest for 20 minutes.
- Roll the dough into a 14x10 inch rectangle.
- Spread softened butter over the dough, leaving a 1/2 inch border. Sprinkle with brown sugar and cinnamon.
- Roll the dough tightly from the long side into a log.
- Trim the ends and slice the log into 12 even rolls.
- Arrange the rolls cut side up in a greased 9x13 inch baking dish.
Baking
- Cover rolls and let them rise in a warm spot for about 45 minutes until doubled in size.
- Preheat your oven to 350°F (175°C) and bake the rolls for 25-30 minutes until golden brown.
- While baking, mix icing ingredients until smooth and creamy.
- After baking, let rolls cool for a few minutes, then generously ice them.


