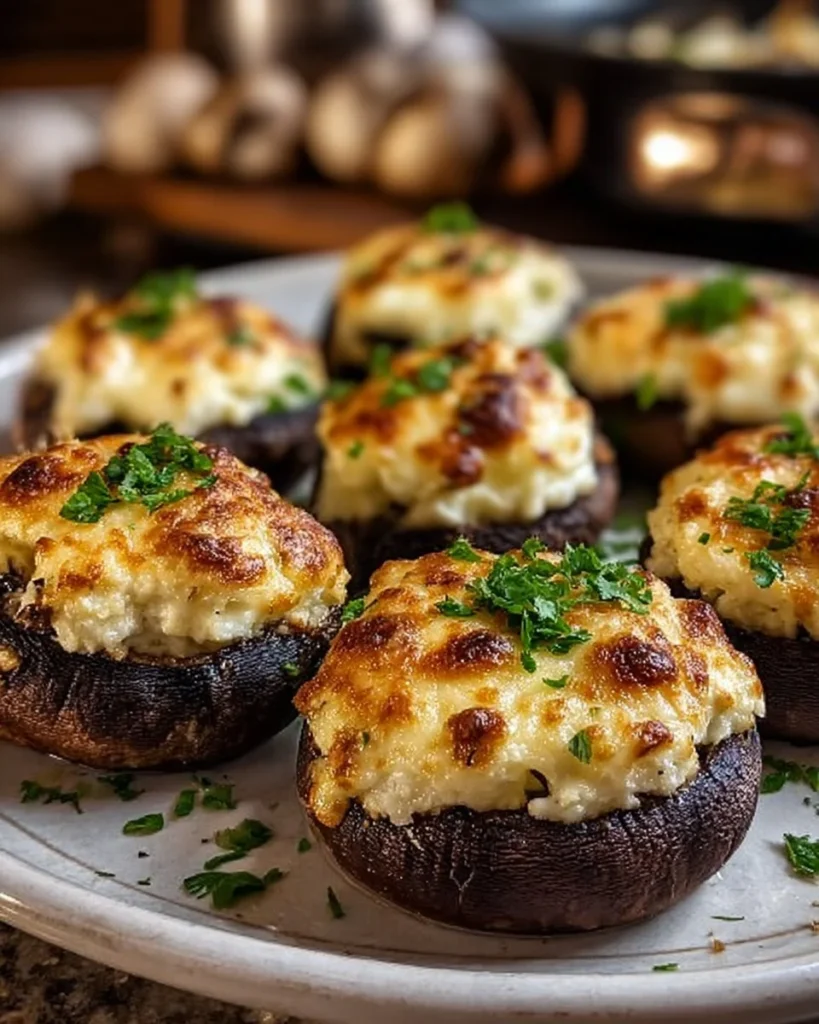

Easy Baked Ricotta-Stuffed Mushrooms: A Cozy Delight
I still remember the first time I encountered baked stuffed mushrooms. It was at my aunt’s house during one of those potluck family gatherings that even the most introverted person can’t resist. The scent wafting from her kitchen was intoxicating—earthy mushrooms mingling with garlic and fresh herbs. Y’all, I thought I had died and gone to flavor heaven! Just thinking about it now puts a smile on my face.
After just one bite of those cheesy, herb-studded delights, I had my heart set on replicating that magic at home. And let me tell you, my first few tries were… let’s say, “experimental.” The mushrooms popped open in the oven like tiny flavor bombs, but not in the good way. Some were too soggy, others had more cheese overboard than I’d care to admit. Oops! I’m still trying to figure out that balance between the stuffing and mushroom, but the beauty of my Easy Baked Ricotta-Stuffed Mushrooms is that they’re forgiving. No culinary school needed—just your love and willingness to dive into a little kitchen chaos!
Typically made for parties, as a side dish, or even a fancy appetizer, these stuffed mushrooms have become the ultimate comforting snack for me. There’s something undeniably cozy about cozy evenings with soft lighting, a bottle of sparkling water, and these mushroom bites. It’s like wrapping yourself up in a favorite blanket as a brisk autumn breeze rolls outside.
So today, let’s jump into these heavenly little bites that are not only high in protein but also deliver a healthy comfort food punch. Whether you’re whipping them up for an easy weeknight dinner or a gathering with friends, these baked ricotta-stuffed mushrooms are bound to please.
Why You’ll Love This Recipe
- Quick to Prepare: Ready in just about 30 minutes—from mixing to baking, you can whip these up between episodes of your latest binge-watch.
- Crowd-Pleaser: Tastes even better than they look! Perfect for impressing guests or something special just for yourself.
- Customize to Your Heart’s Desire: Swap in your favorite herbs or even mix up the cheeses. Go wild!
- Leftover Magic: These little wonders taste just as good—even better!—for lunch the next day. Hello, meal prep win!
- Low-calorie Comfort: Stuffed with nutrient-rich ricotta and fresh herbs, these mushrooms deliver comfort without the calorie guilt.
- Picky Eater Approved: Even my most discerning family members can’t resist these cheesy mushroom delights!
What Makes This Recipe Special?
The unique flavors in my Baked Ricotta-Stuffed Mushrooms come from a few simple, yet high-quality ingredients. You’ve got the creamy texture of ricotta cheese, the sharpness of Parmesan, the punch from garlic, and a rainbow of flavors from fresh herbs. Honestly, I didn’t expect that combo to pack such a flavorful punch!
Each bite is an explosion of rustic Italian comfort, reminiscent of long dinners spent laughing and sharing stories—definitely a recipe worth keeping in your rotation. The toasty notes from the oven and the fresh herbal scent will make your home feel like it’s straight out of a food magazine.
Ingredients
- 12 large mushrooms (stems removed): The perfect vessels for our filling! Look for plump, firm ones.
- 1 cup ricotta cheese: Creaminess to the max! Adds a soft texture and mild flavor.
- 1/2 cup grated Parmesan cheese: A little salty zing that brings everything together.
- 1/4 cup chopped fresh herbs (such as parsley, basil, or thyme): Whatever’s fresh in your garden or fridge! This is your chance to be adventurous!
- 1 clove garlic (minced): Because garlic makes everything better, right?
- Salt and pepper to taste: For that seasoning love—totally essential!
- Olive oil for drizzling: This adds that little extra richness and helps in achieving a golden top.
A Few Tips
To be real, avoid the pre-packaged mushrooms—they can be watery. Go fresh! Also, don’t skip the seasoning. Without it, you’re just left with bland mush, and we all know that’s a disaster. And trust me, no one wants that!
How to Make It Step-by-Step
Now, let’s get down to the fun part—making these beauties! Grab your apron and let’s channel our inner chefs!
-
Preheat the Oven: Set that bad boy to 375°F (190°C). Your kitchen will soon smell divine.
-
Mushroom Prep: Carefully remove the stems from each mushroom. If you’re feeling adventurous, chop them up and toss them into your stuffing mix! But don’t worry if that sounds like too much work—just shove those puppies into the oven next.
-
Mixing Magic: In a mixing bowl, combine the ricotta, Parmesan, herbs, garlic, salt, and pepper.
Visualize this—whipping up the creamy goodness while the garlic wafts around your kitchen. I can almost hear my friends saying, “What’s cooking?”
-
Stuff It Right: Grab a small spoon and start stuffing those mushrooms! Don’t hold back; pack it in there lightly till each cap is full of cheesy goodness. And hey, it’s okay if a little overflows. That just gets extra crispy in the oven!
-
Drizzle Delight: Place your stuffed mushrooms on a baking sheet and give them a gentle drizzle of olive oil. It’ll help with that golden color we’re all chasing.
-
Baking Bliss: Pop them into the oven for about 15-20 minutes. You’ll know they’re ready when the mushrooms are tender and the tops are golden brown. Those little bubbly bits? Gold!
While they’re doing their thing, take a moment. Pour yourself a drink, light a candle, play some music—make it a vibe!
-
Serve and Enjoy: Let them cool for a moment before diving in. Honestly, the anticipation makes that first bite taste even better!
Tips for Best Results
- Fresh Is Best: Always opt for fresh herbs over dried for a pop of flavor.
- Don’t Overstuff: Okay, a little excess looks cute, but if you pack ’em too tightly, you might end up with a gooey mess! Fight the urge, trust me!
- Experiment with Cheese: Feel free to mix in some feta, mozzarella, or even a little goat cheese if you want to get fancy.
Ingredient Substitutions & Variations
- Vegan Version: Swap the ricotta for a cashew nut cream or vegan cheese.
- Seasonal Twist: Try adding spinach or sun-dried tomatoes to the mix for added flair.
- Spice it Up: If you’re feeling adventurous, throw in a pinch of red pepper flakes for a kick!
Directions
- Preheat your oven to 375°F (190°C).
- In a mixing bowl, combine the ricotta, Parmesan, herbs, garlic, salt, and pepper.
- Stuff each mushroom cap with the cheese mixture.
- Place on a baking sheet, drizzle with olive oil.
- Bake for 15-20 minutes until golden and tender.
- Serve warm and savor!
Pairing Ideas (Drinks, Sides, etc.)
Oh, let’s chat about the best pairings! For drinks, I love a crisp white wine or a sparkling water with a sprinkle of lime. Pair these stuffed wonders with a light salad or even atop some toasted baguette slices. Heck, grab a romantic comedy, snuggle up, and enjoy your masterpiece! This and a rom-com? Perfection.
How to Store and Reheat Leftovers
Let’s be honest, if there are any leftovers, you’ve done something right! Store your stuffed mushrooms in an airtight container in the fridge. When it’s time to reheat, it’s best to pop them in the oven for a few minutes to keep that crispy exterior. Microwaving them can lead to a soggy situation—nobody wants that!
Make-Ahead and Freezer Tips
You can prepare the mushroom filling ahead of time and store it in the fridge for up to two days. Just stuff the mushrooms before you’re ready to bake!
If all else fails, you can freeze the stuffed mushrooms before baking. Just lay them out on a baking tray to freeze before transferring them to a freezer bag. When you’re ready to enjoy, simply pop them in the oven straight from the freezer, adding a few extra minutes to the bake time.
Common Mistakes to Avoid
- Not Cleaning the Mushrooms: Brush off any dirt or debris. No one wants gritty mushrooms!
- Rushing the Bake Time: Patience, my friend. Let them cook until they’re golden and perfect.
- Too Much Filling: Remember, the filling is the star, but the mushroom cap is the stage. Don’t overshadow it!
Frequently Asked Questions (FAQ)
Q: Can I use different types of mushrooms?
A: Absolutely! Portobello mushrooms would be amazing, but just remember they will have a different bake time.
Q: Can I make them ahead?
A: Yes! Prep the filling and stuff the mushrooms ahead of time. Just remember to store them in the fridge until you’re ready to bake.
Q: What can I do if I have leftover stuffing?
A: Use it in pasta or spread it on toast—you can’t go wrong!
Cooking Tools You’ll Need
- Baking sheet
- Mixing bowl
- Spoon for stuffing
- Knife for chopping herbs
- Oven (of course!)
Final Thoughts
My Baked Ricotta-Stuffed Mushrooms have evolved from those early kitchen disasters into a staple in my cooking routine. They remind me that cooking doesn’t have to be perfect; it just has to be delicious and made with love. The rubble of fallen mushrooms and spilled herbs becomes a memory rather than a failure.
So, grab your ingredients, get in the kitchen, and try these out! I can’t wait to hear how yours turn out. If you enjoyed this recipe, don’t forget to save it on Pinterest or share it with a friend!

Baked Ricotta-Stuffed Mushrooms
Ingredients
Mushroom Base
- 12 large large mushrooms (stems removed) Look for plump, firm mushrooms.
Cheese Filling
- 1 cup ricotta cheese Adds a soft texture and mild flavor.
- 1/2 cup grated Parmesan cheese A little salty zing that elevates the dish.
Herbs and Seasoning
- 1/4 cup chopped fresh herbs (such as parsley, basil, or thyme) Use whatever’s fresh!
- 1 clove garlic (minced) Enhances flavor.
- to taste salt and pepper Essential for seasoning.
Finishing Touch
- to drizzle tbsp olive oil Adds richness and promotes a golden top.
Instructions
Preparation
- Preheat your oven to 375°F (190°C).
- Carefully remove the stems from each mushroom and chop them if desired.
Mixing the Filling
- In a mixing bowl, combine the ricotta, Parmesan, herbs, garlic, salt, and pepper.
Stuffing the Mushrooms
- Stuff each mushroom cap with the cheese mixture using a small spoon.
- Drizzle the stuffed mushrooms with olive oil and place them on a baking sheet.
Baking
- Bake the mushrooms for 15-20 minutes until golden brown and tender.
Serving
- Let them cool slightly before serving warm.


