
The Best Easy Pink Velvet Cake for Mother’s Day
Mother’s Day, a holiday meant to celebrate the incredible women in our lives, often comes with both expectations and a sprinkle of heartwarming chaos. As I reminisce about past Mother’s Days, one particular memory stands out—baking my first Pink Velvet Cake. I remember squinting at the recipe in my grandmother’s well-loved cookbook, my heart racing as I measured ingredients with trembling hands. I was determined to create a masterpiece, but let’s be real—I had mixed everything a bit too vigorously. The kitchen turned into a scene that looked like an explosion of flour. But, alas, instead of disaster, I created a cake that made everyone smile.
Honestly, it may not have been the prettiest cake, but as my mom took the first bite, her eyes lit up with joy. That cake became a symbol of love and effort, something I strive to replicate every Mother’s Day. The scent of buttery vanilla and cocoa wafting through the house set the stage for a cozy celebration. With no shortage of laughter and a hint of unexpected spills, we gathered around the table to share stories, enjoy the cake, and celebrate our bond.
What makes this Pink Velvet Cake iconic isn’t just its delightful blend of flavors—it’s the love and warmth wrapped up in every layer. It’s for the messy moments in the kitchen, the little oops moments when you realize you forgot to preheat the oven—seriously, how many times have we all been there? This year, I’m sharing this easy and delicious recipe to help you create your own beautiful memories, regardless of culinary experience.
So grab your apron and let’s get started on this cake that truly feels like a hug in cake form!
Why You’ll Love This Recipe
- Easy to Make: If I could toss flour around with reckless abandon as a novice baker, you can whip this up too!
- Perfect for Leftovers: Trust me, if there are any leftovers, they provide an excellent excuse for breakfast all week long!
- Kid-Friendly: Even the pickiest of eaters are generally on board once they hear "cake"!
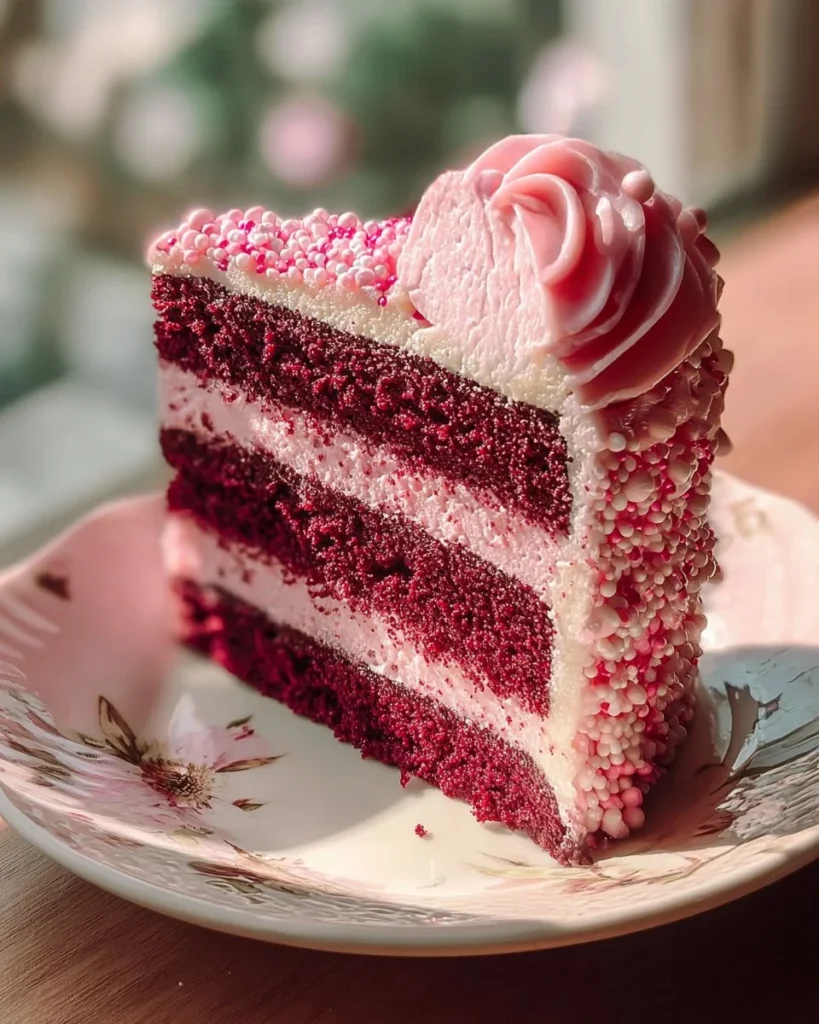
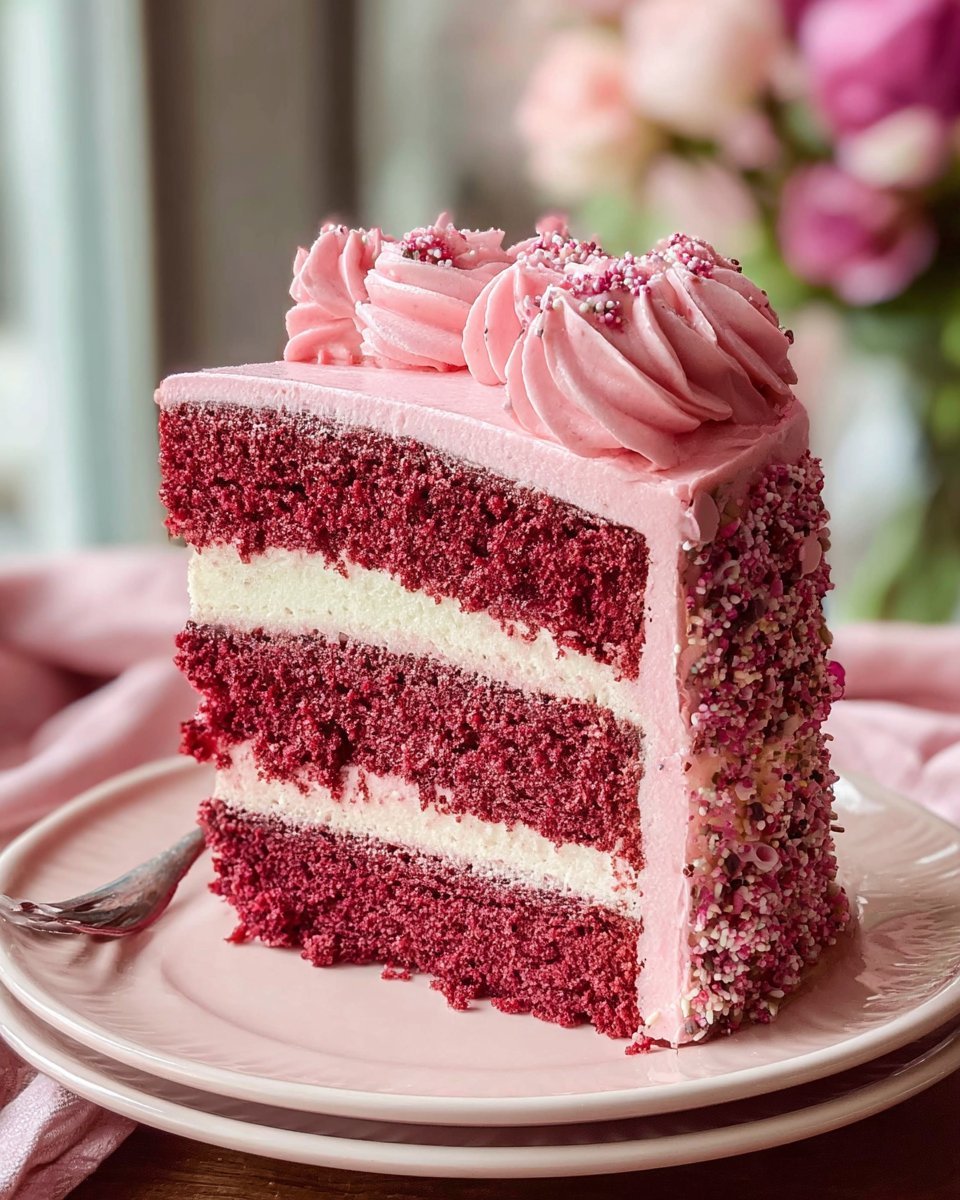
- Beautiful Presentation: The vibrant pink hue is sure to wow your family and friends; it looks like a floral bouquet on a plate.
- Comforting Sweetness: The combination of fluffy cake paired with rich cream cheese frosting feels like home.
- Memories in the Making: Whether you’re celebrating Mom or treating yourself, the act of baking bonds you over shared love and laughter.
What Makes This Recipe Special?
This cake has a unique twist on a classic. The cocoa powder and red food coloring give it that signature pink hue, striking a lovely balance between the lightness of vanilla and the deep undertones of chocolate. It’s not just about color; it’s about flavor and texture—a perfectly fluffy cake that melts in your mouth. Each slice is a conversation starter, sparking stories from our childhoods and the places we associate with sweet treats.
Whenever I bake it, I think of the first time my grandmother made it for me—her secret ingredient was always a touch of love and a sprinkle of mischief. I sometimes incorporate an extra dash of vanilla or even almond extract to elevate the experience, creating layers of flavor that are as unexpected as they are delightful.
The cream cheese frosting is another star—smooth and tangy, it’s like the cherry on top of an already remarkable cake. And, let’s be real, if a cake isn’t frosted, did you even bake it?
Ingredients
- 2 ½ cups cake flour: The foundation of a fluffy cake. Using cake flour helps achieve that airy texture.
- 1 ¾ cups granulated sugar: Sweetness is essential. This helps balance the cocoa powder too.
- ½ cup unsweetened cocoa powder: Don’t underestimate this! It adds depth and a hint of chocolatey goodness.
- 1 tbsp baking powder: This gives the cake lift, making it light and fluffy.
- ½ tsp salt: A dash of salt enhances sweetness and balances flavors.
- ¾ cup unsalted butter, softened: For richness! Softened ensures that it creams well with sugar.
- 4 large eggs (room temperature): Helps in emulsifying the batter, leading to a smoother cake.
- 1 cup buttermilk: Adds moisture and a subtle tang. If you don’t have buttermilk, regular milk with a splash of vinegar works too!
- 2 tsp pure vanilla extract: The essence of baking; it enhances other flavors beautifully.
- Red food coloring: The fun part! Achieve your desired pink hue, and don’t be shy about it.
- Cream cheese frosting: The crowning glory! It’s the best part.
Tips and Tricks
- Don’t rush the creaming process! Trust me, beating the butter and sugar until fluffy will yield magical results.
- Room temperature eggs and butter are non-negotiable. Cold ingredients can lead to a dense cake.
- Always adjust your baking time to your oven’s quirks. Ovens can be like personalities—some run hot, some cool!
How to Make It Step-by-Step
First and foremost, preheat your oven to a cozy 350°F (175°C). While it warms up, grease your two 9-inch cake pans—trust me, nothing’s worse than your cake sticking to the pan.
In a large mixing bowl, whisk together 2 ½ cups of cake flour, ½ cup of unsweetened cocoa powder, 1 tbsp of baking powder, and ½ tsp of salt. I love using a whisk for this; it’s therapeutic. Honestly, it looks like the perfect combination of dry ingredients—the smell of cocoa is just divine!
Now, in another bowl, cream together ¾ cup of softened unsalted butter and 1 ¾ cups of granulated sugar. You want this to be light and fluffy—around 4 to 5 minutes of mixing. It should almost look like whipped clouds. I once got excited and thought I could skip this step—I ended up with a dense, sad cake.
Next, add 4 large room-temperature eggs, one at a time, beating well after each addition. The batter should get nice and creamy. Add in 1 cup of buttermilk, 2 tsp of vanilla extract, and a few drops of red food coloring. Mix until combined.
Here comes the fun part! Gradually fold in your dry ingredients. Be gentle—no need to knock out all those air bubbles you just worked hard to create. The batter will be thick, but oh-so-smooth. I like to get it in my mixing bowl to see the colors meld together; it’s like a paint palette!
Once your batter is beautifully blended, divide it evenly between the prepared pans. Seeking perfection? Just eyeball it, or use a scale. Slide those pans into your preheated oven and set the timer for 25-30 minutes. You’ll know they’re done when a toothpick comes out clean.
While the cakes bake, your kitchen will fill with the most mouthwatering aroma. Seriously, it’s like heaven!
After 10 minutes of cooling in the pans, carefully transfer them to a wire rack to cool completely. Now’s the time to take a break and clean that kitchen chaos I mentioned. But hold on! Don’t forget the best part—the cream cheese frosting.
Make it while your cakes cool by mixing 8 oz of cream cheese, ½ cup of unsalted butter, 4 cups of powdered sugar, and a splash of vanilla until smooth and creamy. Just a note—this frosting can sometimes put up a fight, but just keep beating until it lights up like a cloud!
Now, you can frost your cakes. I like to get a little creative here. Sometimes I stack them, sometimes I layer frosting with fresh fruit in between. Either way, the outcome is a delightful visual treat that tastes even better.
Tips for Best Results
- Don’t overmix your batter—this can lead to a tougher cake; gently fold until just combined.
- Let the cakes cool completely before frosting to avoid melting your cream cheese frosting.
- Use a serrated knife to level your cakes if needed—they’ll stack better and look prettier.
Ingredient Substitutions & Variations
Want to mix it up? Here are some ideas:
- Swap regular flour for gluten-free cake flour, and enjoy this treat without gluten.
- Use Greek yogurt instead of buttermilk for a healthier twist.
- Craving something unique? Try adding a zest of lemon or orange in your frosting for a citrusy kick.
- Feeling adventurous? Toss in some sprinkles into the batter for a fun surprise!
Directions
- Preheat oven to 350°F (175°C) and grease two 9-inch round cake pans.
- Whisk together cake flour, cocoa powder, baking powder, and salt in a bowl.
- In another bowl, cream softened butter and granulated sugar until light and fluffy.
- Add eggs, one at a time, beating well after each.
- Mix in buttermilk, vanilla extract, and enough red food coloring to achieve desired hue.
- Gradually fold in dry ingredients until smooth.
- Divide batter between prepared pans and bake for 25-30 minutes or until a toothpick comes out clean.
- Cool cakes in pans for ten minutes before transferring to wire racks to cool completely.
- Frost as desired with cream cheese frosting!
Layer it, spread it, or create rosettes—whatever speaks to you. A glass of milk or a hot cup of tea pairs perfectly with this cake.
How to Store and Reheat Leftovers
If you somehow have leftovers (what a miracle!), wrap your cake tightly in plastic wrap or store in an airtight container. It can last up to 3 days at room temperature; however, I recommend keeping it in the fridge if you’re using cream cheese frosting—not that it ever sticks around that long!
To reheat slices, pop them in the microwave for about 10-15 seconds. The goal here is to warm it up gently, not cook it anymore. Pair that warm slice with a cup of coffee, and you’re golden!
Make-Ahead and Freezer Tips
Want to prep ahead? Bake the cake a day in advance and frost it when you’re ready to serve. You can also freeze the unfrosted cake. Just ensure you wrap it tightly in plastic wrap and place it in an airtight container. It can last for up to three months frozen!
When ready to enjoy, simply thaw in the fridge overnight, then frost the next day. Trust me; it’ll be just as delicious!
Common Mistakes to Avoid
- Avoid opening the oven door too early; it might cause the cake to sink.
- Don’t skip the cooling step! Frosting too warm cakes leads to a soupy mess (yep, been there).
- Overfilling the pans can lead to batter spillage, and who wants to clean that up?
Frequently Asked Questions (FAQ)
Can I use different food coloring?
Absolutely! You can mix colors to get the desired hue or even use natural dyes for a less artificial alternative.
Why did my cake sink?
Most likely, it’s due to opening the oven door while baking or not properly measuring your ingredients.
How can I make my cake more chocolatey?
Try adding an extra tablespoon of cocoa powder to the batter!
Cooking Tools You’ll Need
- Two 9-inch round cake pans
- Mixing bowls (one large for dry, one for wet)
- Whisk and spatula
- Measuring cups and spoons
- Cooling rack
- Mixer (hand or stand)
Final Thoughts
Baking this Pink Velvet Cake is more than just making dessert; it’s about creating treasured memories and sharing love through food. As you bake this beautiful cake for Mother’s Day, take a moment to reflect on the sweet moments you’ve had and the laughs shared around the table.
If you’ve enjoyed this recipe, please share it with a friend or save it for later on Pinterest! Here’s to many delicious cakes and warm memories ahead!
Pink Velvet Cake
Ingredients
Dry Ingredients
- 2 ½ cups cake flour Helps achieve a fluffy texture.
- ½ cup unsweetened cocoa powder Adds depth and chocolate flavor.
- 1 tbsp baking powder Provides lift to the cake.
- ½ tsp salt Enhances sweetness and balances flavors.
Wet Ingredients
- ¾ cup unsalted butter, softened For richness in flavor.
- 1 ¾ cups granulated sugar Adds sweetness to balance cocoa.
- 4 large eggs Should be at room temperature.
- 1 cup buttermilk Adds moisture and a subtle tang.
- 2 tsp pure vanilla extract Enhances flavor.
- Red food coloring To achieve desired pink hue.
Cream Cheese Frosting
- 8 oz cream cheese Base for the frosting.
- ½ cup unsalted butter For richness.
- 4 cups powdered sugar Provides sweetness to the frosting.
- splash vanilla extract Enhances frosting flavor.
Instructions
Preparation
- Preheat your oven to 350°F (175°C) and grease two 9-inch round cake pans.
- In a large mixing bowl, whisk together the cake flour, cocoa powder, baking powder, and salt.
Mixing the Batter
- In another bowl, cream together the softened butter and granulated sugar until light and fluffy.
- Add the eggs one at a time, beating well after each addition.
- Mix in the buttermilk, vanilla extract, and red food coloring until combined.
- Gradually fold in the dry ingredients until the batter is smooth.
Baking the Cake
- Divide the batter evenly between the prepared pans and bake for 25-30 minutes or until a toothpick comes out clean.
- Allow the cakes to cool in the pans for 10 minutes, then transfer to a wire rack to cool completely.
Making the Frosting
- Mix the cream cheese, unsalted butter, powdered sugar, and vanilla extract until smooth and creamy.
Frosting the Cake
- Once the cakes are completely cool, frost with the cream cheese frosting as desired.


