

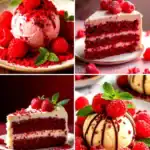
The Best Easy Red Velvet Cake Recipe
When you think of classic desserts that elicit a wave of nostalgia, red velvet cake surely tops the list. Honestly, there’s something irresistibly charming about its vibrant red hue, contrasting cream cheese frosting, and the unique hint of cocoa. For me, red velvet brings back memories of my childhood—family get-togethers, cheerful birthdays, and, whether I like to admit it or not, a few culinary disasters when I first attempted to recreate it in my kitchen.
The first time I tried my hand at red velvet cake, let’s just say it turned into a full-on science experiment gone wrong. I misread "teaspoon" as "tablespoon" with the baking soda (oops!), and let’s just say my cake puffed up like a balloon before dramatically deflating. The flavor was still delicious—my friends and family graciously devoured it—but the aesthetics? Let’s just say they left much to be desired.
Fast-forward a few years, and I finally nailed a version that I love. This easy red velvet cake recipe is not just about the looks; it’s a blend of flavors, comfort, and a sprinkle of love—and trust me, it’s become my go-to for almost every festive or cozy occasion. It’s like a hug in cake form! With its moist layers, a hint of cocoa, and that luscious cream cheese frosting, it impresses without needing a culinary degree or any fancy gadgets.
Think cozy evenings snuggled under a blanket with a slice of this magnificent cake, or a sunny afternoon gathering with friends. The rich scent of vanilla and frosting wafting through the air, the cake proudly displayed on the table, it’s honestly quite the sight! Yes, it’s a playful indulgence, and to be real, nobody’s counting calories when there’s a delicious red velvet cake in front of them.
Why You’ll Love This Recipe
- Easy to Make: Perfect for beginner bakers or those who want something impressive without the fuss.
- Moist and Flavorful: Thanks to the oil and kefir (or buttermilk), the cake is tender and delightful.
- Picky-Eater Approved: Kids and adults alike can’t resist the allure of red velvet—seriously, it’s that good!
- Meal Prep Winner: You can bake it ahead of time and frost it when you’re ready to impress.
- Perfect for Any Occasion: Birthdays, holidays, or just a cozy night in; the cake fits any celebration.
What Makes This Recipe Special?
This recipe stands out partly because of its rich history. Originating in the South U.S., red velvet cake has been cherished for generations. The unique combination of subtle cocoa flavor, moistness from oil, and slight tang from the kefir creates an unforgettable bite. Plus, the infusion of red food coloring makes it a festive choice that brings cheer to any table.
As you gather the ingredients, imagine the scent of butter, cream cheese, and vanilla filling your kitchen—it’s truly comforting. Plus, trust me when I say that this cake will earn you some serious bragging rights at any gathering. Sharing it brings joy not just to your guests but to yourself as the proud baker!
Ingredients
For the Cake:
- 2 1/2 cups flour: Provides the structure while keeping the cake light.
- 1 1/2 cups granulated sugar: Sweetens it perfectly, balancing the rich flavors.
- 1 teaspoon cocoa powder: Just a hint to give that traditional red velvet taste.
- 1 teaspoon baking soda: Helps the cake rise beautifully.
- 1/2 teaspoon salt: Elevates all the flavors and balances the sweetness.
- 1 cup vegetable oil: Keeps the cake moist and tender.
- 1 cup kefir (or buttermilk): Adds a delicious tang and moisture.
- 2 large eggs: Binds everything together.
- 1 teaspoon white vinegar: Reacts with the baking soda for a fluffy texture.
- 1 teaspoon vanilla extract: Enhances the flavor profile.
- 1 tablespoon red food coloring (gel recommended): For that classic red hue.
For the Frosting:
- 200 g cream cheese: The star of the frosting; creamy and dreamy.
- 100 g butter (at room temperature): Adds richness and smoothness.
- 2 cups powdered sugar: Sweetens the frosting to perfection.
- 1 teaspoon vanilla extract: Again, to amplify the flavor.
Personal Tips:
- Choosing Your Ingredients: I often opt for high-quality cocoa, as it makes a world of difference. Don’t skimp here!
- For Best Results: Use gel food coloring for a more vibrant red without altering the cake’s texture. Liquid food coloring can sometimes lead to inconsistent results.
- Avoid Overmixing: This is a gentle batter; overmixing can lead to a tougher cake—nobody wants that!
How to Make It Step-by-Step
Preheat and Prep
First things first—preheat that oven to 350°F (175°C). Trust me, you’ll want it hot and ready for that beautiful batter. Next, generously grease and flour two 8-inch cake pans. Nobody wants to deal with a cake that doesn’t want to leave its pan, right? Use my "secret" tip: After greasing, dust the pans with cocoa powder instead of flour for an extra touch of flavor and no white streaks on our luscious red cake!
Mix the Dry Ingredients
In a large bowl, grab your flour, cocoa powder, baking soda, and salt. Sift them together—yes, you can skip the sifting, but this will ensure a lump-free batter, which, let’s be honest, is what we all want. I usually mix this up while jamming to some classic tunes. Baking is as much about the experience as it is about the end product!
Whisk the Wet Ingredients
In another bowl, whisk together your oil, sugar, eggs, vanilla, kefir (or buttermilk), and vinegar. Seriously, take a moment to drink in that heavenly aroma as you mix. The smell of vanilla and sugary goodness? To die for! Once you’ve got it nice and uniform, add your gel food coloring. Pro tip: don’t be shy; the more red, the more festive!
Combine Everything
Now, it’s time to blend your wet and dry mixtures. Gently fold the flour mixture into the wet ingredients using a spatula. Be kind to your batter—this is where I often remind myself to slow down and appreciate the process. The texture should be thick yet smooth, begging to be poured into those prepared pans. Divide the batter evenly, trying your utmost to get it right. I always judge with a little scale when I want to be precise.
Bake
Pop those pans into your preheated oven and set a timer for 25-30 minutes. The aroma will begin to envelop your kitchen—talk about a homey feel! You’ll know they’re ready when a toothpick inserted into the center comes out clean. Don’t be tempted to open the oven early—I’ve learned that the hard way too! Cakes need their quiet time to rise.
Cool Down
Once baked, let the cakes cool in their pans for about 10 minutes, then carefully transfer them onto wire racks to cool completely. I usually stand back and admire my work at this stage; it’s always a bit surreal seeing how far I’ve come from my initial cooking disasters!
Make the Frosting
While your cakes cool, let’s whip up that luscious cream cheese frosting! In a medium bowl, beat your room-temp butter and cream cheese together until creamy. The sound of your mixer doing its thing is music to my ears. Add the vanilla and gradually mix in the powdered sugar until you reach a smooth, dreamy frosting. Don’t rush this step—there’s something therapeutic about watching the frosting come together.
Assemble the Cake
Alright, once your cakes are completely cool, you can make the call—do you want to slice those layers in half for a super fancy effect, or keep them whole? I usually do halve them because who doesn’t love a thicker layer of frosting? Spread a generous amount of cream cheese frosting between each layer and then cover the entire cake liberally—no shame in your frosting game! For a fun twist, decorate the top with crumbled cake pieces or white chocolate shavings. It provides a nice crunch and an extra touch of elegance.
Tips for Best Results
- Room Temperature Ingredients: Make sure your eggs, butter, and cream cheese are at room temperature for an easier and smoother mix.
- Don’t Overbake: Keep a keen eye on the baking time. A bad case of overbaking leads to dry cake—nobody wants that!
- Chill Your Frosting: If it feels too soft to frost (especially in warmer months), stick it in the fridge for a few minutes to firm it up a bit.
Ingredient Substitutions & Variations
- Gluten-free Version: A 1-to-1 gluten-free flour blend works beautifully in this recipe.
- Dairy-Free Option: You can substitute the kefir with a non-dairy milk mixed with a teaspoon of lemon juice.
- Color Change: Play with other food colors for holidays—blue for a casual summer party, green for St. Patrick’s Day—let your creativity take flight!
Serving Suggestions
Enjoy this red velvet cake with a steaming cup of coffee or a chilled glass of milk. It’s also a delightful treat alongside a fruit salad. For a fun movie night, just imagine curling up with a slice of this cake and a heartwarming rom-com—it’s pure bliss!
How to Store and Reheat Leftovers
If you have any leftovers (which can be a challenge), store your cake in an airtight container in the refrigerator. It stays deliciously fresh for about 3-4 days—trust me; it’s a perfect snack to have handy! Just pop it in the microwave for about 10-15 seconds for a little warmth, allowing that frosting to become slightly gooey again—it’s a game-changer!
Make-Ahead and Freezer Tips
You can bake the cake layers ahead and store them tightly wrapped in plastic wrap in your freezer. Just ensure they cool completely before wrapping. Honestly, nothing feels better than having prepped cakes on hand for unexpected visitors or a sweet tooth craving!
Common Mistakes to Avoid
- Underestimating Cooling Time: Take your time. Frosting a warm cake leads to a melty mess. Let it cool completely!
- Misreading Measurements: Always double-check those crucial ingredient amounts. It can turn a masterpiece into regret—trust me, I’ve been there!
Frequently Asked Questions (FAQ)
- Can I use liquid food coloring instead of gel? Yes, but it could result in less vibrant coloring and might change the consistency of the batter slightly.
- What can I substitute for cream cheese? If you prefer a non-dairy option, you can try using a vegan cream cheese alternative.
- How can I ensure my cake layers are even? When dividing your batter, using a kitchen scale can help achieve consistent layers.
Cooking Tools You’ll Need
- Two 8-inch round cake pans
- Mixing bowls (a large for dry & a smaller for wet)
- An electric mixer (or whisk if you’re wanting a workout!)
- Spatula for folding and frosting
- Cooling racks
- Measuring cups and spoons
Final Thoughts
This red velvet cake recipe doesn’t just fill your belly; it fills your heart with joy. It’s about the shared moments, the laughter echoing through your home, and the satisfaction of creating something beautiful from scratch. Whether it’s a celebration or simply a cozy night with family, this cake is here to stay in my rotation.
Now, I want to hear all about your own red velvet cake adventures! Share your stories, tips, and even those disaster moments because who doesn’t love a good baking saga? If you enjoyed this recipe, don’t forget to save it on Pinterest or share it with a friend! Happy baking!
Easy Red Velvet Cake
Ingredients
For the Cake
- 2.5 cups 2 1/2 cups flour Provides the structure while keeping the cake light.
- 1.5 cups 1 1/2 cups granulated sugar Sweetens it perfectly, balancing the rich flavors.
- 1 teaspoon 1 teaspoon cocoa powder Just a hint to give that traditional red velvet taste.
- 1 teaspoon 1 teaspoon baking soda Helps the cake rise beautifully.
- 0.5 teaspoon 1/2 teaspoon salt Elevates all the flavors and balances the sweetness.
- 1 cup 1 cup vegetable oil Keeps the cake moist and tender.
- 1 cup 1 cup kefir (or buttermilk) Adds a delicious tang and moisture.
- 2 large 2 large eggs Binds everything together.
- 1 teaspoon 1 teaspoon white vinegar Reacts with the baking soda for a fluffy texture.
- 1 teaspoon 1 teaspoon vanilla extract Enhances the flavor profile.
- 1 tablespoon 1 tablespoon red food coloring (gel recommended) For that classic red hue.
For the Frosting
- 200 g 200 g cream cheese The star of the frosting; creamy and dreamy.
- 100 g 100 g butter (at room temperature) Adds richness and smoothness.
- 2 cups 2 cups powdered sugar Sweetens the frosting to perfection.
- 1 teaspoon 1 teaspoon vanilla extract Again, to amplify the flavor.
Instructions
Preheat and Prep
- Preheat the oven to 350°F (175°C). Grease and flour two 8-inch cake pans, dusting them with cocoa powder instead of flour for an extra touch of flavor.
Mix the Dry Ingredients
- In a large bowl, sift together flour, cocoa powder, baking soda, and salt.
Whisk the Wet Ingredients
- In another bowl, whisk together oil, sugar, eggs, vanilla, kefir (or buttermilk), and vinegar. Add gel food coloring and stir until uniform.
Combine Everything
- Gently fold the dry mixture into the wet ingredients until combined. The texture should be thick yet smooth.
Bake
- Divide the batter evenly between the prepared pans and bake for 25-30 minutes until a toothpick inserted comes out clean.
Cool Down
- Allow the cakes to cool in their pans for about 10 minutes, then transfer them to wire racks to cool completely.
Make the Frosting
- Beat butter and cream cheese together until creamy. Add vanilla and gradually mix in powdered sugar until smooth.
Assemble the Cake
- Once cakes are cool, spread cream cheese frosting between each layer and on top. Decorate with crumbled cake pieces or white chocolate shavings if desired.


